By Danial Marquez | Maintenance | Updated June 20
Your garage is sitting right there — attached to your home, protected from the elements, and potentially worth thousands of dollars in added living space. Yet most homeowners treat it as nothing more than a dumping ground for tools, boxes, and bikes they haven’t ridden since 2019.
If you’ve been wondering how to convert your garage into a living space, you’re not alone. In 2026, garage conversions have become one of the most popular and cost-effective home improvement projects in the United States. Whether you want an extra bedroom, a home office, a gym, a guest suite, or even a rental unit — your garage has more potential than you think.
This complete guide walks you through every single step: from planning and permits to insulation, flooring, lighting, and finishing touches. By the end, you’ll know exactly how to turn that cluttered, cold garage into a comfortable, functional living area your family will actually use.
Let’s get started.
Why Convert Your Garage into a Living Space?
Before diving into the how-to, let’s talk about the why. Here are the biggest reasons homeowners are making the switch in 2026:
1. Massive ROI on Investment A properly converted garage can return between 65% and 80% of your renovation costs when you sell your home, according to real estate experts. In high-demand housing markets, that number climbs even higher — especially if you add a bathroom and create an Accessory Dwelling Unit (ADU).
2. Affordable Square Footage Adding a traditional home addition costs $150–$300 per square foot. A garage conversion? Typically $50–$120 per square foot — because the walls, roof, and foundation already exist.
3. No More Wasted Space The average American garage is 400–600 square feet. That’s the size of a studio apartment just sitting unused behind your car.
4. Multiple Use Cases Home office, guest room, rental income (ADU), gym, playroom, in-law suite — the options are almost endless.
5. Increased Home Value A livable extra room significantly increases your home’s appraised value, especially when the conversion meets local building codes.
Step 1: Planning Your Garage Conversion
Decide on the Purpose
The first step is deciding what you want the converted garage to become. Your choice will determine everything: budget, permits required, utilities needed, and finish level.
Here are the most popular options in 2026:
- Home Office / Remote Work Studio — Lower budget, minimal plumbing needed
- Guest Bedroom — Moderate budget, requires egress window
- ADU / Rental Unit — Higher budget, requires full kitchen + bathroom
- Home Gym — Lower budget, focus on flooring and ventilation
- Kids’ Playroom — Moderate budget, focus on safety and insulation
- In-Law Suite — Higher budget, full amenities needed
Choose your purpose before spending a single dollar. Everything else follows from this decision.
Measure Your Garage
Grab a tape measure and document:
- Total square footage (length × width)
- Ceiling height (standard garages: 8–9 ft; ideal for conversion: 8 ft minimum)
- Location of electrical panel, water lines, and existing outlets
- Garage door opening dimensions
- Window placement (or lack thereof)
This measurement data will be essential when pulling permits and planning layouts.
Set a Realistic Budget
Here’s a general breakdown for a standard 2-car garage (approximately 400 sq ft) conversion in 2026:
| Item | Estimated Cost |
|---|---|
| Permits & Inspections | $500 – $2,000 |
| Insulation | $800 – $2,500 |
| Drywall & Finishing | $1,500 – $4,000 |
| Flooring | $800 – $3,000 |
| Electrical Upgrades | $1,000 – $3,500 |
| HVAC / Mini-Split | $1,500 – $5,000 |
| Windows & Doors | $800 – $3,000 |
| Plumbing (if needed) | $2,000 – $8,000 |
| Painting | $400 – $1,200 |
| Finishing / Trim | $300 – $1,000 |
| Total Estimate | $9,600 – $33,200 |
A basic home office conversion can be done for under $10,000. A full ADU with kitchen and bathroom will push toward $30,000–$50,000 or more depending on your location.
Step 2: Check Permits and Local Zoning Laws
This is the step most DIYers skip — and it’s the one that causes the biggest headaches later.
Why Permits Matter
Converting a garage without proper permits can:
- Void your homeowner’s insurance
- Create problems when you sell your home
- Result in fines or forced demolition of unpermitted work
- Affect your property tax assessment incorrectly
What Permits Do You Typically Need?
Depending on your city or county, you may need:
- Building permit (almost always required)
- Electrical permit (if adding or upgrading circuits)
- Plumbing permit (if adding bathroom or kitchenette)
- Mechanical permit (for HVAC installation)
How to Check Your Local Requirements
- Visit your city or county’s building department website
- Search “[your city] garage conversion permit requirements”
- Call your local planning department directly
- Hire a local contractor familiar with your area’s codes
ADU-Specific Note: Many California, Texas, and Pacific Northwest cities have streamlined ADU permit processes as of 2026 to address the housing shortage. Check if your city has an ADU pre-approved plan program — it can save weeks of processing time.
HOA Considerations
If you live in a neighborhood with a Homeowners Association, check your CC&Rs (Covenants, Conditions & Restrictions) before starting. Some HOAs restrict garage conversions to maintain neighborhood appearance. Always get approval in writing.
Step 3: Insulate the Garage Properly
A garage is not built for human comfort — it’s built for cars. That means no insulation, no climate control, and temperature extremes. Fixing this is absolutely non-negotiable for a livable space.
Why Insulation is Critical
Without proper insulation, your converted garage will be:
- Freezing cold in winter
- Sweltering hot in summer
- Expensive to heat and cool
- Prone to moisture and condensation
For a deep dive into this topic, check out our complete guide: How to Insulate a Garage: The Complete Step-by-Step Guide (2026)
What to Insulate
Garage Door or New Wall: If you’re replacing the garage door with a wall (most conversions do), frame out the new wall with 2×4 or 2×6 studs and fill with R-13 or R-19 batt insulation.
Existing Walls: Most garage walls share a wall with the house (which may already be insulated) and have an exterior wall. Add R-13 fiberglass batt or rigid foam board insulation to all exterior walls.
Ceiling / Roof: This is the most important surface. Heat rises and escapes through the ceiling. Use R-30 to R-38 insulation in the ceiling, depending on your climate zone.
Concrete Floor: The slab floor is a cold, hard surface that needs attention. Options include:
- Rigid foam board (1–2 inches) under new flooring
- Subfloor panels (DRIcore or similar) that provide both insulation and moisture barrier
- Spray foam under a floating floor system
Recommended Insulation Types
| Location | Recommended R-Value | Best Material |
|---|---|---|
| Walls | R-13 to R-19 | Fiberglass batt or rigid foam |
| Ceiling | R-30 to R-38 | Blown-in or batt |
| Floor | R-10 minimum | Rigid foam board |
| Garage Door Wall | R-13 | Batt in new framing |
Step 4: Handle Electrical Upgrades
Most garages have minimal electrical — maybe one or two outlets and a light. A living space requires significantly more.
Typical Electrical Needs for a Converted Garage
- Dedicated 20-amp circuits for appliances (mini-fridge, microwave, space heater)
- Bedroom circuits if used as a sleeping space
- GFCI outlets near any wet areas
- Recessed lighting or ceiling fixtures
- Smoke and CO detectors (required by code in habitable rooms)
- USB outlet upgrades for convenience
For a home office, you may also need:
- Ethernet wiring or a wireless access point
- Surge-protected outlet clusters
- Dedicated circuit for a desktop PC or workstation
Always hire a licensed electrician for any new circuit work or panel upgrades. This is not a project to DIY unless you are a qualified electrician — and even then, permits are required.
Lighting Tips
Good lighting transforms a garage into a living space instantly. For ideas and product recommendations, see our guide: The Complete Garage Lighting Guide: Best Lights, Setup Tips & Ideas (2026)
For a converted living space specifically, consider:
- Recessed LED downlights for general illumination (4–6 inch cans, warm white 2700K-3000K)
- Pendant or chandelier for a bedroom or living room feel
- Under-cabinet lighting if adding a kitchenette
- Natural light via new windows (see Step 6)
Step 5: Install Heating and Cooling (HVAC)
Climate control is what separates a converted garage from a livable room. You have several options in 2026:
Option 1: Extend Your Home’s Existing HVAC System
This works well if your current HVAC has enough capacity and the garage is close to existing ductwork. A licensed HVAC contractor can run new ducts and registers. Cost: $1,500–$4,000
Pros: Seamless integration, controlled from your main thermostat Cons: Requires ductwork, may overload existing system
Option 2: Ductless Mini-Split System (Most Popular in 2026)
A mini-split is a wall-mounted unit that both heats and cools — no ductwork required. It’s the most popular choice for garage conversions because of its efficiency and ease of installation.
Cost: $1,500–$4,500 installed
Pros: Highly efficient, no ductwork, separate thermostat, heats AND cools Cons: Upfront cost, requires professional installation, needs exterior wall access
Option 3: Electric Baseboard Heater
Cheapest to install, most expensive to run. Fine for occasional use spaces.
Cost: $200–$600 installed
Option 4: Infrared Heater
Wall or ceiling mounted, great for workshops or gyms. Not ideal for bedrooms.
Cost: $300–$800 installed
Recommendation: For most garage-to-living-space conversions, a mini-split system offers the best balance of comfort, efficiency, and ease of installation. Budget at least $2,000–$3,500 for a quality unit with professional installation.
Step 6: Add Windows and Upgrade the Door
Garages typically have poor natural light and only one entry point. Living spaces require more.
Egress Windows (May Be Required by Code)
If your converted garage will be used as a bedroom, building codes in most states require at least one egress window — a window large enough for a person to escape through in an emergency.
Standard egress window requirements:
- Minimum opening of 5.7 square feet
- Minimum height of 24 inches
- Minimum width of 20 inches
- Maximum sill height of 44 inches from floor
Installing a new window requires cutting through the exterior wall — hire a contractor for this unless you have significant framing experience.
Replacing the Garage Door
Most garage conversions involve removing the garage door entirely and framing in a new wall. Options include:
- Solid wall with windows — Most affordable, best for privacy
- French doors — Great for home offices or ADUs that need outdoor access
- Full glass wall/sliding doors — Upscale look, maximum light, higher cost
- Keep the garage door (with insulated upgrade) — If you want the option to restore later
If you keep the garage door, upgrading to an insulated model makes a huge difference. Learn more: Best Garage Door Openers: Complete Buying Guide & Installation Tips (2026)
Step 7: Flooring — Transform That Cold Concrete
The concrete garage floor is functional for cars but miserable for living. Covering it properly is one of the biggest transformations you can make.
Option 1: Epoxy Coating (Budget-Friendly, Durable)
If your budget is tight or you want a polished, durable surface (great for gyms or workshops), epoxy coating is an excellent option.
It’s easy to clean, resists stains, and looks professional. Read our complete tutorial: Garage Floor Epoxy Coating: The Complete DIY Guide (2026)
Cost: $2–$7 per sq ft DIY | $3–$12 per sq ft professional
Option 2: Luxury Vinyl Plank (LVP) — Most Popular for Living Spaces
LVP is waterproof, comfortable underfoot, looks like wood, and can be installed directly over concrete with a thin foam underlayment. It’s the most popular flooring choice for garage conversions in 2026.
Cost: $3–$8 per sq ft installed
Option 3: Laminate Flooring
Similar to LVP but NOT waterproof. Only use if you’re certain moisture isn’t an issue.
Cost: $2–$6 per sq ft installed
Option 4: Engineered Hardwood
Beautiful and durable, but more expensive and requires a moisture barrier over concrete.
Cost: $5–$12 per sq ft installed
Option 5: Carpet
Warm, comfortable, affordable. Not ideal for garages due to potential moisture issues unless subfloor/moisture barrier is properly installed first.
Cost: $2–$7 per sq ft installed
Pro Tip: Before installing any flooring, always do a moisture test. Tape a plastic sheet (12″×12″) to the concrete and leave it for 24–48 hours. If moisture collects underneath, you need a vapor barrier or moisture-resistant subfloor panel before any flooring goes down.
Step 8: Drywall, Ceiling, and Wall Finishing
Once insulation and electrical rough-in are complete and inspected, it’s time to close the walls.
Drywall Installation
Use 5/8″ Type X drywall on any wall that separates the garage space from the main house — this is a fire code requirement in most jurisdictions. For other walls, standard 1/2″ drywall works fine.
Steps:
- Hang drywall on walls (horizontal orientation for fewer joints)
- Hang drywall on ceiling (or use ceiling panels)
- Tape and mud all seams
- Apply 2–3 coats of joint compound, sanding between each
- Prime before painting
Ceiling Options
- Drywall ceiling — Most professional look, requires overhead framing
- Drop ceiling / Grid ceiling — Easier installation, good for hiding utilities
- Exposed wood beams + drywall — Trendy, adds warmth
- Shiplap panels — Farmhouse/modern aesthetic
Painting
Choose interior paint (not garage floor paint). For a living space, select:
- Eggshell or satin finish — Easy to clean, slight sheen, good for walls
- Semi-gloss — For trim and doors
- Flat/matte — For ceilings only
Light, warm colors make converted garages feel larger and more welcoming. Whites, warm grays, and light beiges work especially well.
Before painting any walls, always prep them properly. Our guide covers this in detail: How to Clean Garage Walls Before Painting
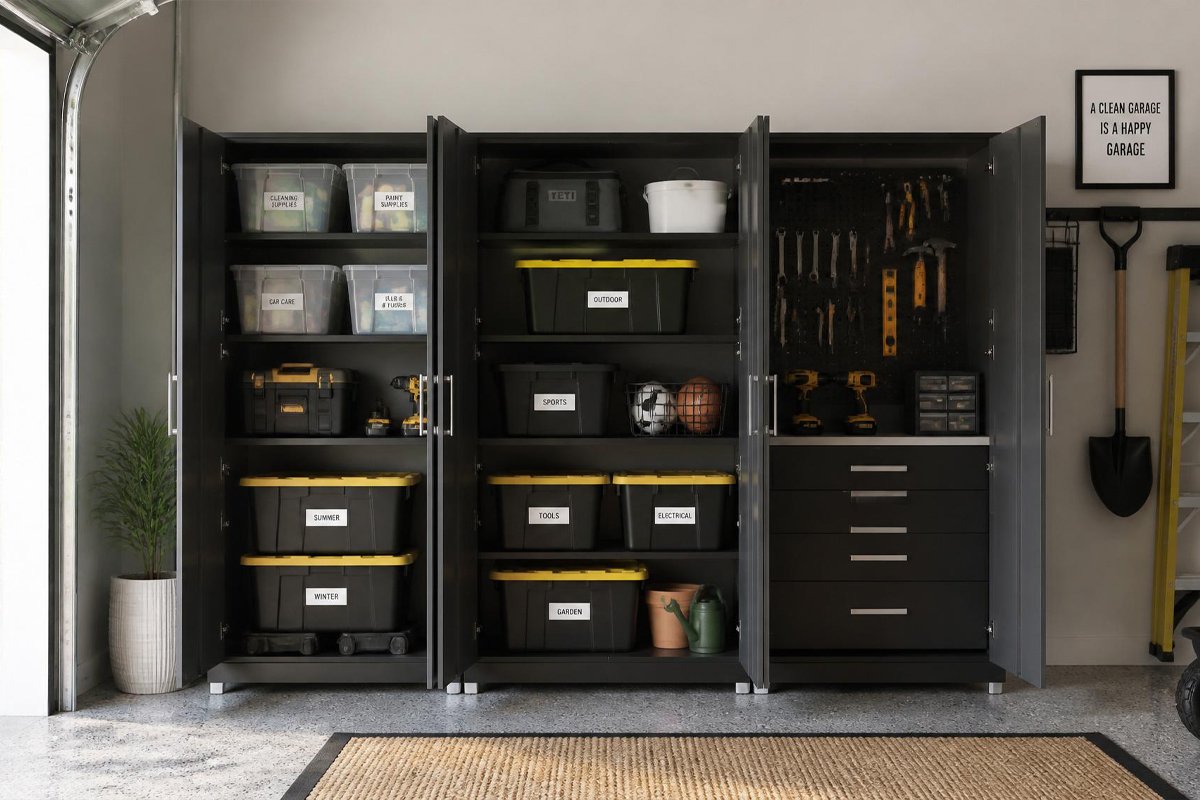
Step 9: Storage Solutions (Don’t Lose What You Had)
One thing people forget: you’re losing garage storage when you convert. Plan ahead for where those tools, seasonal items, and sports gear will go.
Smart solutions include:
- Wall-mounted overhead storage in remaining garage space (if partial conversion)
- Outdoor storage shed
- Built-in closet in the converted room
- Wall storage systems in other areas of the garage
For creative ideas on maximizing the storage you keep, read: 25 Best Garage Wall Storage Ideas: The Complete Guide to Maximizing Your Space (2026)
Step 10: Safety Requirements for Habitable Rooms
Before you call the final inspection, make sure your converted space meets all safety requirements:
Required Safety Features (Most Jurisdictions)
✅ Smoke detector — Within 10 feet of sleeping area, interconnected with home system ✅ Carbon monoxide detector — Required if any gas appliances nearby ✅ GFCI outlets — Near any wet areas (bathroom, kitchenette) ✅ Egress window — Required for sleeping rooms (see Step 6) ✅ Proper ventilation — Bathroom fan, kitchen exhaust if applicable ✅ Ceiling height — Minimum 7 feet for habitable space (most codes) ✅ Fire separation wall — Between converted space and any attached garage area
For a comprehensive look at all garage safety standards, refer to our guide: Garage Safety Guide: 20 Essential Tips to Keep Your Garage Safe in 2026
Common Mistakes to Avoid
After reviewing hundreds of garage conversion projects, here are the most common — and costly — mistakes homeowners make:
❌ Skipping permits — As mentioned, this creates massive problems down the road. Always permit your work.
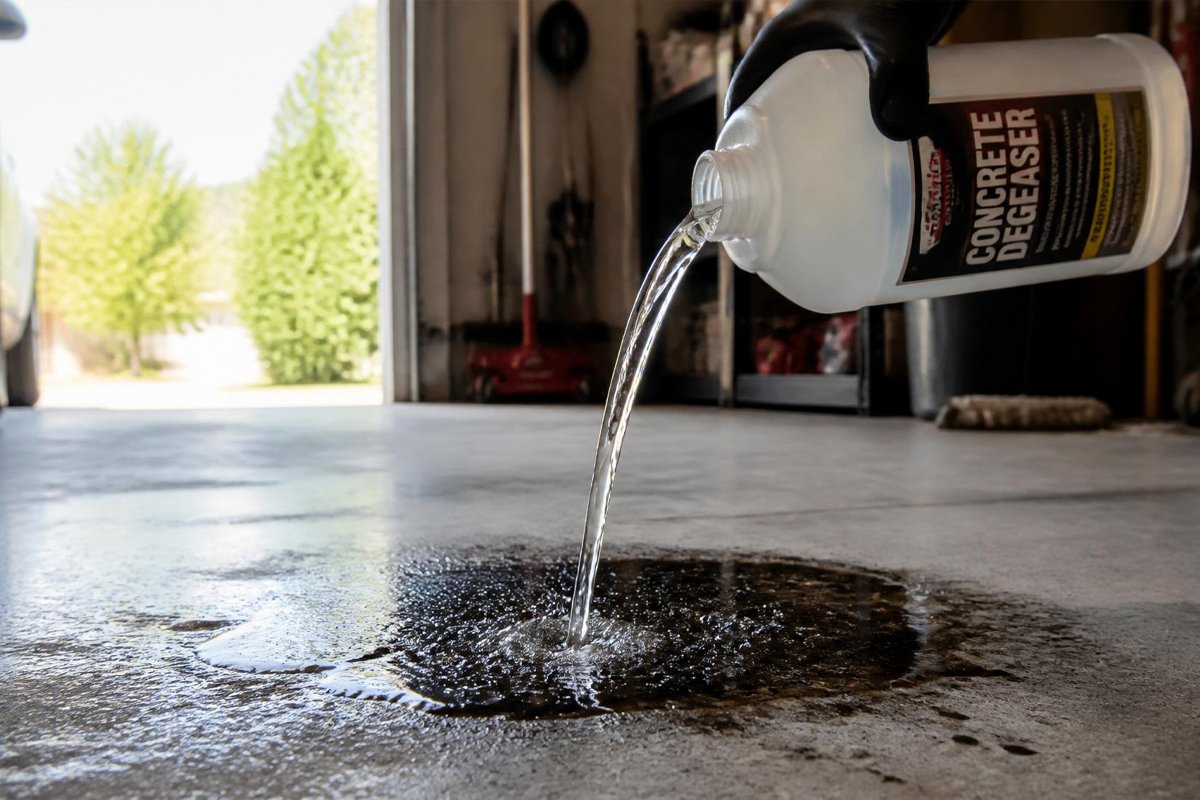
❌ Ignoring moisture — Concrete slabs wick moisture from the ground. Skipping the vapor barrier leads to mold, warped floors, and unhealthy air quality.
❌ Underestimating the electrical load — A living space needs far more power than a garage. Don’t just add outlets to existing circuits — consult an electrician about load capacity.
❌ Poor insulation decisions — Cheap R-11 insulation in the ceiling will make the space unbearable in summer. Don’t cut corners here.
❌ Forgetting about ventilation — Fresh air exchange is required for habitable spaces. A bathroom fan or HRV (Heat Recovery Ventilator) may be needed.
❌ Not measuring for furniture before framing — That sectional sofa you want? Make sure it can actually fit through the door.
❌ DIYing the plumbing — Unless you’re a licensed plumber, adding a bathroom or kitchenette should be left to professionals. One bad connection = catastrophic water damage.
Garage Conversion Costs: Full Breakdown by Project Type
| Project Type | Estimated Cost Range | Timeline |
|---|---|---|
| Home Office | $8,000 – $15,000 | 4–6 weeks |
| Home Gym | $7,000 – $14,000 | 3–5 weeks |
| Guest Bedroom | $12,000 – $22,000 | 6–8 weeks |
| Kids’ Playroom | $8,000 – $16,000 | 4–6 weeks |
| ADU with Bathroom | $25,000 – $50,000+ | 8–16 weeks |
| ADU with Kitchen + Bath | $35,000 – $75,000+ | 12–20 weeks |
Costs vary significantly by region. California, New York, and the Pacific Northwest tend to run 30–50% higher than national averages.
DIY vs. Hiring a Contractor
Not everything in a garage conversion needs to be done by a professional. Here’s a helpful breakdown:
DIY-Friendly Tasks
- Painting walls and ceilings
- Installing LVP or laminate flooring
- Installing insulation (batt type)
- Hanging drywall (with help)
- Basic trim and baseboard installation
- Cleaning and prepping surfaces
For guidance on cleaning prep: How to Clean a Garage Floor: The Complete Step-by-Step Guide (2026)
Hire a Professional
- All electrical circuit work and panel upgrades
- Plumbing additions
- HVAC installation
- Framing new walls or garage door opening
- Installing egress windows
- Final inspections and permit sign-offs
Frequently Asked Questions
Q: Does converting a garage add value to my home? Yes — typically between 50–80% of your renovation cost, and even more in high-demand markets. An ADU conversion can add $50,000–$150,000+ in value in cities with housing shortages.
Q: Do I need a permit to convert my garage? In almost all jurisdictions, yes. Building, electrical, and possibly plumbing permits are required. Unpermitted conversions can cause serious problems when selling your home.
Q: Can I convert just part of my garage? Absolutely. A partial conversion (one car bay converted, one left as garage) is very popular. You keep some storage and parking while gaining living space. This typically requires less permitting and lower cost.
Q: How long does a garage conversion take? A basic conversion (home office or gym) takes 4–8 weeks with contractors. A full ADU can take 3–6 months depending on permit timelines and complexity.
Q: Can I convert a detached garage? Yes, and in many ways it’s easier — you don’t have the fire separation wall requirements. However, you’ll need to run utilities (electrical, possibly water/sewer) from the main house, which adds cost.
Q: What’s the difference between a garage conversion and a garage addition? A conversion uses the existing garage footprint. An addition expands the footprint. Conversions are cheaper but don’t add square footage beyond what already exists.
Final Thoughts
Converting your garage into a living space is one of the smartest home improvement investments you can make in 2026. You’re taking underutilized square footage you already own and transforming it into something genuinely useful — whether that’s extra income, a comfortable workspace, a guest suite, or a space for your family to actually enjoy.
The key is to do it right: pull your permits, insulate properly, upgrade the electrical, and address the floor before it becomes a problem. Shortcuts here don’t save money — they create expensive problems later.
If you take one thing from this guide, let it be this: plan before you build. A good plan up front saves time, money, and frustration. Know your purpose, set your budget, understand your permits, and then execute with confidence.
Your garage is waiting. Let’s put it to work.
Have questions about your garage conversion project? Drop them in the comments below or contact us — we’d love to help.
How to Convert Your Garage into a Living Space: Complete Step-by-Step Guide (2026)
By Danial Marquez | Maintenance | Updated June 2026
Introduction
Your garage is sitting right there — attached to your home, protected from the elements, and potentially worth thousands of dollars in added living space. Yet most homeowners treat it as nothing more than a dumping ground for tools, boxes, and bikes they haven’t ridden since 2019.
If you’ve been wondering how to convert your garage into a living space, you’re not alone. In 2026, garage conversions have become one of the most popular and cost-effective home improvement projects in the United States. Whether you want an extra bedroom, a home office, a gym, a guest suite, or even a rental unit — your garage has more potential than you think.
This complete guide walks you through every single step: from planning and permits to insulation, flooring, lighting, and finishing touches. By the end, you’ll know exactly how to turn that cluttered, cold garage into a comfortable, functional living area your family will actually use.
Let’s get started.
Why Convert Your Garage into a Living Space?
Before diving into the how-to, let’s talk about the why. Here are the biggest reasons homeowners are making the switch in 2026:
1. Massive ROI on Investment A properly converted garage can return between 65% and 80% of your renovation costs when you sell your home, according to real estate experts. In high-demand housing markets, that number climbs even higher — especially if you add a bathroom and create an Accessory Dwelling Unit (ADU).
2. Affordable Square Footage Adding a traditional home addition costs $150–$300 per square foot. A garage conversion? Typically $50–$120 per square foot — because the walls, roof, and foundation already exist.
3. No More Wasted Space The average American garage is 400–600 square feet. That’s the size of a studio apartment just sitting unused behind your car.
4. Multiple Use Cases Home office, guest room, rental income (ADU), gym, playroom, in-law suite — the options are almost endless.
5. Increased Home Value A livable extra room significantly increases your home’s appraised value, especially when the conversion meets local building codes.
Step 1: Planning Your Garage Conversion
Decide on the Purpose
The first step is deciding what you want the converted garage to become. Your choice will determine everything: budget, permits required, utilities needed, and finish level.
Here are the most popular options in 2026:
- Home Office / Remote Work Studio — Lower budget, minimal plumbing needed
- Guest Bedroom — Moderate budget, requires egress window
- ADU / Rental Unit — Higher budget, requires full kitchen + bathroom
- Home Gym — Lower budget, focus on flooring and ventilation
- Kids’ Playroom — Moderate budget, focus on safety and insulation
- In-Law Suite — Higher budget, full amenities needed
Choose your purpose before spending a single dollar. Everything else follows from this decision.
Measure Your Garage
Grab a tape measure and document:
- Total square footage (length × width)
- Ceiling height (standard garages: 8–9 ft; ideal for conversion: 8 ft minimum)
- Location of electrical panel, water lines, and existing outlets
- Garage door opening dimensions
- Window placement (or lack thereof)
This measurement data will be essential when pulling permits and planning layouts.
Set a Realistic Budget
Here’s a general breakdown for a standard 2-car garage (approximately 400 sq ft) conversion in 2026:
| Item | Estimated Cost |
|---|---|
| Permits & Inspections | $500 – $2,000 |
| Insulation | $800 – $2,500 |
| Drywall & Finishing | $1,500 – $4,000 |
| Flooring | $800 – $3,000 |
| Electrical Upgrades | $1,000 – $3,500 |
| HVAC / Mini-Split | $1,500 – $5,000 |
| Windows & Doors | $800 – $3,000 |
| Plumbing (if needed) | $2,000 – $8,000 |
| Painting | $400 – $1,200 |
| Finishing / Trim | $300 – $1,000 |
| Total Estimate | $9,600 – $33,200 |
A basic home office conversion can be done for under $10,000. A full ADU with kitchen and bathroom will push toward $30,000–$50,000 or more depending on your location.
Step 2: Check Permits and Local Zoning Laws
This is the step most DIYers skip — and it’s the one that causes the biggest headaches later.
Why Permits Matter
Converting a garage without proper permits can:
- Void your homeowner’s insurance
- Create problems when you sell your home
- Result in fines or forced demolition of unpermitted work
- Affect your property tax assessment incorrectly
What Permits Do You Typically Need?
Depending on your city or county, you may need:
- Building permit (almost always required)
- Electrical permit (if adding or upgrading circuits)
- Plumbing permit (if adding bathroom or kitchenette)
- Mechanical permit (for HVAC installation)
How to Check Your Local Requirements
- Visit your city or county’s building department website
- Search “[your city] garage conversion permit requirements”
- Call your local planning department directly
- Hire a local contractor familiar with your area’s codes
ADU-Specific Note: Many California, Texas, and Pacific Northwest cities have streamlined ADU permit processes as of 2026 to address the housing shortage. Check if your city has an ADU pre-approved plan program — it can save weeks of processing time.
HOA Considerations
If you live in a neighborhood with a Homeowners Association, check your CC&Rs (Covenants, Conditions & Restrictions) before starting. Some HOAs restrict garage conversions to maintain neighborhood appearance. Always get approval in writing.
Step 3: Insulate the Garage Properly
A garage is not built for human comfort — it’s built for cars. That means no insulation, no climate control, and temperature extremes. Fixing this is absolutely non-negotiable for a livable space.
Why Insulation is Critical
Without proper insulation, your converted garage will be:
- Freezing cold in winter
- Sweltering hot in summer
- Expensive to heat and cool
- Prone to moisture and condensation
For a deep dive into this topic, check out our complete guide: How to Insulate a Garage: The Complete Step-by-Step Guide (2026)
What to Insulate
Garage Door or New Wall: If you’re replacing the garage door with a wall (most conversions do), frame out the new wall with 2×4 or 2×6 studs and fill with R-13 or R-19 batt insulation.
Existing Walls: Most garage walls share a wall with the house (which may already be insulated) and have an exterior wall. Add R-13 fiberglass batt or rigid foam board insulation to all exterior walls.
Ceiling / Roof: This is the most important surface. Heat rises and escapes through the ceiling. Use R-30 to R-38 insulation in the ceiling, depending on your climate zone.
Concrete Floor: The slab floor is a cold, hard surface that needs attention. Options include:
- Rigid foam board (1–2 inches) under new flooring
- Subfloor panels (DRIcore or similar) that provide both insulation and moisture barrier
- Spray foam under a floating floor system
Recommended Insulation Types
| Location | Recommended R-Value | Best Material |
|---|---|---|
| Walls | R-13 to R-19 | Fiberglass batt or rigid foam |
| Ceiling | R-30 to R-38 | Blown-in or batt |
| Floor | R-10 minimum | Rigid foam board |
| Garage Door Wall | R-13 | Batt in new framing |
Step 4: Handle Electrical Upgrades
Most garages have minimal electrical — maybe one or two outlets and a light. A living space requires significantly more.
Typical Electrical Needs for a Converted Garage
- Dedicated 20-amp circuits for appliances (mini-fridge, microwave, space heater)
- Bedroom circuits if used as a sleeping space
- GFCI outlets near any wet areas
- Recessed lighting or ceiling fixtures
- Smoke and CO detectors (required by code in habitable rooms)
- USB outlet upgrades for convenience
For a home office, you may also need:
- Ethernet wiring or a wireless access point
- Surge-protected outlet clusters
- Dedicated circuit for a desktop PC or workstation
Always hire a licensed electrician for any new circuit work or panel upgrades. This is not a project to DIY unless you are a qualified electrician — and even then, permits are required.
Lighting Tips
Good lighting transforms a garage into a living space instantly. For ideas and product recommendations, see our guide: The Complete Garage Lighting Guide: Best Lights, Setup Tips & Ideas (2026)
For a converted living space specifically, consider:
- Recessed LED downlights for general illumination (4–6 inch cans, warm white 2700K-3000K)
- Pendant or chandelier for a bedroom or living room feel
- Under-cabinet lighting if adding a kitchenette
- Natural light via new windows (see Step 6)
Step 5: Install Heating and Cooling (HVAC)
Climate control is what separates a converted garage from a livable room. You have several options in 2026:
Option 1: Extend Your Home’s Existing HVAC System
This works well if your current HVAC has enough capacity and the garage is close to existing ductwork. A licensed HVAC contractor can run new ducts and registers. Cost: $1,500–$4,000
Pros: Seamless integration, controlled from your main thermostat Cons: Requires ductwork, may overload existing system
Option 2: Ductless Mini-Split System (Most Popular in 2026)
A mini-split is a wall-mounted unit that both heats and cools — no ductwork required. It’s the most popular choice for garage conversions because of its efficiency and ease of installation.
Cost: $1,500–$4,500 installed
Pros: Highly efficient, no ductwork, separate thermostat, heats AND cools Cons: Upfront cost, requires professional installation, needs exterior wall access
Option 3: Electric Baseboard Heater
Cheapest to install, most expensive to run. Fine for occasional use spaces.
Cost: $200–$600 installed
Option 4: Infrared Heater
Wall or ceiling mounted, great for workshops or gyms. Not ideal for bedrooms.
Cost: $300–$800 installed
Recommendation: For most garage-to-living-space conversions, a mini-split system offers the best balance of comfort, efficiency, and ease of installation. Budget at least $2,000–$3,500 for a quality unit with professional installation.
Step 6: Add Windows and Upgrade the Door
Garages typically have poor natural light and only one entry point. Living spaces require more.
Egress Windows (May Be Required by Code)
If your converted garage will be used as a bedroom, building codes in most states require at least one egress window — a window large enough for a person to escape through in an emergency.
Standard egress window requirements:
- Minimum opening of 5.7 square feet
- Minimum height of 24 inches
- Minimum width of 20 inches
- Maximum sill height of 44 inches from floor
Installing a new window requires cutting through the exterior wall — hire a contractor for this unless you have significant framing experience.
Replacing the Garage Door
Most garage conversions involve removing the garage door entirely and framing in a new wall. Options include:
- Solid wall with windows — Most affordable, best for privacy
- French doors — Great for home offices or ADUs that need outdoor access
- Full glass wall/sliding doors — Upscale look, maximum light, higher cost
- Keep the garage door (with insulated upgrade) — If you want the option to restore later
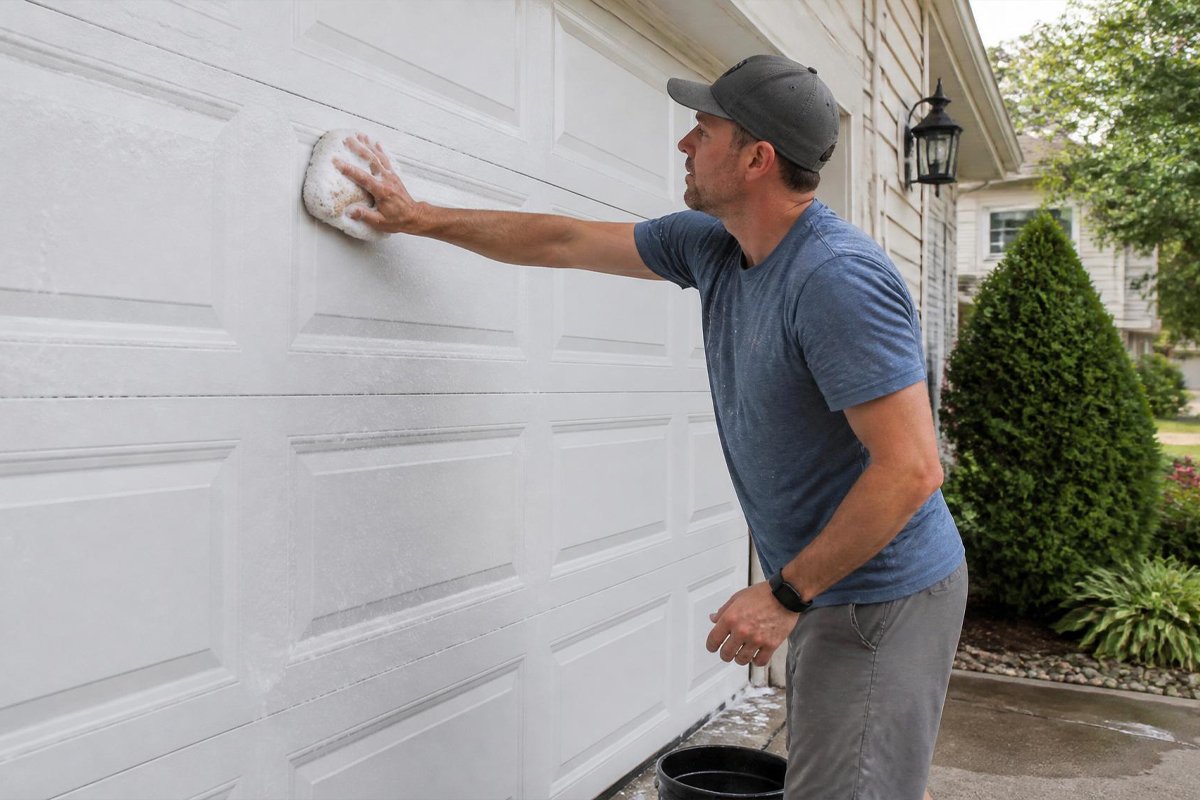
If you keep the garage door, upgrading to an insulated model makes a huge difference. Learn more: Best Garage Door Openers: Complete Buying Guide & Installation Tips (2026)
Step 7: Flooring — Transform That Cold Concrete
The concrete garage floor is functional for cars but miserable for living. Covering it properly is one of the biggest transformations you can make.
Option 1: Epoxy Coating (Budget-Friendly, Durable)
If your budget is tight or you want a polished, durable surface (great for gyms or workshops), epoxy coating is an excellent option.
It’s easy to clean, resists stains, and looks professional. Read our complete tutorial: Garage Floor Epoxy Coating: The Complete DIY Guide (2026)
Cost: $2–$7 per sq ft DIY | $3–$12 per sq ft professional
Option 2: Luxury Vinyl Plank (LVP) — Most Popular for Living Spaces
LVP is waterproof, comfortable underfoot, looks like wood, and can be installed directly over concrete with a thin foam underlayment. It’s the most popular flooring choice for garage conversions in 2026.
Cost: $3–$8 per sq ft installed
Option 3: Laminate Flooring
Similar to LVP but NOT waterproof. Only use if you’re certain moisture isn’t an issue.
Cost: $2–$6 per sq ft installed
Option 4: Engineered Hardwood
Beautiful and durable, but more expensive and requires a moisture barrier over concrete.
Cost: $5–$12 per sq ft installed
Option 5: Carpet
Warm, comfortable, affordable. Not ideal for garages due to potential moisture issues unless subfloor/moisture barrier is properly installed first.
Cost: $2–$7 per sq ft installed
Pro Tip: Before installing any flooring, always do a moisture test. Tape a plastic sheet (12″×12″) to the concrete and leave it for 24–48 hours. If moisture collects underneath, you need a vapor barrier or moisture-resistant subfloor panel before any flooring goes down.
Step 8: Drywall, Ceiling, and Wall Finishing
Once insulation and electrical rough-in are complete and inspected, it’s time to close the walls.
Drywall Installation
Use 5/8″ Type X drywall on any wall that separates the garage space from the main house — this is a fire code requirement in most jurisdictions. For other walls, standard 1/2″ drywall works fine.
Steps:
- Hang drywall on walls (horizontal orientation for fewer joints)
- Hang drywall on ceiling (or use ceiling panels)
- Tape and mud all seams
- Apply 2–3 coats of joint compound, sanding between each
- Prime before painting
Ceiling Options
- Drywall ceiling — Most professional look, requires overhead framing
- Drop ceiling / Grid ceiling — Easier installation, good for hiding utilities
- Exposed wood beams + drywall — Trendy, adds warmth
- Shiplap panels — Farmhouse/modern aesthetic
Painting
Choose interior paint (not garage floor paint). For a living space, select:
- Eggshell or satin finish — Easy to clean, slight sheen, good for walls
- Semi-gloss — For trim and doors
- Flat/matte — For ceilings only
Light, warm colors make converted garages feel larger and more welcoming. Whites, warm grays, and light beiges work especially well.
Before painting any walls, always prep them properly. Our guide covers this in detail: How to Clean Garage Walls Before Painting
Step 9: Storage Solutions (Don’t Lose What You Had)
One thing people forget: you’re losing garage storage when you convert. Plan ahead for where those tools, seasonal items, and sports gear will go.
Smart solutions include:
- Wall-mounted overhead storage in remaining garage space (if partial conversion)
- Outdoor storage shed
- Built-in closet in the converted room
- Wall storage systems in other areas of the garage
For creative ideas on maximizing the storage you keep, read: 25 Best Garage Wall Storage Ideas: The Complete Guide to Maximizing Your Space (2026)
Step 10: Safety Requirements for Habitable Rooms
Before you call the final inspection, make sure your converted space meets all safety requirements:
Required Safety Features (Most Jurisdictions)
✅ Smoke detector — Within 10 feet of sleeping area, interconnected with home system ✅ Carbon monoxide detector — Required if any gas appliances nearby ✅ GFCI outlets — Near any wet areas (bathroom, kitchenette) ✅ Egress window — Required for sleeping rooms (see Step 6) ✅ Proper ventilation — Bathroom fan, kitchen exhaust if applicable ✅ Ceiling height — Minimum 7 feet for habitable space (most codes) ✅ Fire separation wall — Between converted space and any attached garage area
For a comprehensive look at all garage safety standards, refer to our guide: Garage Safety Guide: 20 Essential Tips to Keep Your Garage Safe in 2026
Common Mistakes to Avoid
After reviewing hundreds of garage conversion projects, here are the most common — and costly — mistakes homeowners make:
❌ Skipping permits — As mentioned, this creates massive problems down the road. Always permit your work.
❌ Ignoring moisture — Concrete slabs wick moisture from the ground. Skipping the vapor barrier leads to mold, warped floors, and unhealthy air quality.
❌ Underestimating the electrical load — A living space needs far more power than a garage. Don’t just add outlets to existing circuits — consult an electrician about load capacity.
❌ Poor insulation decisions — Cheap R-11 insulation in the ceiling will make the space unbearable in summer. Don’t cut corners here.
❌ Forgetting about ventilation — Fresh air exchange is required for habitable spaces. A bathroom fan or HRV (Heat Recovery Ventilator) may be needed.
❌ Not measuring for furniture before framing — That sectional sofa you want? Make sure it can actually fit through the door.
❌ DIYing the plumbing — Unless you’re a licensed plumber, adding a bathroom or kitchenette should be left to professionals. One bad connection = catastrophic water damage.
Garage Conversion Costs: Full Breakdown by Project Type
| Project Type | Estimated Cost Range | Timeline |
|---|---|---|
| Home Office | $8,000 – $15,000 | 4–6 weeks |
| Home Gym | $7,000 – $14,000 | 3–5 weeks |
| Guest Bedroom | $12,000 – $22,000 | 6–8 weeks |
| Kids’ Playroom | $8,000 – $16,000 | 4–6 weeks |
| ADU with Bathroom | $25,000 – $50,000+ | 8–16 weeks |
| ADU with Kitchen + Bath | $35,000 – $75,000+ | 12–20 weeks |
Costs vary significantly by region. California, New York, and the Pacific Northwest tend to run 30–50% higher than national averages.
DIY vs. Hiring a Contractor
Not everything in a garage conversion needs to be done by a professional. Here’s a helpful breakdown:
DIY-Friendly Tasks
- Painting walls and ceilings
- Installing LVP or laminate flooring
- Installing insulation (batt type)
- Hanging drywall (with help)
- Basic trim and baseboard installation
- Cleaning and prepping surfaces
For guidance on cleaning prep: How to Clean a Garage Floor: The Complete Step-by-Step Guide (2026)
Hire a Professional
- All electrical circuit work and panel upgrades
- Plumbing additions
- HVAC installation
- Framing new walls or garage door opening
- Installing egress windows
- Final inspections and permit sign-offs
Frequently Asked Questions
Q: Does converting a garage add value to my home? Yes — typically between 50–80% of your renovation cost, and even more in high-demand markets. An ADU conversion can add $50,000–$150,000+ in value in cities with housing shortages.
Q: Do I need a permit to convert my garage? In almost all jurisdictions, yes. Building, electrical, and possibly plumbing permits are required. Unpermitted conversions can cause serious problems when selling your home.
Q: Can I convert just part of my garage? Absolutely. A partial conversion (one car bay converted, one left as garage) is very popular. You keep some storage and parking while gaining living space. This typically requires less permitting and lower cost.
Q: How long does a garage conversion take? A basic conversion (home office or gym) takes 4–8 weeks with contractors. A full ADU can take 3–6 months depending on permit timelines and complexity.
Q: Can I convert a detached garage? Yes, and in many ways it’s easier — you don’t have the fire separation wall requirements. However, you’ll need to run utilities (electrical, possibly water/sewer) from the main house, which adds cost.
Q: What’s the difference between a garage conversion and a garage addition? A conversion uses the existing garage footprint. An addition expands the footprint. Conversions are cheaper but don’t add square footage beyond what already exists.
Final Thoughts
Converting your garage into a living space is one of the smartest home improvement investments you can make in 2026. You’re taking underutilized square footage you already own and transforming it into something genuinely useful — whether that’s extra income, a comfortable workspace, a guest suite, or a space for your family to actually enjoy.
The key is to do it right: pull your permits, insulate properly, upgrade the electrical, and address the floor before it becomes a problem. Shortcuts here don’t save money — they create expensive problems later.
If you take one thing from this guide, let it be this: plan before you build. A good plan up front saves time, money, and frustration. Know your purpose, set your budget, understand your permits, and then execute with confidence.
Your garage is waiting. Let’s put it to work.
Have questions about your garage conversion project? Drop them in the comments below or contact us — we’d love to help.