
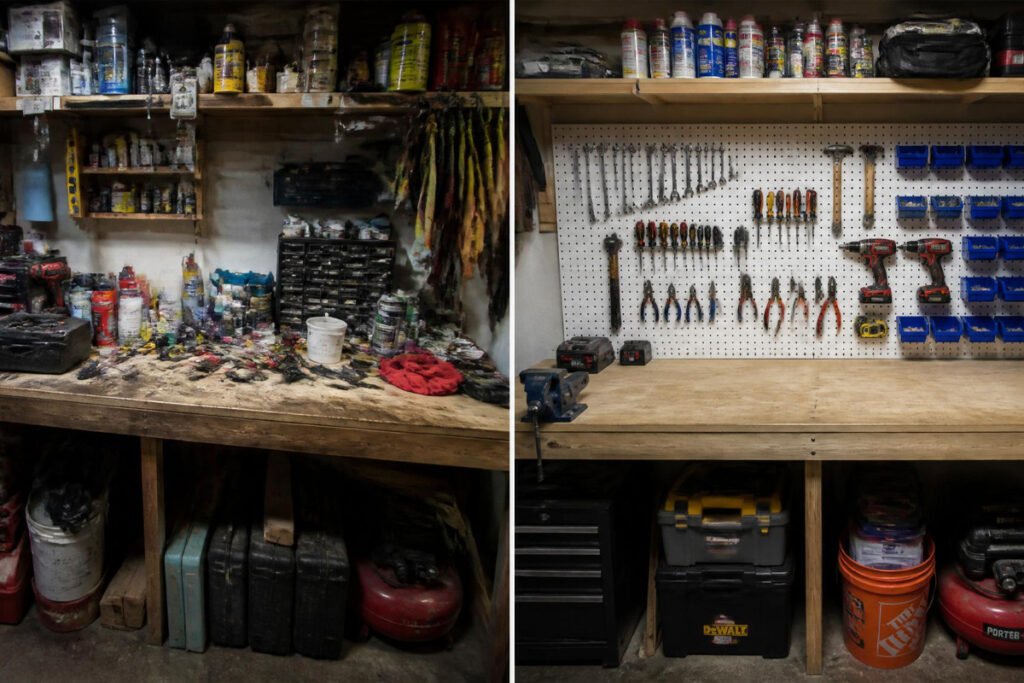
A workbench starts out clean. Within a month it’s covered in half-finished projects, loose screws, and tools that never made it back to where they belong — and within a year, most people are working on a twelve-inch clear patch surrounded by clutter instead of the full surface they started with. It’s one of the most common complaints from anyone who spends real time in their garage: the workbench that was supposed to make projects easier has become the biggest obstacle to starting one.
The good news is that a workbench that stays organized isn’t about having more storage — it’s about having the right layout for how you actually work. This guide covers how to lay out a workbench by zone, which tool storage systems fit different working styles, and the maintenance habits that keep a bench functional instead of becoming a dumping ground again within a week. If you’re setting up a workbench as part of a larger space, our garage workshop setup guide covers the bigger picture this fits into.
Quick Answer
The best way to organize a garage workbench is to divide it into zones based on how often you reach for something. Keep daily tools within arm’s reach on a pegboard or wall rail directly above the bench, store project-specific tools in drawers or bins below the surface, and move anything used only occasionally — like specialty tools or bulk supplies — off the bench entirely onto nearby shelving or overhead storage. The goal is a clear working surface with everything else positioned by frequency of use, not by category alone.
Table of Contents
- Why Workbenches Get Cluttered So Fast
- How to Choose the Right Layout for Your Work
- Best Workbench Organization Systems
- Comparison Table
- Organizing Workbenches for Different Garage Uses
- How to Set Up an Organized Workbench (Step-by-Step)
- Common Mistakes
- Expert Tips
- Final Thoughts
- FAQ
Why Workbenches Get Cluttered So Fast {#why-cluttered}
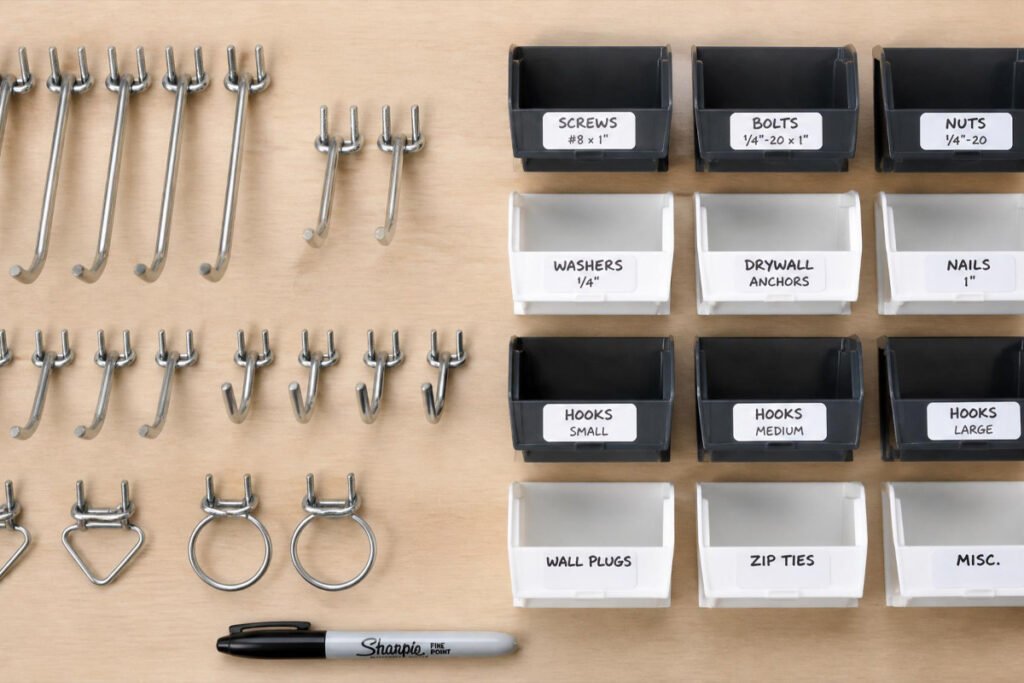
A workbench is the one surface in the garage that touches nearly every project, which means it also absorbs the leftover mess from every one of them. Unlike a shelf or cabinet, nothing about a bare workbench naturally tells you where anything belongs — so tools and hardware just pile up wherever there was space when a project wrapped up.
The problem compounds because the bench is usually the most convenient flat surface in the whole garage. Mail, mower parts, half-empty paint cans, and things you’re not sure what to do with all end up there simply because it’s open and reachable. Within a few weeks, the actual working surface shrinks to whatever small patch hasn’t been claimed by clutter yet — which is the same pattern that affects garage cabinets and shelving if they aren’t given a defined purpose from the start.
How to Choose the Right Layout for Your Work {#choose-layout}
Before installing any organization system, answer three questions:
What do you actually build or repair here? Woodworking, small engine repair, electronics, and general household fixes all call for different tool sets and different amounts of clear surface space.
How often do you use each tool? Daily tools belong within arm’s reach. Occasional tools belong nearby but off the bench. Rarely used tools belong in cabinets or overhead storage entirely.
How much clear surface do you actually need at once? A rule of thumb from workplace ergonomics research is to keep the items you reach for most within about 13 to 17 inches of each shoulder, with less frequent items positioned farther out — the same reach-zone principle OSHA outlines for general workstation layout applies just as well to a physical workbench as it does to a desk.
Best Workbench Organization Systems {#best-methods}
Pegboard Wall Systems
Overview: A pegboard mounted directly above the workbench is the most flexible way to store hand tools, since hooks can be rearranged instantly as your tool collection or project focus changes.
Key Features:
- Fully customizable hook and shelf layout
- Keeps tools visible for quick identification
- Low cost relative to drawer systems
- Works well combined with a bench below
Best For: Hand-tool-heavy work like general repairs and hobby projects.
Pros: ✅ Instantly rearrangeable ✅ Affordable ✅ Everything visible at a glance
Cons: ❌ Dust collects in the holes over time ❌ Not ideal for small loose hardware
Our Verdict: Pegboard is the best starting point for most garages, especially if your tool collection is still growing. Clean it periodically the same way you would any other garage wall surface, since dust builds up in the holes faster than on a flat panel.
Drawer & Cabinet Storage
Overview: Built-in or add-on drawers below the bench surface handle small hardware, measuring tools, and anything you’d rather keep out of sight and dust-free.
Key Features:
- Fully enclosed, dust-free storage
- Best for small parts, fasteners, and precision tools
- Can be organized with dividers and labeled bins
- Adds real cost compared to open shelving
Best For: Small hardware, precision tools, and anything sensitive to dust.
Pros: ✅ Keeps small items from getting lost ✅ Fully enclosed and protected ✅ Scales well with dividers
Cons: ❌ Contents aren’t visible without opening ❌ More expensive than open storage
Our Verdict: Pair drawers with a labeling system so you’re not opening five drawers to find one drill bit. This is the same principle behind organizing garage cabinets — a system only works if you can find things without searching.
Wall-Mounted Rail & Bin Systems
Overview: Slatwall or rail-based systems use interchangeable bins, baskets, and tool holders that slide into a mounted rail, offering more structure than pegboard while staying more flexible than fixed drawers.
Key Features:
- Modular bins and holders that reposition easily
- Handles both hand tools and small parts
- More structured than pegboard, less rigid than drawers
- Mid-range cost between pegboard and full cabinetry
Best For: Garages that want organization flexibility without full drawer cabinetry.
Pros: ✅ Good middle ground of structure and flexibility ✅ Bins keep small items contained ✅ Easy to reconfigure seasonally
Cons: ❌ Higher cost than basic pegboard ❌ Bin capacity is limited compared to drawers
Our Verdict: A strong option if your projects change often enough that a fixed drawer layout feels too rigid, but you still want more containment than open pegboard hooks provide.
Overhead & Off-Bench Storage
Overview: Not everything belongs on or near the bench — bulk supplies, seasonal tools, and rarely used equipment are better moved entirely off the workspace.
Key Features:
- Frees bench-adjacent space for daily tools only
- Works well for bulky, infrequently used items
- Requires planning ahead for what’s stored where
- Complements rather than replaces bench-side storage
Best For: Bulk materials, seasonal tools, and anything used only a few times a year.
Pros: ✅ Keeps the bench area uncluttered ✅ Maximizes total garage storage ✅ Reduces daily decision fatigue about where things go
Cons: ❌ Less convenient for anything needed regularly ❌ Requires a ladder or lift to access
Our Verdict: Use overhead racks for anything you touch less than once a month. If it’s not part of your regular workflow, it doesn’t need to live near the bench at all.
Comparison Table {#comparison}
| System Type | Best For | Visibility | Dust Protection | Relative Cost |
|---|---|---|---|---|
| Pegboard | Hand tools, growing collections | High | Low | $ |
| Drawers/Cabinets | Small hardware, precision tools | Low (enclosed) | High | $$$ |
| Rail & Bin Systems | Mixed tools and small parts | Medium | Medium | $$ |
| Overhead/Off-Bench | Bulk and seasonal items | Low (out of sight) | Medium | $$ |
Organizing Workbenches for Different Garage Uses {#situations}
General Household Repairs
A mixed-use bench for everyday fixes benefits most from pegboard for common hand tools and a small drawer unit for fasteners and hardware — enough structure to stay organized without the cost of a full cabinet system.
Dedicated Workshop or Hobby Space
Garages set up as a real workshop benefit from a rail and bin system paired with drawer storage, since project-specific tools need to be swapped in and out more often than a general-repair bench.
Small or Shared-Use Garages
If the bench shares space with a parked car or other activities, prioritize wall-mounted storage over bench-top storage entirely, and keep the surface itself as clear as possible between uses. A folding or slide-out bench extension can also help here if floor space is tight.
How to Set Up an Organized Workbench (Step-by-Step) {#how-to}
Step 1: Prepare
Clear the bench completely and sort everything on and around it into keep, relocate, and toss piles. This is the only way to see what you’re actually working with before deciding on a system.
Step 2: Clean/Setup
Wipe down the bench surface and the wall behind it, and decide which organization system — pegboard, drawers, rail, or a mix — fits your most common tasks.
Step 3: Apply/Execute
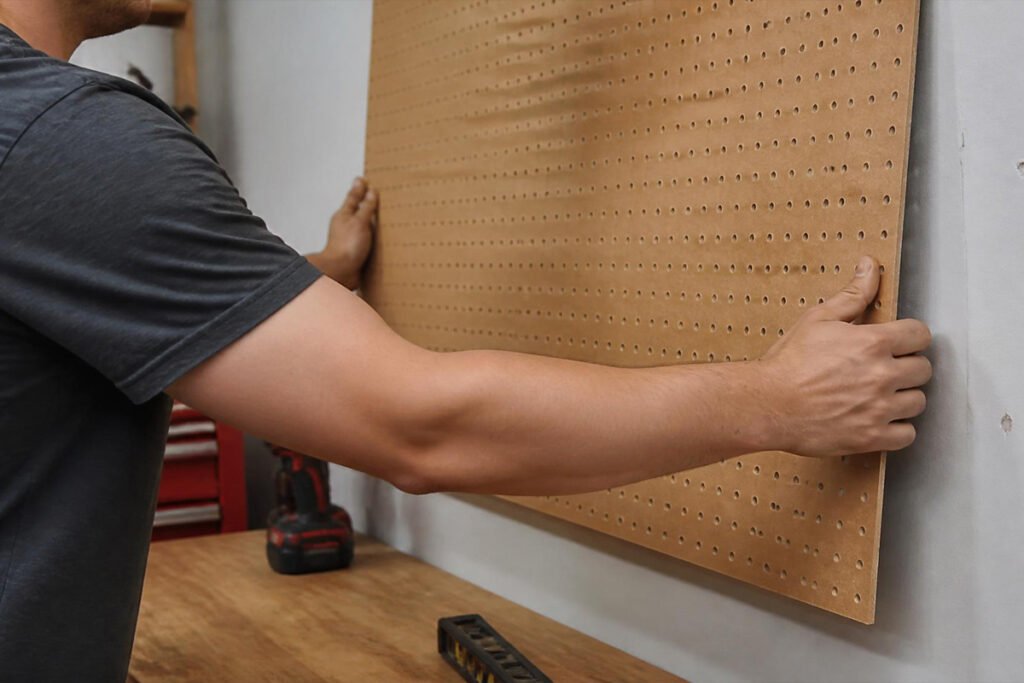
Mount wall storage first, working top to bottom, then place daily tools in the most accessible positions closest to where you naturally stand while working.
Step 4: Wait/Cure/Process
Use the bench for a week or two before finalizing tool placement — the first layout rarely matches how you actually reach for things once real projects are underway.
Step 5: Finish/Review
Adjust hook and bin positions based on that trial period, then label drawers and bins so the system holds up even when someone else uses the space.
Common Mistakes {#mistakes}
Storing everything on the bench instead of around it. If the surface itself is where tools live, there’s no room left to actually work. Wall and overhead storage should hold the majority of tools, leaving the bench surface for the task at hand.
Organizing by category instead of frequency of use. Grouping all wrenches together sounds logical, but if you only use two of them regularly, the other ten are just taking up prime reachable space. Sort by how often something gets used first, category second.
Skipping the trial period. Setting a “final” layout on day one usually means redoing it within a month. Give a new system a couple of weeks of real use before treating any placement as permanent.
Expert Tips {#tips}
Leave one section of the bench permanently clear. A dedicated clear zone — even just two feet — makes starting a new project far easier than having to clear space every single time.
Label bins and drawers with both words and a quick visual. A written label plus a small picture or color code helps anyone using the space find things faster, especially for small hardware that looks similar at a glance.
Reassess the layout seasonally. Projects change with the seasons — yard tool maintenance in spring, holiday project storage in winter — and a bench organized for one season often needs minor adjustments for the next, similar to how seasonal garage organization works for the rest of the space.
Final Thoughts / Final Verdict {#final}
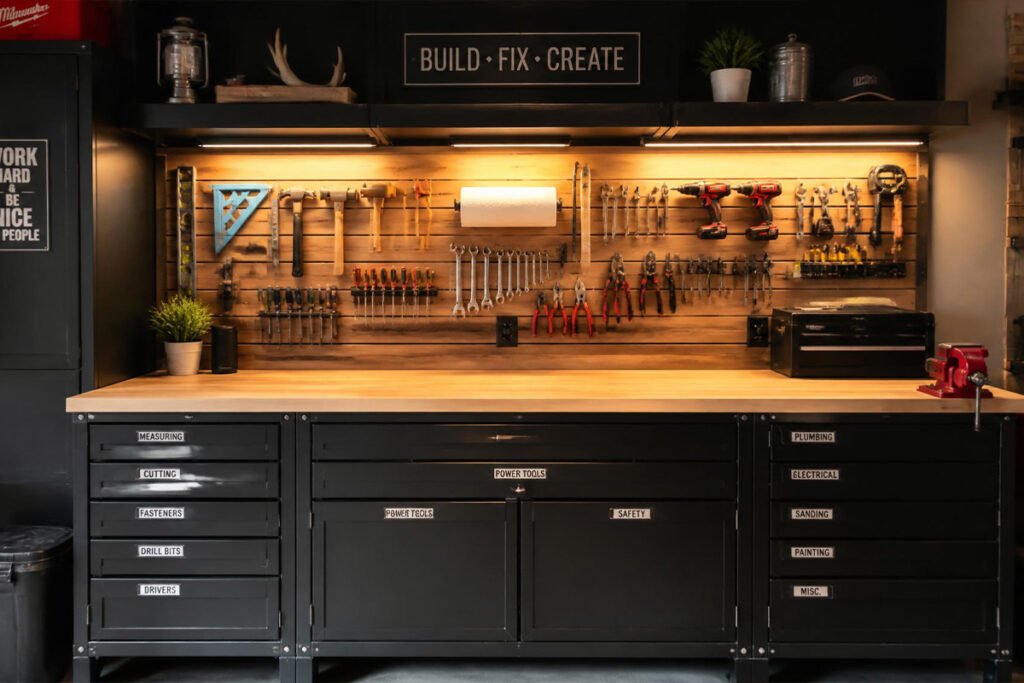
Best overall: Pegboard above the bench paired with a small drawer unit below — flexible, affordable, and enough structure for most households. Best for dedicated workshops: A rail and bin system combined with full drawer cabinetry for frequent tool swaps. Best for tight or shared spaces: Wall-first storage with minimal bench-top clutter and off-bench overhead storage for anything used occasionally.
An organized workbench isn’t a one-time project — it’s a system that needs a real trial period and small adjustments before it sticks. Once it’s dialed in, pair it with our garage organization guide and overhead storage guide to make sure everything that doesn’t belong on the bench has a clear home somewhere else.
Frequently Asked Questions {#faq}
How much clear space should I leave on my workbench? At least two to three feet of consistently clear surface is enough for most household projects. Dedicated woodworking or mechanical work may need more depending on what you’re building.
Should I use pegboard or drawers for tool storage? Pegboard works best for frequently used hand tools you want visible and instantly accessible. Drawers are better for small hardware, precision tools, and anything you want protected from dust.
How do I stop my workbench from becoming cluttered again? Give every category of item an off-bench home before you start using the space, and do a five-minute reset at the end of each project rather than letting clutter accumulate over weeks.
What’s the best height for a garage workbench? Most standing workbenches are comfortable between 34 and 38 inches high, though the right height depends on your own height and whether tasks involve fine precision work or heavier downward force.
Should tools be organized by type or by how often I use them? Frequency of use should come first. Group by type within that — for example, keep your most-used screwdrivers together in the easiest reach zone, with the rest stored slightly farther away.
Is it worth buying a pre-made workbench organization kit? Pre-made kits can save setup time and offer more consistent hardware, but a DIY pegboard and shelf combination is usually more affordable and just as effective for most household needs.
How do I organize a workbench I share with a car parked in the same garage? Prioritize wall-mounted storage over floor and bench-top storage, and treat the bench surface as temporary workspace that gets cleared between uses rather than permanent storage.
Can I mix pegboard, drawers, and rail systems together? Yes, and combining them is often the most effective approach — pegboard for visible daily tools, drawers for small hardware, and a rail system for anything in between.
How often should I reorganize my workbench? A quick seasonal check is usually enough for most households, with minor adjustments any time your project focus shifts significantly, such as switching from indoor projects to yard equipment maintenance.
What should never be stored directly on the workbench surface? Avoid leaving loose fasteners, flammable materials, or anything you’re not actively using on the open surface. These belong in labeled containers or off-bench storage where they won’t get lost or create a hazard while you’re working.
Author: Danial Marquez Last Updated: July 2026






