
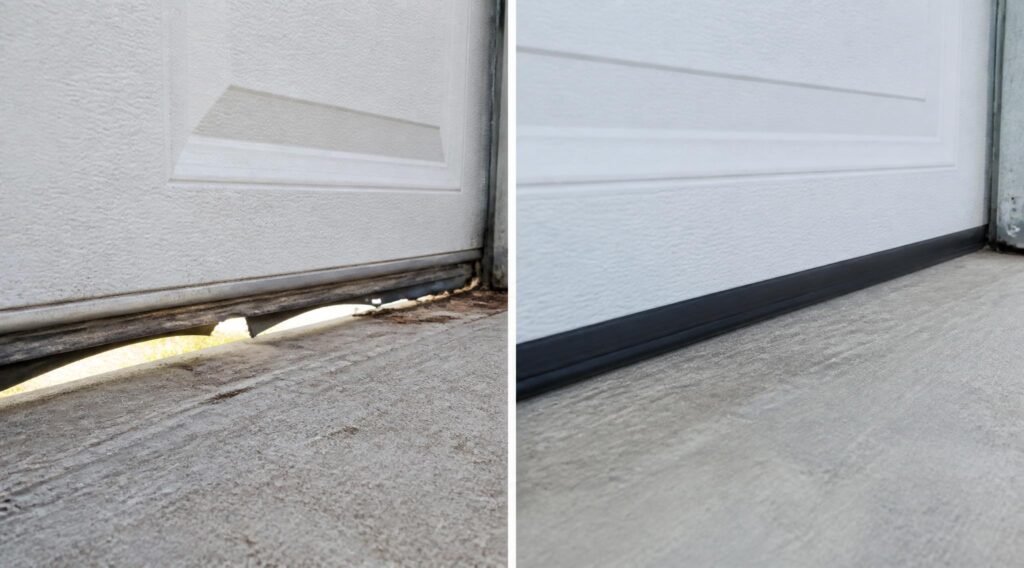
A gap of just a quarter inch under a garage door doesn’t look like much — until winter air, rainwater, and the occasional mouse start treating it like an open invitation. Most homeowners don’t notice a failing seal until they see daylight under the door, feel a draft near the connecting entry, or find a damp line along the base of the wall after a storm.
Weather seals are one of the cheapest, fastest upgrades available for a garage, and yet they’re often the last thing anyone thinks to replace. This guide breaks down the best garage door weather seals and weatherstripping kits available right now, organized by exactly which gap they’re built to close. If you’ve already identified a specific bottom seal issue, our guide on replacing a garage door bottom seal covers the hands-on replacement process in detail.
Quick Answer
The best garage door weather seal depends on which gap you’re closing. For the bottom of the door, a bulb-style vinyl or rubber seal that presses into the concrete threshold offers the best water and draft protection. For the sides and top of the frame, a flexible flap or brush-style seal closes the gap between the door panel and the jamb. For garages in wet or snowy climates, a threshold seal adds an extra layer of water defense right at the floor. Most well-sealed garages combine at least two of these — a bottom seal plus side/top weatherstripping — rather than relying on just one.
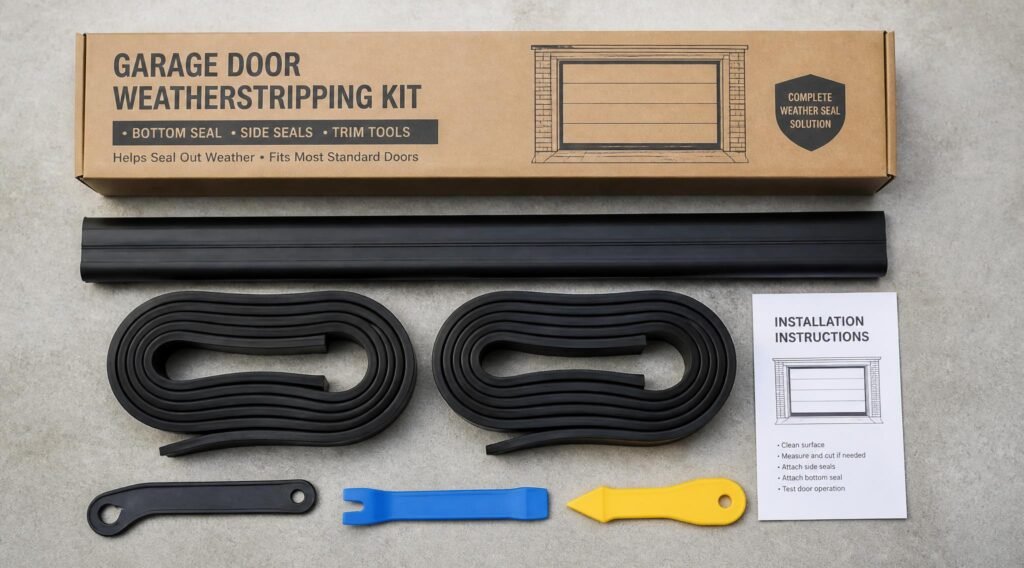
Table of Contents
- Why Garage Door Seals Matter More Than People Think
- How to Choose the Right Weather Seal
- Best Garage Door Weather Seals Available
- Comparison Table
- Best Seals for Different Climates and Door Types
- How to Install a Garage Door Weather Seal
- Common Mistakes
- Expert Tips
- Final Thoughts
- Frequently Asked Questions
Why Garage Door Seals Matter More Than People Think {#why-you-need}
A garage door is the largest moving opening in most homes, and even a well-fitted one leaves small gaps around its perimeter by design, to allow for smooth operation. Over time, sun exposure, temperature swings, and simple friction wear down the rubber or vinyl seal that closes those gaps, letting in cold air, rain, dust, and pests. A failing seal doesn’t just make the garage less comfortable — it can lead to water pooling near the garage floor or contribute to musty, lingering odor problems if moisture sits unaddressed.
For homes actively working on garage insulation, weather seals are the first line of defense before insulation even matters — see our garage insulation guide for how the two work together.
How to Choose the Right Weather Seal {#how-to-choose}
Before buying, ask three questions:
- Which gap am I actually sealing? Bottom, side, and top gaps each require a different seal profile — a single universal seal rarely performs as well as matched, purpose-built pieces.
- What’s my door track type? Most residential doors use a T-style or bulb-style track that determines which seal profiles will actually fit without modification.
- How harsh is my climate? Homes in wet, snowy, or extreme-temperature regions benefit from thicker, more durable seal materials than homes in mild climates.
For general guidance on home weatherization and energy efficiency standards, the U.S. Department of Energy’s weatherization guidance is a solid, non-commercial reference, even though it isn’t garage-specific.
Best Garage Door Weather Seals Available {#best-tools}
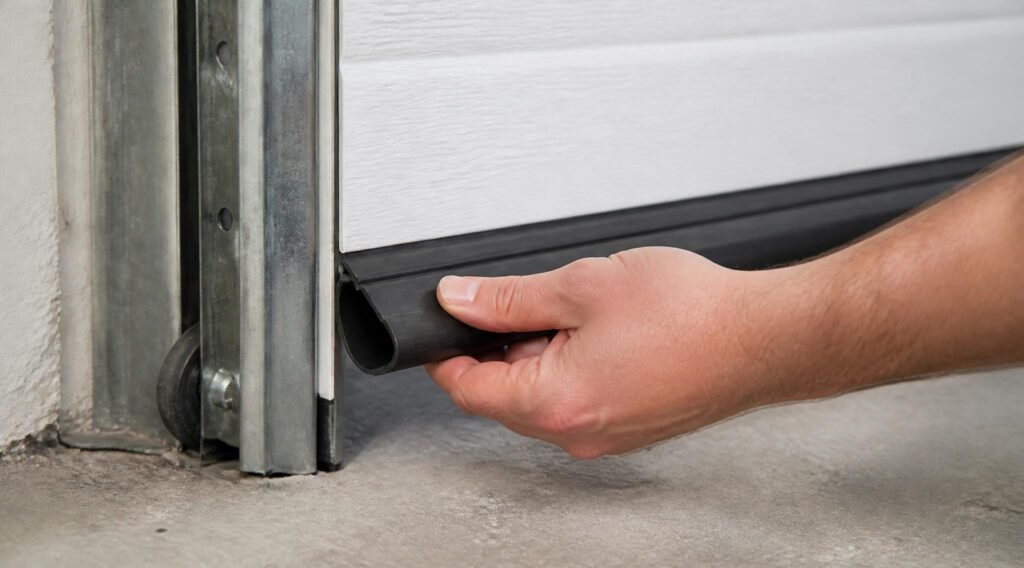
1. Bulb-Style Vinyl Bottom Seal
Overview: This is the standard replacement seal for most residential garage doors — a rounded, hollow vinyl “bulb” that compresses against the floor to block drafts, water, and debris. It slides into most existing bottom tracks without needing new hardware.
Key Features:
- Slides into standard T-style bottom tracks
- Flexible vinyl compresses to seal uneven floor surfaces
- Available in multiple widths to match door track size
- No adhesive required for most track types
Best For: Standard bottom seal replacement on most residential garage doors
Pros: ✅ Simple slide-in installation, no special tools ✅ Compresses well against slightly uneven concrete ✅ Widely compatible with standard door tracks Cons: ❌ Needs periodic replacement as vinyl hardens with age ❌ Not as durable as rubber in extreme cold
Our Verdict: This is the right starting point for most homeowners — pair it with our bottom seal replacement guide for the full swap-out process.
2. Heavy-Duty Rubber Bottom Seal
Overview: For garages in harsher climates, a heavy-duty rubber bottom seal holds up better against extreme cold and repeated compression than standard vinyl, without becoming brittle over time.
Key Features:
- Rubber compound resists cracking in cold temperatures
- Thicker profile for larger floor gaps
- Compatible with most standard and heavy-duty track types
- Longer expected lifespan than vinyl
Best For: Cold-climate garages, doors with larger or uneven floor gaps
Pros: ✅ Handles extreme cold without becoming brittle ✅ Better compression on larger gaps ✅ Longer-lasting than standard vinyl Cons: ❌ Higher price than basic vinyl seals ❌ Stiffer material can be slightly harder to install
Our Verdict: Worth the upgrade if your garage sees real winters — especially alongside our garage ventilation guide, since a well-sealed door changes how your garage handles airflow and condensation.
3. Side and Top Flap Weatherstripping Kit
Overview: While bottom seals get most of the attention, side and top gaps let in just as much air and debris. Flap-style weatherstripping attaches along the door frame and presses against the door panel when closed, sealing these overlooked edges.
Key Features:
- Covers side and top gaps separately from the bottom seal
- Flap design presses against the door panel when closed
- Available in coiled kits sized for standard door widths
- Multiple color options to match door and trim
Best For: Completing a full weatherstripping upgrade after bottom seal replacement
Pros: ✅ Closes gaps that bottom seals alone miss ✅ Noticeable reduction in drafts near the top and sides ✅ Improves the door’s finished, sealed appearance Cons: ❌ More involved installation than a slide-in bottom seal ❌ Needs accurate measurement and cutting for a clean fit
Our Verdict: Pair this with a bottom seal for genuinely complete coverage — most of the draft complaints we hear about trace back to skipping this step and only addressing the bottom.
4. Threshold Seal (Floor-Mounted)
Overview: A threshold seal mounts directly to the garage floor rather than the door itself, creating a raised barrier that blocks water, wind-driven rain, and debris even if the door’s own bottom seal isn’t perfectly flush.
Key Features:
- Mounts to the floor, not the door
- Low-profile ramp design allows vehicle and foot traffic
- Adds a redundant layer of water protection
- Available in rubber or heavy-duty PVC
Best For: Homes in heavy rain regions, sloped driveways, or garages prone to water intrusion
Pros: ✅ Extra layer of protection independent of the door seal ✅ Works even if the door seal is slightly worn ✅ Low profile doesn’t interfere with normal vehicle use Cons: ❌ Adds a small ramp that some vehicles with low clearance may notice ❌ Requires floor-level adhesive or fastening
Our Verdict: A smart addition if you’ve dealt with water intrusion before — see our guide on garage mold removal if past water issues have already caused a moisture problem worth addressing directly.
5. Universal Weatherstripping Seal Kit (Bottom + Side + Top)
Overview: For a full weather-sealing project in one purchase, universal kits bundle a bottom seal with side and top weatherstripping cut to standard door widths, simplifying both the shopping and the installation process.
Key Features:
- Bundles bottom, side, and top seals in one kit
- Pre-cut or easily trimmed to standard door widths
- Consistent material and color across all pieces
- Typically the most cost-effective option for a full replacement
Best For: A complete weather-sealing upgrade in a single project
Pros: ✅ Simplifies shopping with one matched kit ✅ Cost-effective compared to buying pieces separately ✅ Consistent look and material across the whole door Cons: ❌ Less customizable than buying individual pieces for a specific gap ❌ May include more material than needed if only one section needs replacing
Our Verdict: The best choice if your seals haven’t been touched in years and the whole system needs a refresh — pair the finished result with our garage door maintenance checklist to keep it in good shape going forward.
Comparison Table {#comparison-table}
| Seal Type | Best For | Installation Difficulty | Approx. Price Range | Climate Suitability |
|---|---|---|---|---|
| Bulb-Style Vinyl Bottom Seal | Standard bottom seal replacement | Easy | $15–$30 | Mild to moderate |
| Heavy-Duty Rubber Bottom Seal | Cold climates, uneven floors | Easy–Moderate | $25–$45 | Cold, harsh winters |
| Side/Top Flap Weatherstripping | Completing a full seal upgrade | Moderate | $20–$40 | All climates |
| Threshold Seal | Heavy rain, sloped driveways | Moderate | $30–$60 | Wet climates |
| Universal Full Kit | One-time complete replacement | Moderate | $40–$80 | All climates |
Best Seals for Different Climates and Door Types {#different-setups}
Cold and Snowy Climates
Prioritize a heavy-duty rubber bottom seal over standard vinyl, since rubber resists the cracking and stiffening that cold weather causes. Pair it with full side and top weatherstripping to minimize heat loss.
Wet or Rain-Prone Regions
A threshold seal adds meaningful redundancy against water intrusion, especially on sloped driveways where water naturally pools at the garage entrance. Combine it with a solid bottom seal for the best defense.
Older or Uneven Garage Floors
Look for bulb-style seals with extra flexibility, since they compress more evenly over minor floor irregularities than stiffer profiles — check floor condition using our garage floor cleaning guide before assuming the seal alone is the issue.
How to Install a Garage Door Weather Seal {#how-to-install}
Step 1: Measure Your Door and Track Type
Confirm your door’s width and bottom track profile before ordering, since seal profiles aren’t universal across all track types.
Step 2: Remove the Old Seal
Open the door partway and slide the old, worn seal out of the track, cleaning out any debris left behind.
Step 3: Slide In or Attach the New Seal
For bottom seals, slide the new bulb into the track; for side and top weatherstripping, attach along the frame per the kit’s instructions, trimming to length as needed.
Step 4: Close the Door and Check the Seal
With the door fully closed, check for daylight gaps or uneven compression along the full width and sides.
Step 5: Adjust as Needed
Minor track or hinge adjustments may be needed for a truly even seal — if the gap is uneven specifically at the tracks, our track alignment repair guide covers the fix.
Common Mistakes {#common-mistakes}
Only replacing the bottom seal and ignoring the sides and top. Side and top gaps let in nearly as much draft as a worn bottom seal — a full weatherstripping job addresses all three.
Buying a seal without checking the actual track profile. Not all bottom seals fit all tracks — measure first, since an ill-fitting seal won’t compress properly no matter how new it is.
Ignoring a persistently uneven seal gap. If one section of the door never seals evenly even after a fresh seal install, the issue is likely the track or hinges, not the seal itself — see our track alignment guide before buying another seal.
Expert Tips {#expert-tips}
Replace seals proactively every 3–5 years, not just when they visibly fail. Vinyl and rubber degrade gradually, and a seal that “still looks fine” may already be letting in more air than you’d expect.
Check seal condition seasonally, not just once a year. Extreme summer heat and winter cold both accelerate wear — a quick visual check each season catches problems before a full storm tests the seal for you.
Pair new seals with a broader maintenance check. A fresh seal on a door with sticking rollers or an out-of-adjustment track won’t seal as evenly as it should — our garage door maintenance checklist covers the full picture.
Final Thoughts {#final-thoughts}
Best Overall: A bulb-style vinyl bottom seal paired with side and top flap weatherstripping covers the majority of homes. Best for Cold Climates: A heavy-duty rubber bottom seal, for durability against repeated freeze-thaw cycles. Best for Wet Climates: A threshold seal added on top of standard weatherstripping for redundant water protection.
A properly sealed garage door is one of the cheapest upgrades that pays off immediately — for the bigger picture on keeping your garage comfortable and protected, see our garage insulation guide and garage maintenance checklist.
Frequently Asked Questions {#faq}
How often should I replace my garage door weather seal? Most seals need replacement every 3–5 years, though harsh climates or heavy daily use can shorten that. Visible cracking, hardening, or gaps under the door are all signs it’s time.
Do I need a professional to install a new weather seal? No, most bottom seal replacements and weatherstripping kits are straightforward DIY jobs that take under an hour, especially with a matched, pre-sized kit.
Bulb seal vs. rubber seal — what’s the real difference? Standard bulb-style seals are usually vinyl and work well in mild climates, while rubber seals resist cracking better in extreme cold and offer a longer lifespan overall.
Will a new seal actually lower my energy bills? It can meaningfully reduce drafts and heat loss, especially in an attached garage, though the full energy-saving effect is greater when paired with proper garage insulation.
How do I know if my seal gap problem is actually a track issue? If the gap is uneven across the width of the door even with a fresh seal installed, the track or hinges are likely misaligned rather than the seal being at fault — check our track alignment guide.
Can a weather seal actually keep pests out? A well-fitted bottom seal significantly reduces entry points for mice and insects, though it isn’t a complete pest-proofing solution on its own.
What’s a threshold seal, and do I really need one? It’s a raised barrier that mounts to the floor rather than the door, adding extra water protection. It’s most valuable in wet climates or on driveways that slope toward the garage.
Do side and top seals matter as much as the bottom seal? Yes — many homeowners only replace the bottom seal and are surprised drafts continue, when the side and top gaps were the actual source.
Can I install weatherstripping on an older garage door? In most cases yes, as long as you match the seal profile to your door’s existing track and frame style — older doors sometimes use non-standard tracks, so measuring carefully matters more than usual.
Author: Danial Marquez Last Updated: August 2026






