
You pull into the driveway, hit the remote, and instead of the usual smooth glide you hear a sharp snap followed by a metallic clatter. One side of the door hangs lower than the other, or it won’t budge at all. Nine times out of ten, that’s a garage door cable that has frayed through or jumped its drum — not the opener, and not always the spring. It’s one of the most common garage door failures homeowners run into, and also one of the most misunderstood, because cables live right next to torsion springs that store a genuinely dangerous amount of energy.
This guide walks through how to diagnose a bad cable, when it’s safe to fix yourself, and the full step-by-step process for replacing one correctly — plus the points in the job where the smart move is to stop and call a professional instead.
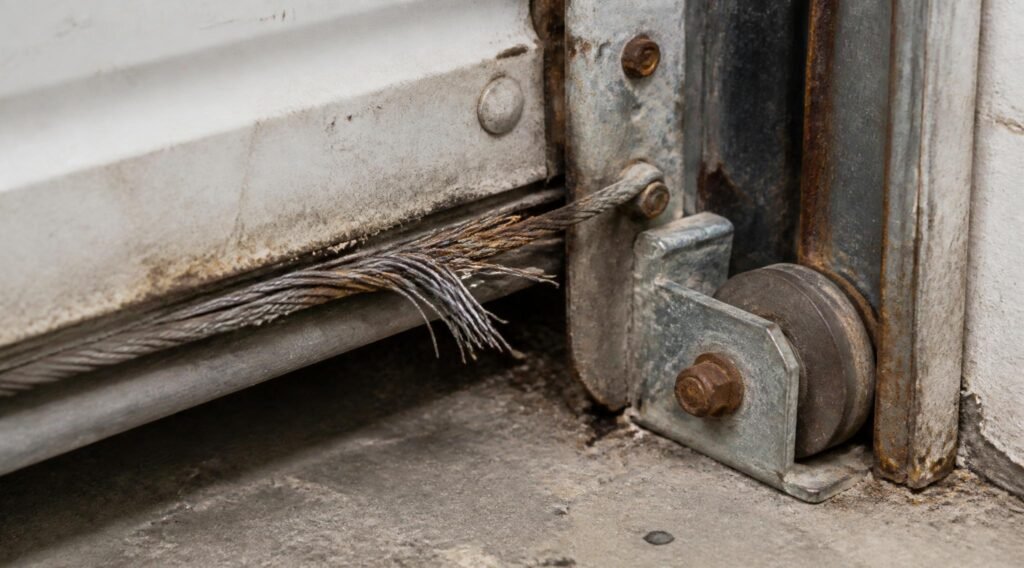
Signs Your Garage Door Cable Is Failing
Cable problems rarely show up out of nowhere. Catching the warning signs early usually turns a cable job into a $15 part instead of a damaged track or a trip to the ER.
- The door hangs crooked, with one side noticeably lower than the other
- A loose or dangling cable visible near the bottom roller bracket
- Fraying, kinking, or visible rust on the cable strands
- A loud snap or bang followed by the door refusing to move
- The door feels unusually heavy when opened manually
- Grinding or scraping near the drum at the top corners of the door
If the door won’t close at all, it’s worth first ruling out simpler causes — see Why Won’t My Garage Door Close? before you assume the cable is the culprit.
Why Cable Work Is Different From Other Garage Repairs
A garage door cable and its torsion spring work as one system. The spring stores the force that lifts a 150-to-400-pound door thousands of times a year, and the cable is what transmits that force to the bottom of the door. According to the U.S. Consumer Product Safety Commission, garage doors and their components are involved in tens of thousands of emergency-room visits every year in the United States, and a large share trace back to spring and cable systems releasing stored energy uncontrolled. That’s the single most important thing to understand before you touch a cable: you are never just replacing a wire, you’re working next to a loaded spring.
This doesn’t mean the job is off-limits for a careful DIYer — it means the tension-release step is non-negotiable and cannot be rushed. If you’ve already worked through our garage door spring replacement guide, the winding-bar technique described there is the exact same skill you’ll use here.
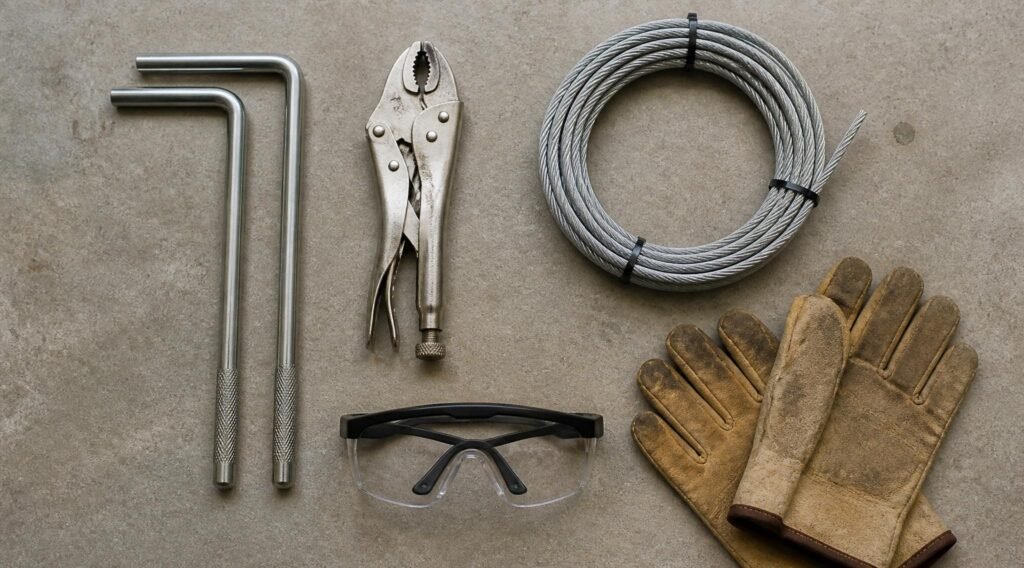
Tools and Materials You’ll Need
- Two properly sized steel winding bars (never screwdrivers or improvised bars)
- Locking pliers (Vise-Grips) or C-clamps, two pairs
- A sturdy stepladder
- Adjustable wrench and a socket set
- Replacement cable matched in length and gauge to your existing one (galvanized aircraft cable, typically 1/8″)
- Safety glasses and heavy leather work gloves
- A tape measure
- Optional: garage door lubricant for the drum and rollers once the new cable is on
If your rollers are also worn or noisy, it’s worth handling both jobs in the same session — see our step-by-step roller replacement guide.
Step 1: Prep the Door and Release Spring Tension
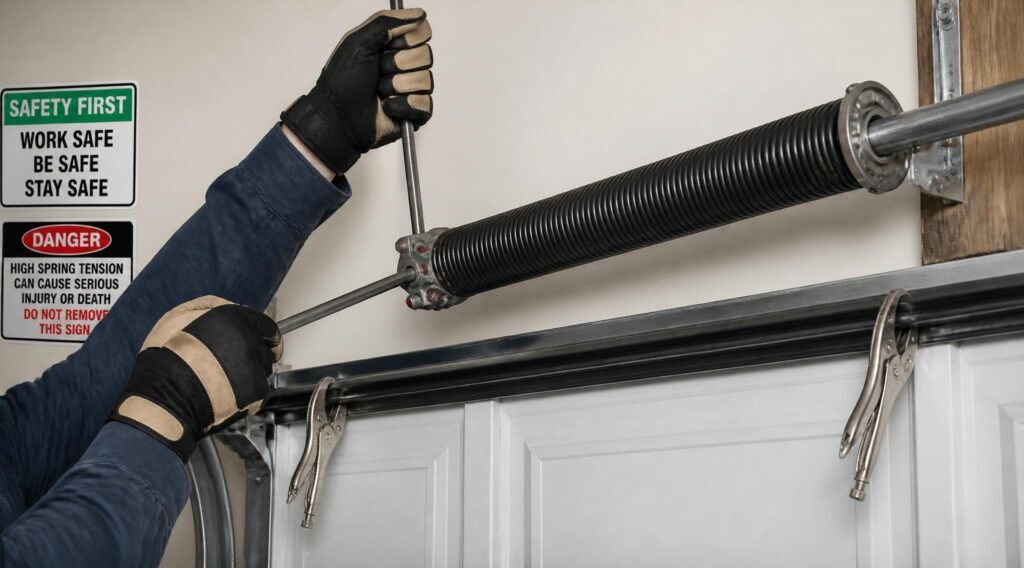
Unplug the garage door opener before doing anything else — an accidental button press while the door is disassembled is a real hazard. Fully open the door and clamp locking pliers onto the track directly below the bottom roller on both sides. This keeps the door from crashing down once the cable is disconnected.
Next, release the torsion spring tension using winding bars, exactly as described in our spring adjustment guide. Insert a bar fully into the winding cone, loosen the set screws a quarter turn at a time, and unwind in small increments until the spring goes fully slack. Never remove both winding bars at once, and never use fewer than two — a spring with only one bar in place can spin the bar out of your hands with enough force to break bones.
Step 2: Access the Drum and Disconnect the Old Cable
With tension released, the cable should now be slack. Loosen the set screws on the cable drum at the top of the track and unwind the old cable by hand. Note carefully how many wraps were on the drum and which direction it was wound — you’ll duplicate this exactly with the new cable so both sides lift evenly.
Detach the bottom end of the cable from the bracket at the base of the door. While you’re in there, check the track for the kind of misalignment covered in our track alignment and repair guide — a bent or out-of-plumb track is a common hidden cause of premature cable wear.
If the old cable shows rust rather than a clean snap, it’s worth reading our guide on removing rust from a garage door so the replacement cable doesn’t corrode the same way — usually a sign of moisture getting into the track or drum area.
Step 3: Route and Install the New Cable
Thread the new cable through the same pulley path as the old one, and attach the bottom end securely to the bracket first. At the top, wind the cable onto the drum in the same direction and the same number of wraps you noted in Step 2, keeping every wrap seated in the drum’s groove so it can’t jump off under load.
A drum that’s gummed up with old grease and debris makes it hard to see whether the wraps are seated correctly — a quick clean first, following our guide to removing grease from garage door tracks, makes this step far easier to get right the first time.
Tighten the drum set screws once the cable is seated, but don’t apply full spring tension yet — first confirm the cable sits evenly on both sides by comparing wrap counts side to side.
Step 4: Re-Tension the Spring and Test the Door
With the cable installed, re-wind the torsion spring using the winding bars — the reverse of Step 1 — following the same quarter-turn process from the spring replacement guide. Standard residential doors typically need around 7 to 7.5 full turns, but always match your door’s original setting rather than guessing.
Remove the locking pliers, plug the opener back in, and test the door manually first — lift it about halfway and let go. A properly balanced door should stay roughly in place rather than sliding up or crashing down. Only after that check passes should you test it on the opener.
If the chain or opener drive feels off after reassembly, our guides on fixing a garage door chain and tightening a garage door chain cover that separately from the cable-and-spring system.
How to Measure a Replacement Cable Correctly
Cable length and diameter matter more than most first-time DIYers expect — a cable that’s even half an inch off can throw the door out of balance permanently. Measure the old cable end-to-end while it’s still slack, or measure the door height and add roughly 8–12 inches to account for the drum wraps and the bottom bracket connection, then confirm against your door’s published spec sheet or model number if one is available. Diameter is usually stamped or listed on the packaging of the original — most residential doors use 1/8-inch cable, but heavier commercial-grade or oversized doors sometimes step up to 3/16-inch or 7×19 strand construction for extra flex resistance. When in doubt, bring the old cable to a hardware or garage door supply store rather than ordering by guesswork; a mismatched cable is one of the most common reasons a freshly repaired door still hangs unevenly.
Single vs. Double-Car Doors: Why Tension Differs
A single-car door typically uses one torsion spring and stores noticeably less energy than a double-wide door, which is often run on a single oversized spring rather than two smaller ones. That single oversized spring on a two-car door can hold significantly more torque than either spring on a matching pair of single doors, which is exactly why professionals treat double-door torsion work with extra caution. If your garage has a double-wide door with a single center-mounted spring, budget extra time for the winding process, use bars rated for the higher torque, and consider that this is one of the more common scenarios where paying for professional cable and spring service is the more sensible call, even for an otherwise confident DIYer.
Torsion Cables vs. Extension Spring Safety Cables
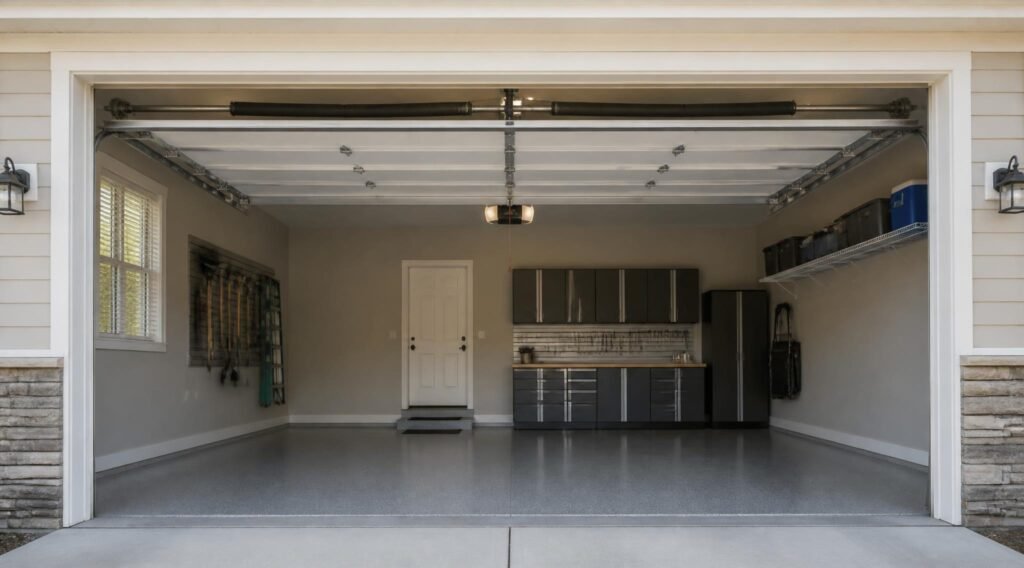
Most modern garage doors use a torsion spring system, where cables run from the bottom corner brackets up to drums mounted on the same shaft as the spring — this is the setup this guide covers. Older doors sometimes use extension springs mounted horizontally above the tracks, with separate safety cables threaded through the springs themselves. Those safety cables don’t lift the door; they exist purely to contain a spring if it snaps, and they should be replaced any time the extension springs themselves are replaced, even if the cable looks intact.
If you have an extension-spring door, the safety cable job looks a little different: clamp the door open the same way, but instead of unwinding a torsion cone, you’ll unhook the extension spring from its pulley bracket while it’s fully relaxed (door open), thread the new safety cable through the coil of the spring itself, and reattach both ends to the same anchor points the old cable used. Extension springs still carry real stored energy when stretched, so the same clamps-and-gloves precautions apply even though there’s no winding bar step involved.
DIY Cost vs. Professional Cable Replacement
A replacement cable itself is inexpensive — typically $10 to $25 for a matched pair, plus whatever tools you don’t already own. Professional cable replacement generally runs $150 to $350 depending on region and whether the spring also needs attention, according to pricing reported across several garage door service providers.
| Approach | Typical Cost | Time Required |
| DIY (parts + tools) | $25–$80 | 2–4 hours |
| Professional service | $150–$350 | 30–60 minutes |
| Combined spring + cable job | $200–$450 | 1–2 hours (pro) |
For a full breakdown of what goes into a professional quote, see our garage door repair cost guide for broken springs, since most cable jobs get priced alongside spring work.
When to Call a Professional Instead
- You’ve never released spring tension before and don’t have both winding bars
- The door uses a single torsion spring on a double-wide door (higher stored energy)
- The cable snapped while the door was in a partially open position and the door is jammed on the tracks
- You’re missing a matched replacement cable and are tempted to improvise with a different gauge
- Multiple systems seem to be failing at once — cable, opener, and track alignment together
If it turns out to be a broader issue rather than just a worn cable, our complete maintenance and troubleshooting guide is a good next stop for narrowing down what’s actually failing.
Keeping New Cables From Failing Early
A correctly installed cable should easily last 7 to 10 years. Rust, misalignment, and a door that’s out of balance are what shorten that lifespan, so a little routine upkeep pays for itself.
- Run through the seasonal items in our garage door maintenance checklist a couple of times a year.
- If the opener’s remote sensor starts blinking after a cable job, double-check the sensor alignment before assuming the cable work caused it.
- A remote that stops responding is usually unrelated to the cable — check our opener remote troubleshooting guide first.
- Replace the opener battery on schedule using our LiftMaster battery replacement guide so a dead remote doesn’t get mistaken for a mechanical fault.
- Keep the drum and pulleys lightly lubricated, and wipe down visible rust before it spreads to the cable itself
Common Mistakes to Avoid
- Working on the spring with only one winding bar, or with screwdrivers instead of proper bars
- Guessing at wrap count and direction instead of recording the original setup before removal
- Using a cable that doesn’t match the original gauge or length
- Forcing a door that’s stuck rather than checking whether it’s jumped the track first
- Skipping the manual balance test before running the opener
Related Safety Checks Worth Doing at the Same Time
Since you’ll already have the door open and the opener unplugged, it’s an efficient time to check a couple of adjacent safety items rather than making two separate trips into the garage.
- If you park a vehicle in the garage regularly, review our carbon monoxide safety guide for detector placement.
- A garage that stores fuel, oil, or a workshop setup should also follow the garage fire safety guide.
- If the door itself is an easy target for forced entry, our garage door security guide covers hardware upgrades worth pairing with a cable repair.
- A door that won’t seal fully at the bottom after cable work is often a sealing issue, not a cable issue — see fixing a gap on one side of the garage door.
Frequently Asked Questions
Can I replace a garage door cable without releasing the spring?
No. The cable and spring share the same tension system on a torsion setup — the spring must be fully unwound before the cable can be safely removed or installed.
How long does a garage door cable typically last?
Most cables last 7 to 10 years under normal use. Coastal or humid climates, or a garage with poor drainage, can shorten that through rust.
Is it safe to drive with a broken garage door cable?
If the door is stuck open, most vehicles can be moved out first, but don’t attempt to force the door itself closed — an unbalanced door on a broken cable can jump the track or fall.
Do both cables need to be replaced at once?
It’s strongly recommended. If one cable failed from age or wear, the other is usually close behind, and mismatched cable age is a common cause of an unevenly hanging door.
What gauge cable does a residential garage door need?
Most residential doors use 1/8-inch 7×19 galvanized aircraft cable, but always match the exact diameter and length of the original rather than assuming a standard size.
Why does only one side of my garage door cable usually break first?
Uneven sun exposure, moisture, or a slightly misaligned track puts more wear on one side than the other. It’s normal for one cable to fail years before its match, which is exactly why replacing both at once is recommended.
Can a broken cable damage my garage door opener?
Yes, indirectly. An unbalanced door forces the opener’s motor to work harder than it’s rated for, which can wear out the drive gear or trip the force-sensing safety reversal prematurely. Fixing the cable promptly protects the opener as much as the door itself.
The Bottom Line
A frayed or snapped garage door cable is one of the more approachable garage repairs for a careful DIYer, provided the spring tension step is never rushed or shortcut. If any part of the process feels uncertain — especially around the spring — the cost of a professional visit is small compared to the risk of working on a loaded torsion system without the right tools or experience.
Last Updated: September 2026






