Introduction
Gym memberships average $50–$80 per month. That’s $600–$960 per year — paid whether you go or not. Factor in drive time, crowded equipment, and inflexible hours, and the case for a home gym becomes compelling fast.
Your garage is the single best room in your house for a home gym. It has the space, the concrete floor, the ceiling height, and — critically — it’s separate from your living area. You can make noise, sweat, drop weights, and leave equipment set up permanently without affecting the rest of your home.
Converting a garage into a functional home gym is more achievable than most homeowners think. This guide walks through every step: planning your space, preparing the floor and walls, choosing the right equipment for your goals, managing climate and lighting, and keeping the car-storage function if you need it.
Why a Garage Gym Beats a Basement or Spare Room
Before getting into the how, it’s worth understanding why the garage is specifically the right location.
Floor load capacity. Concrete garage floors handle heavy weight without the structural concerns of upper floors or wood subfloors. A 300-lb barbell rack, a 400-lb power rack, and multiple plates will not stress a concrete slab.
Ceiling height. Most garages have 8–10-foot ceilings — sufficient for overhead pressing, pull-up bars, and jumping exercises that would be impossible in lower-ceilinged spaces.
Ventilation. Garage doors provide instant ventilation. Cracking the door a foot during a hard workout delivers far more airflow than any window in a spare bedroom.
Noise isolation. Dropping weights, using a rowing machine, or playing loud music doesn’t travel to living spaces the way it does from a basement or spare room.
Dedicated purpose. When you walk into a garage gym, you’re in gym mode. The psychological separation from living space consistently improves workout frequency and intensity.
Cost recovery. The average garage gym pays for itself within 2–4 years compared to a gym membership, then continues delivering value indefinitely.
Step 1: Plan Your Space
The first and most important step is mapping your available space against your fitness goals. The two most common planning mistakes are underestimating how much space equipment needs and overbuying equipment before understanding what you’ll actually use.
Measure Everything First
Measure your garage’s full dimensions — length, width, and ceiling height. Account for any permanent fixtures: water heaters, electrical panels, HVAC units, support columns.
If you’re sharing the space with a car, measure the car’s footprint carefully. A standard sedan needs approximately 8×18 feet. An SUV or truck needs 8×20 feet. Leave at minimum 3 feet clearance on each side and the front for safe maneuvering — and remember the door swing area at the front.
Match Space to Goals
| Fitness Goal | Minimum Space | Key Equipment |
|---|---|---|
| Cardio focus | 8×10 ft | Treadmill or rower + mats |
| Strength training (basic) | 10×12 ft | Power rack, barbell, plates, bench |
| Strength + cardio | 12×16 ft | Power rack, barbell, plates, bench, rower/bike |
| CrossFit / functional | 14×20 ft | Full rig, bumper plates, pull-up bar, open floor |
| Full home gym | 20×20 ft | Complete equipment selection |
Zone Your Space
Divide your garage into functional zones before buying equipment:
Free weight zone: Power rack, barbell, plates, bench. Needs open floor in front for loading/unloading the bar and performing exercises. Allow 6–8 feet of clear space in front of the rack.
Cardio zone: Treadmill, rowing machine, or bike. Position for easy access and, if near a window, with a view — you’ll use it more.
Stretching/floor work zone: Open rubber mat area. Often placed in the center or near the garage door for natural light during warm-ups.
Storage zone: Wall-mounted dumbbell rack, plate storage, band hooks, accessory storage. Vertical wall storage keeps the floor clear.
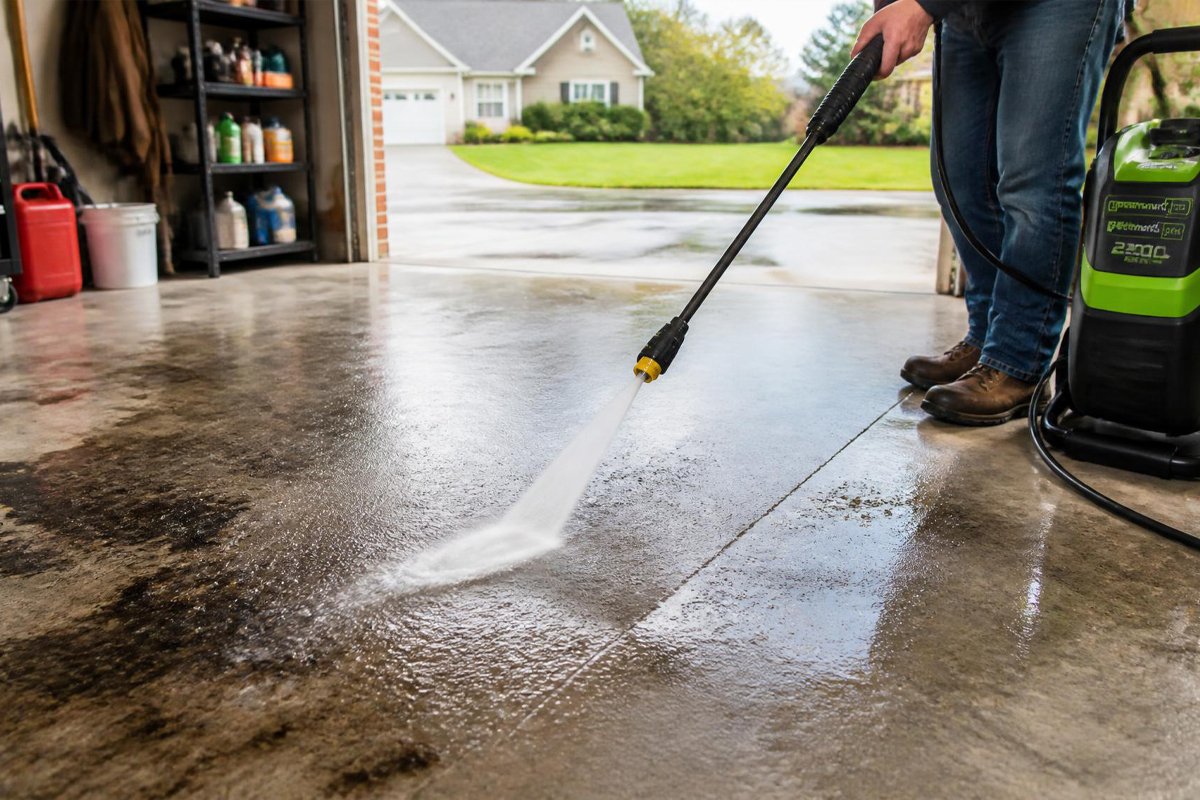
Step 2: Prepare the Floor
Your garage floor needs to be safe for barefoot or socked training, protect your concrete from dropped weights, reduce fatigue during long sessions, and provide grip for lifting shoes.
Flooring Options Compared
Rubber stall mats (⅜ inch, 4×6 feet) The standard choice for garage gyms. Heavy-duty, dense rubber originally designed for horse stalls — exceptionally durable, resistant to cuts from dropped weights, and comfortable underfoot.
- Cost: $40–$60 per mat
- A 10×10 foot area needs approximately 4–5 mats
- Requires no adhesive — just lay flat and they stay in place through friction and weight
- Off-gas a rubber smell for 1–4 weeks initially (ventilate the space)
Interlocking rubber tiles More flexible layout options than stall mats, available in various thicknesses.
- ⅜ inch: Light use, stretching areas, cardio zones
- ½ inch: General strength training
- ¾ inch: Heavy deadlift areas, bumper plate dropping zones
Foam tiles Not recommended for garage gyms with free weights. Foam compresses under heavy loads and provides poor stability for barbell work. Fine for yoga and stretching areas.
Epoxy + rubber mat combination If you’re doing a full garage upgrade, apply an epoxy coating to the concrete first, then lay rubber mats over the cured epoxy. The epoxy protects the concrete and makes cleaning easy; the mats provide cushioning and grip where needed. Our complete guide to epoxy coating your garage floor covers the full application process before you lay your gym flooring.
Deadlift Platform
If you’ll be doing heavy deadlifts, consider building or buying a dedicated deadlift platform — a section of floor with additional protection specifically designed for dropping loaded barbells. A basic DIY deadlift platform uses two layers of ¾-inch plywood topped with horse stall mats, approximately 8×8 feet.
Step 3: Handle Climate Control
This is the step most garage gym builders underestimate — and then regret every July and January.
A garage without climate control in most US climates will be:
- Below 40°F for weeks in winter — dangerous for cold muscles, uncomfortable, and the reason most garage gyms go unused November through March
- Above 95°F in summer with door closed — dangerous in many regions, miserable everywhere
Insulation First — Always
Before spending money on heating or cooling equipment, insulate the garage. An uninsulated garage is nearly impossible to heat or cool efficiently — you’re spending energy conditioning a space that immediately loses it through the walls, ceiling, and door.
Our complete guide to insulating your garage covers wall, ceiling, and door insulation in full detail. For a gym conversion specifically, prioritize:
- Walls: R-13 minimum, R-19 in colder climates
- Ceiling: R-30 minimum if there’s living space or attic above
- Garage door: Insulated door or door insulation kit (R-8 to R-12)
Heating Options
Mini-split heat pump (best overall) Provides both heating and cooling from a single unit. Highly efficient, quiet, and effective. Requires professional installation (typically $1,500–$3,000 installed). The best long-term investment for a dedicated garage gym.
Propane or natural gas unit heater Ceiling-mounted heaters that heat a garage quickly and powerfully. Excellent for cold climates. Requires adequate ventilation. Lower upfront cost than a mini-split but provides heating only.
Electric space heater Lowest upfront cost. Works for small garages or mild climates. Expensive to run in cold climates. Fine for occasional use; impractical as a primary heat source in cold regions.
Cooling Options
Mini-split (again, the best choice) If you’re installing a mini-split for heating, it handles cooling at the same time.
Window AC unit If your garage has a window or you can cut through a wall, a window AC unit costs $200–$600 and handles cooling effectively for most garage sizes. Lower upfront cost than a mini-split; provides cooling only.
Portable AC unit Convenient but less efficient. Requires venting through a window or door. Works adequately for smaller garages.
Garage door open + fans Free and effective when outdoor temperatures are moderate (65–80°F). A ceiling fan or large box fans create genuine comfort for mild-weather training.
Step 4: Sort Out Lighting
Poor lighting makes a gym feel oppressive and makes it harder to maintain proper form. Good lighting makes a gym feel energizing and professional.
Garage lighting defaults — a single fluorescent fixture in the center of the ceiling — are inadequate for a gym. You need bright, even illumination across the entire floor, with particular attention to the areas where you train.
Target light level: 50 foot-candles across the training area. Most homes never achieve this in their garage without a lighting upgrade.
Best approach: Install 4–6 LED shop light fixtures across the ceiling in rows. Modern LED shop lights provide 5,000–6,000 lumens each, link together for a single switch control, and consume minimal electricity. Position them perpendicular to the garage door to minimize shadows when the door is open.
Task lighting for specific areas:
- A dedicated light above your power rack eliminates shadows during squats and bench press
- Under-cabinet LED strips above a wall-mounted dumbbell rack make it easy to see weights clearly
Mirror placement and lighting interaction: If you’re adding mirrors (recommended for form checking), position lights so they illuminate the mirror from above rather than creating glare.
For a complete guide to garage lighting types, placement strategies, and smart lighting options, our garage lighting guide covers every option from basic overhead LEDs to motion-sensing and app-controlled systems.
Step 5: Choose Your Equipment
Equipment selection is where most home gym builders overspend or make decisions they later regret. The principles that prevent both:
- Buy for your actual goals, not aspirational ones
- Quality over quantity — one great piece beats three mediocre ones
- Start with the foundation, add accessories later
- Buy used for everything except flooring and pull-up bars
The Foundation: Power Rack + Barbell + Plates
For anyone doing strength training, this is the core of your gym. Everything else is optional; this is not.
Power rack (squat cage): Allows you to squat, bench press, and overhead press safely without a spotter. Look for 1,000-lb weight rating minimum, 2×3 or 3×3 inch uprights, and included pull-up bar.
Budget options: Rogue, Rep Fitness, Titan — the market for racks is competitive and quality is good across the board at $400–$800.
Barbell: A standard 7-foot Olympic barbell handles all compound movements. Buy once, buy quality. A $150–$300 barbell from Rogue, Rep, or CAP Barbell will last decades.
Weight plates: Start with enough to train your current strength level plus 20% progression room. For most beginners: two 45-lb plates, two 25-lb plates, two 10-lb plates, two 5-lb plates. Add as you get stronger.
Bench: A flat/incline/decline adjustable bench handles bench press, dumbbell work, and step-ups. Budget $150–$350 for a quality adjustable bench.
Cardio Equipment: Match to Your Preference
Rowing machine (rower): The most effective full-body cardio machine per square foot. Concept2 is the gold standard; used models hold their value and perform identically to new. Works equally well for short intense intervals and long steady-state cardio.
Assault bike / air bike: Brutal and effective. Small footprint. Excellent for high-intensity intervals. No moving belt to wear out.
Treadmill: The familiar standard. Takes more floor space than a rower or bike. Good used treadmills can be found for $300–$800; new quality units run $1,500–$3,000.
Jump rope: Almost free, zero floor space, outstanding cardio. A speed rope handles everything from warm-up to 30-minute HIIT sessions.
Dumbbells: Adjustable vs. Fixed
Fixed dumbbell rack: The gym aesthetic, maximum convenience. A full set from 5 to 50 lbs takes significant space and costs $500–$1,500+. Buy used — dumbbells are just iron; used works identically to new.
Adjustable dumbbells (Bowflex, PowerBlocks, etc.): Take the space of a single dumbbell pair, replace 10–20 pairs, cost $300–$600. Slightly slower to adjust than fixed but dramatically more space-efficient.
Accessories Worth Having
- Pull-up bar (included with most power racks)
- Resistance bands (warm-up, mobility, accessory work)
- Gymnastics rings (row variations, dips, core work)
- Foam roller and mobility tools
- Jump rope
- Timer/clock (phone works; dedicated wall clock is better for interval training)
Equipment Budget Guide
| Budget | What to Buy | Who It’s For |
|---|---|---|
| $500–$1,000 | Used power rack, barbell, plates, bench, mats | Beginner strength trainers |
| $1,000–$2,500 | Quality new power rack, barbell, plates, bench, adjustable dumbbells, mats | Intermediate lifters |
| $2,500–$5,000 | Full strength setup + rower or bike, full dumbbell range | Serious home gym athlete |
| $5,000+ | Complete professional-grade setup | Enthusiast or family gym |
Step 6: Storage and Organization
A cluttered gym is a gym you’ll avoid. Even a small garage can feel like a professional facility with proper organization.
Wall-mounted dumbbell rack: Gets weights off the floor immediately. Position near your lifting zone for easy access.
Vertical plate storage: A plate tree or wall-mounted plate storage keeps plates organized, accessible, and off the floor where they create trip hazards.
Band and accessory hooks: Simple wall hooks or a pegboard section keeps bands, jump ropes, foam rollers, and accessories visible and accessible.
Chalk holder and towel hook: Small details that make a gym feel intentional. A chalk bucket mounted on the rack saves your floor from chalk dust spreading everywhere.
Mirror: A 4×8-foot mirror mounted on the wall significantly improves form checking and makes the space feel larger and more gym-like. Available from home improvement stores for $100–$200.
For comprehensive wall storage systems beyond gym-specific equipment — if you’re keeping the garage as partial storage — our 12 creative garage storage solutions guide covers ceiling racks, pegboards, and wall-mounted systems that maximize vertical space without consuming your gym floor area.
Step 7: The Details That Make It Feel Like a Real Gym
The difference between a garage with some equipment and a garage gym you actually want to train in comes down to details.
Speaker system: A Bluetooth speaker or mounted speakers connected to your phone. Music significantly impacts workout intensity and duration. Don’t underestimate this.
TV or monitor: Optional, but a mounted screen allows workout video streaming, form check recording playback, and entertainment during cardio. Wall-mount at eye level when standing.
Chalk: A staple of any serious lifting space. Bar chalk dramatically improves grip on deadlifts, pull-ups, and Olympic lifts. A chalk bowl on the rack is all you need.
Timer: A wall-mounted digital clock or interval timer (Rogue Echo Timer is the standard) keeps rest periods honest and intervals precise.
Whiteboard: A simple whiteboard for writing workouts, tracking PRs, and keeping programming visible. Underrated gym addition.
Door to the house: If your garage connects to your home interior, make the connecting door a solid-core exterior door with a deadbolt — both for security and noise isolation from the gym.
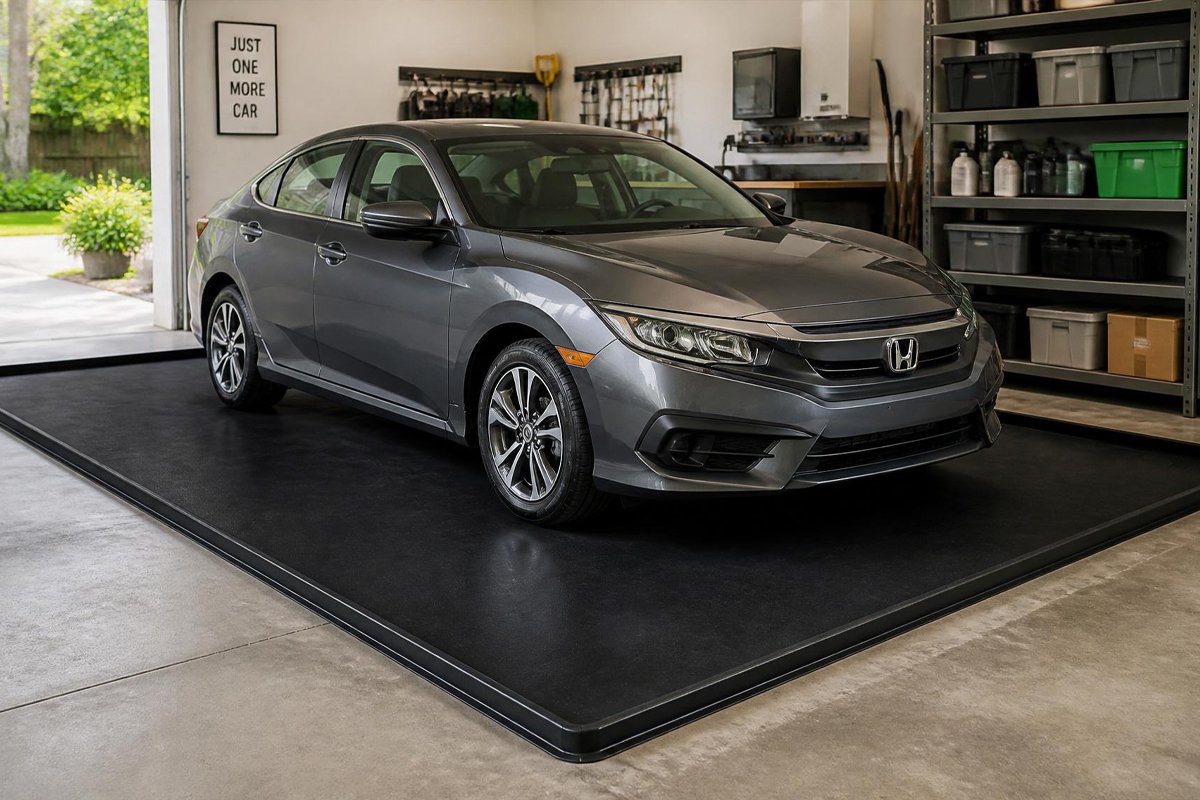
Sharing the Garage: Gym + Car Storage
Many homeowners want a home gym without losing all vehicle storage. This is absolutely achievable with planning.
The single-car solution: A single car needs approximately 8×20 feet. In a two-car garage (20×20 feet), this leaves a 12×20 or 20×12 foot gym area — more than sufficient for a complete strength training setup.
Ceiling storage for off-season items: Move seasonal items (holiday decorations, camping gear, sports equipment) to overhead ceiling racks, freeing wall and floor space for gym equipment. This single move often creates 100–200 square feet of usable gym space in a previously crowded garage.
Fold-away equipment: A wall-mounted fold-down power rack (available from companies like PRx Performance) folds flat against the wall when not in use, freeing the full floor for vehicle parking. More expensive than a standard rack ($800–$2,000+) but the ideal solution for tight spaces.
Rubber mat layout: Lay mats only over the gym zone, not the vehicle zone. The contrast helps define the space mentally and practically.
Common Garage Gym Conversion Mistakes
Skipping climate control. The most common reason garage gyms go unused. Invest in insulation and at minimum a heater before buying any equipment.
Buying too much equipment immediately. Start with the basics, use the space for 3–6 months, then buy additional equipment based on what you actually need.
Not insulating before heating/cooling. A heater or AC in an uninsulated garage runs constantly and still can’t maintain comfortable temperatures. Insulation first; climate control second.
No mirror. Form degradation is a major injury risk when training alone. A mirror isn’t vanity — it’s safety.
Inadequate lighting. Dark gyms are depressing and dangerous. LED shop lights are inexpensive and transformative.
Ignoring noise. Metal plates on metal barbells in a concrete-floored garage create significant noise at 6am. Rubber bumper plates dramatically reduce impact noise; rubber mats under the rack reduce floor transmission.
Poor flooring. Training on bare concrete is hard on joints and dangerous — concrete has zero grip when wet with sweat. Rubber mats are not optional.
Full Conversion Checklist
Use this as your project tracker:
Space Planning:
- [ ] Dimensions measured and zones mapped
- [ ] Car storage needs assessed and planned for
Floor:
- [ ] Epoxy or floor prep completed if desired
- [ ] Rubber mats purchased and laid
- [ ] Deadlift platform built or purchased if needed
Climate:
- [ ] Walls insulated
- [ ] Ceiling insulated
- [ ] Garage door insulated or replaced
- [ ] Heating solution installed
- [ ] Cooling solution installed or planned
Lighting:
- [ ] LED shop lights installed (at least 4 fixtures)
- [ ] Task lighting added at rack if needed
Equipment:
- [ ] Power rack assembled and anchored
- [ ] Barbell and plates organized on rack
- [ ] Bench positioned and tested
- [ ] Cardio equipment placed and tested
- [ ] Mats under all equipment
Organization:
- [ ] Plate storage installed
- [ ] Dumbbell rack or storage in place
- [ ] Band/accessory hooks installed
- [ ] Mirror mounted
Finishing touches:
- [ ] Speaker installed
- [ ] Timer mounted
- [ ] Whiteboard hung
FAQs
How much does a garage gym conversion cost? A basic functional gym (rubber mats, used power rack, barbell, plates, bench) can be done for $800–$1,500. A complete setup with climate control, quality equipment, and lighting runs $3,000–$8,000. The garage structure improvements (insulation, flooring, lighting) typically cost $500–$2,000 depending on your starting point.
Will a home gym increase my home’s value? A well-finished garage gym can add appeal to buyers who exercise — but a bare garage is more universally appealing to buyers who don’t. If you’re planning to sell, choose removable equipment and flooring that can be taken with you or easily removed.
Can I put a power rack on a rubber mat without anchoring it? Most racks are stable enough unanchored for typical use. For very heavy squats (300+ lbs), Olympic lifting, or if you have children who might climb the rack, anchor to the floor with concrete anchors for safety.
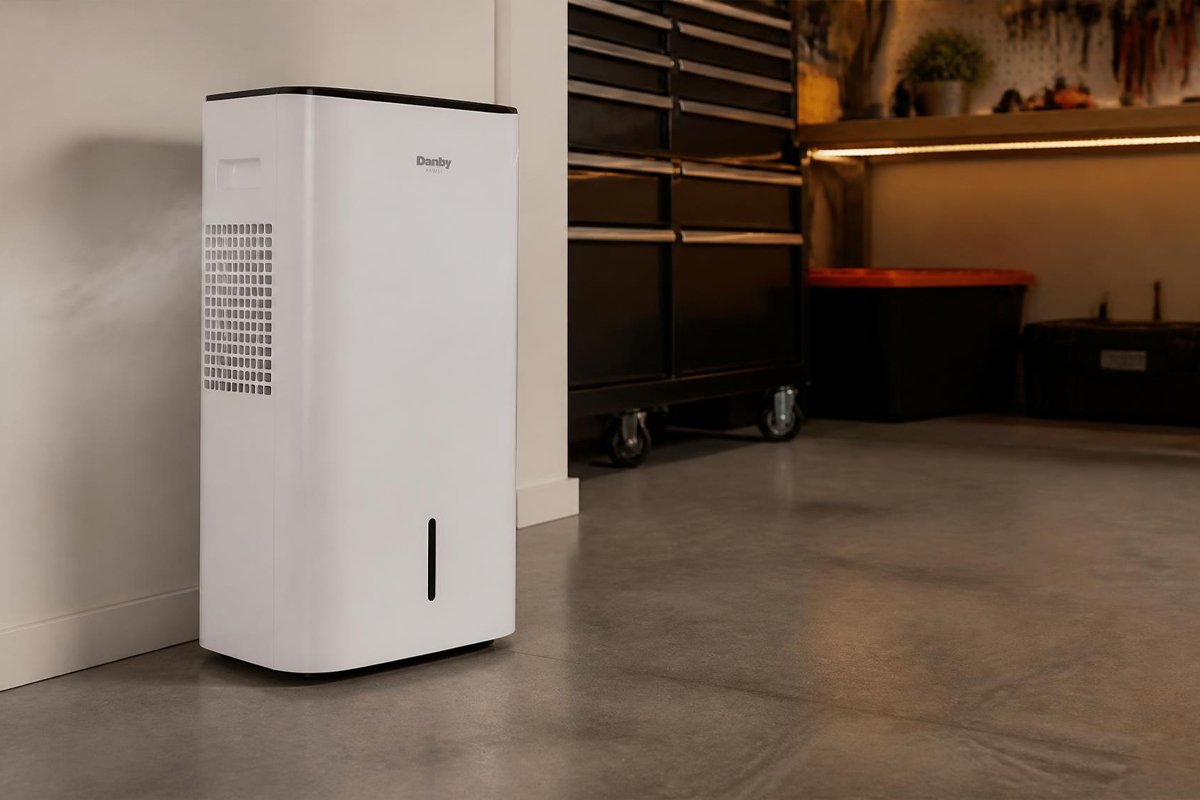
How do I keep the garage gym from getting too dusty? Concrete off-gasses dust continuously. An epoxy floor coating eliminates concrete dust at the source. Air purifiers with HEPA filters handle airborne dust. Regular sweeping and occasional damp mopping keeps surfaces clean.
What’s the minimum space for a home gym? A 8×10 foot space can hold a power rack, barbell, and bench — the core of a strength training gym. It’s tight, but functional. For comfortable training without feeling cramped, 12×12 is the practical minimum for a full strength setup.
Final Thoughts
A garage gym is one of the best long-term investments a fitness-focused homeowner can make. No commute, no waiting for equipment, no membership fees, no closing times. Just a space that’s always available, always set up the way you like it, and always ready.
The conversion process is straightforward when approached systematically: plan your space, prepare the floor and climate, install proper lighting, select equipment matched to your goals, and organize for daily use.
Give it the same planning attention you’d give any serious home improvement project — because that’s exactly what it is. The result is a space that pays dividends in health, convenience, and satisfaction for decades.