Introduction
A bare concrete garage floor is functional — but it’s also porous, stain-prone, dusty, and genuinely unpleasant to look at. Oil drips leave permanent marks. Dust from the concrete itself coats everything in the garage. And no matter how much you clean it, bare concrete always looks dirty.
An epoxy floor coating changes all of this in a single weekend.
Epoxy transforms a raw concrete floor into a hard, glossy, chemical-resistant surface that’s easy to clean, dramatically better looking, and built to last 10–20 years with proper application. It’s one of the highest-impact garage upgrades you can make — and unlike most garage improvements, it’s completely visible every time you open the door.
This step-by-step guide covers everything you need to know: what epoxy actually is, how to prepare your floor correctly (the step most people rush and regret), which products to use, and how to apply a finish that looks professional and lasts.
What Is Garage Floor Epoxy?
Epoxy is a two-part coating system — a resin and a hardener — that chemically bond together when mixed, creating an extremely hard, durable surface. Unlike paint, which sits on top of concrete, epoxy penetrates slightly into the concrete surface and bonds mechanically, creating a coating that is far more resistant to peeling, chipping, and chemical damage.
What epoxy floor coating does:
- Creates a hard, high-gloss surface that repels oil, chemicals, and moisture
- Dramatically reduces concrete dust — no more dusty garage
- Makes floor cleaning as simple as sweeping and mopping
- Resists staining from oil, gasoline, antifreeze, and most automotive fluids
- Lasts 10–20 years with proper application on well-prepared concrete
What epoxy floor coating doesn’t do:
- It cannot adhere to a damp or contaminated surface — prep is everything
- It will peel if applied over a sealed or painted floor without proper preparation
- It cannot fix structural cracks or major concrete damage — these must be repaired first
Types of Garage Floor Epoxy
Not all epoxy products are the same. Understanding the options helps you choose the right product for your situation.
| Type | Coverage | Durability | DIY-Friendly | Best For |
|---|---|---|---|---|
| Water-based epoxy | 1 coat | Good | ✅ Very easy | Light-use garages, first-time applicators |
| Solvent-based epoxy | 1–2 coats | Very good | ✅ Moderate | Higher-use garages |
| 100% solid epoxy | 2–3 coats | Excellent | ⚠️ Challenging | Heavy-use, commercial-grade results |
| Epoxy paint (1-part) | Multiple coats | Fair | ✅ Easy | Decorative, light use only |
For most homeowners: A high-quality water-based or solvent-based two-part epoxy kit is the right choice. Brands like Rust-Oleum EpoxyShield, Armor Granite Grip, and Radonseal provide professional results at DIY-accessible prices and difficulty levels.
Avoid: Single-component “epoxy paint” products — these are standard paint with epoxy marketing. They look similar initially but peel within 1–2 years under normal garage use.
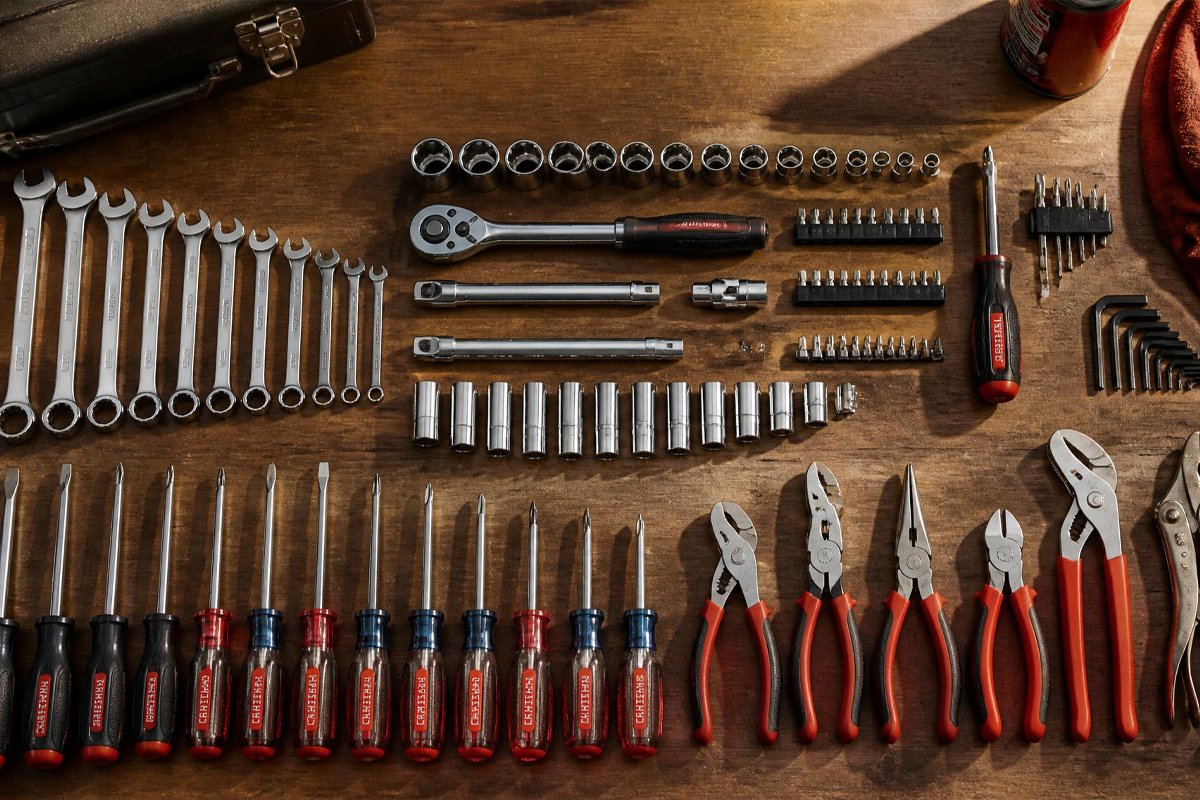
Materials You’ll Need
Gather everything before starting — stopping mid-project for supplies ruins your timing.
For surface preparation:
- Concrete degreaser (TSP or dedicated concrete degreaser)
- Concrete etching solution (muriatic acid or citric acid-based etcher)
- Stiff-bristle scrub brush or floor buffer with scrubbing pad
- Wet/dry shop vacuum
- Pressure washer (strongly recommended) or garden hose
- Crack filler or concrete patching compound
- Safety glasses, chemical-resistant gloves, rubber boots, respirator
For epoxy application:
- Two-part epoxy floor coating kit (sized for your floor area)
- Paint roller with 3/8-inch nap roller covers (at least 2–3 covers)
- Roller extension handle
- Paint tray
- Paintbrush (2–3 inch) for edges and corners
- Decorative color flakes/chips (usually included in kits)
- Optional: clear topcoat for additional protection
Coverage calculator: A standard two-car garage (20×20 feet = 400 sq ft) typically requires two 1-gallon kits or one 2-gallon kit for a single coat. Always buy 10–15% extra.
Step 1: Test for Moisture — Before You Buy Anything
Moisture is the number one cause of epoxy floor failure. Concrete that appears dry can still have significant moisture vapor transmission rising from below — and epoxy applied over this moisture will bubble, peel, and fail within months.
The plastic sheet test:
- Tape a 2×2-foot piece of clear plastic sheeting to your garage floor with duct tape, sealing all four edges completely
- Leave it in place for 24–48 hours
- Lift the sheet and examine: condensation on the underside of the plastic or dark, damp concrete beneath = too much moisture for standard epoxy
If your floor fails the moisture test, you have two options: use a moisture-tolerant epoxy formula specifically designed for damp concrete, or address the moisture source before proceeding. Do not skip this test.
Step 2: Repair Cracks and Damage
Epoxy will not hide or bridge significant cracks — it will follow the contour of the concrete and cracks will show through the finished coating.
For hairline cracks (under 1/8 inch): Clean out any loose material with a wire brush or vacuum. Fill with a concrete crack filler or epoxy injection filler. Allow to cure fully per product instructions (typically 24 hours).
For wider cracks or spalling: Use a concrete patching compound. Chisel out loose material to create a clean, solid edge for the patch to bond to. Apply, level, and allow to cure fully before proceeding.
For deep structural cracks: These require professional assessment before any coating. Epoxy on structurally compromised concrete is money wasted.
Step 3: Degrease the Floor — Thoroughly
This is the most important preparation step — and the one most often rushed.
Concrete absorbs oil, grease, automotive fluids, and cleaning product residue over years of use. Any contamination on the surface when you apply epoxy creates a barrier that prevents adhesion. Even areas that look clean may have invisible oil penetration.
Degreasing process:
- Sweep the floor completely to remove all loose debris
- Apply a concrete degreaser (TSP substitute works well) according to label instructions — work in sections
- Scrub aggressively with a stiff brush or floor buffer
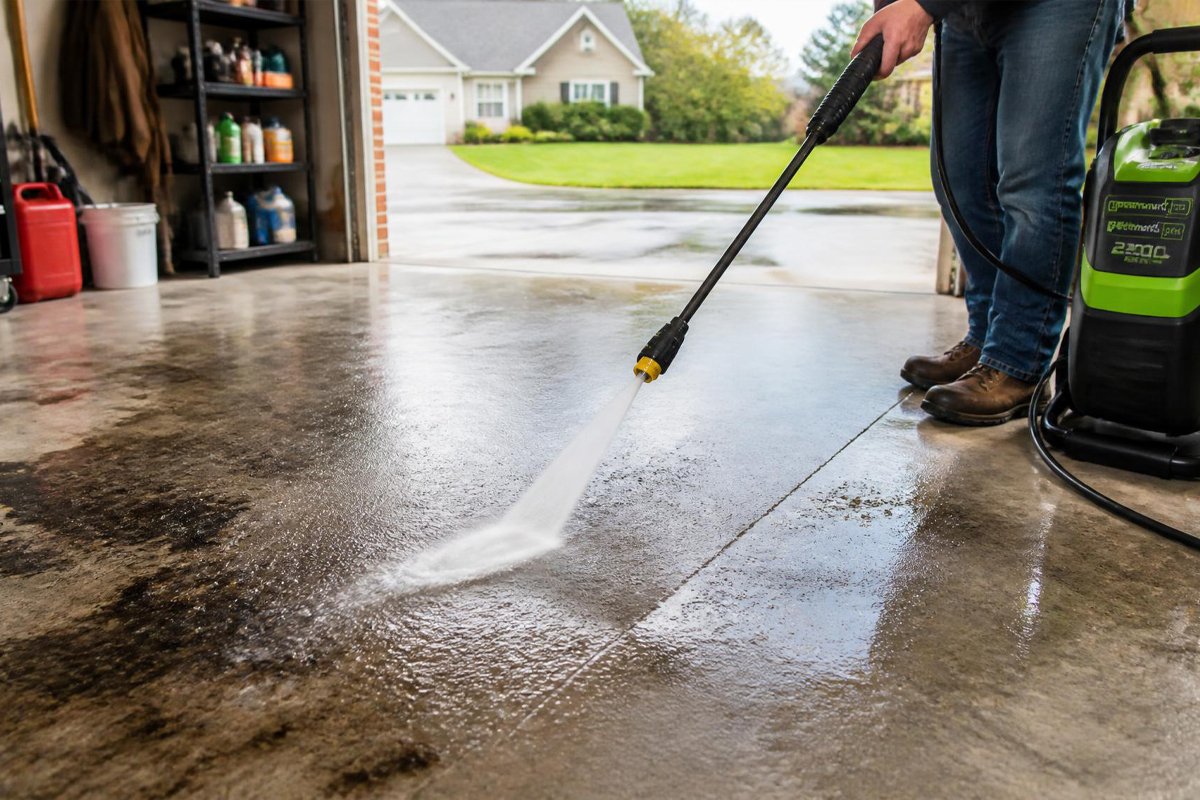
- Rinse thoroughly with a pressure washer or garden hose — a pressure washer is strongly preferred as it removes loosened contamination more effectively
- Allow to dry completely — at least 24 hours in normal conditions
For stubborn oil stains, apply the degreaser, cover with cat litter or sawdust to absorb the loosened oil, and repeat. Our guide on how to clean oil off the garage floor covers oil stain removal in detail — get the floor completely clean before moving to etching.
Step 4: Etch the Concrete Surface
Etching is what creates the mechanical “tooth” that epoxy bonds to. Bare, smooth concrete is too slick for epoxy to adhere reliably — etching opens up the pores and creates microscopic texture that gives the epoxy something to grip.
How to etch:
Option A — Acid Etching (Most Effective):
- Dilute muriatic acid per product instructions (typically 1 part acid to 10 parts water — always add acid to water, never water to acid)
- Wet the floor with water first
- Apply the acid solution and scrub with a stiff brush — you should see active bubbling, which indicates the acid is reacting with the concrete
- Allow to dwell for 5–10 minutes
- Rinse thoroughly — multiple times — until the pH of the rinse water is neutral (test with pH strips)
- Neutralize with a baking soda and water solution if needed
- Vacuum up all water with a wet/dry vac
- Allow to dry completely — 24–48 hours
Option B — Mechanical Grinding (Preferred for Sealed Floors): For floors that have been previously sealed, painted, or have old epoxy, mechanical grinding with a floor grinder or diamond grinder pad is more reliable than acid etching. Rent a floor grinder from a tool rental store for $50–$100/day.
How to know if etching worked: The dried concrete should have the texture and appearance of 120-grit sandpaper — matte, slightly rough, with no shiny or glossy spots. Any shiny areas have not been properly etched and will cause adhesion failure.
Step 5: Final Cleaning Before Application
After etching and drying, the floor must be perfectly clean before epoxy goes down.
- Vacuum the entire floor with a shop vacuum — remove every particle of dust and debris
- Wipe a section with a white cloth — if it picks up gray dust, vacuum again
- Check for any remaining glossy or smooth spots that indicate inadequate etching — re-etch these areas
- Tape off the walls, door jambs, and any areas you don’t want coated with painter’s tape
- Do not walk on the prepared floor with bare feet or street shoes — oils from footwear contaminate the surface. Use clean shoe covers or dedicated clean shoes.
Step 6: Mix the Epoxy
Timing is critical from this point. Two-part epoxy begins curing the moment the resin and hardener are combined. You have a working time (pot life) of typically 2–4 hours depending on temperature — plan your application to complete the floor within this window.
Mixing process:
- Read your specific product’s instructions completely before opening — mixing ratios and procedures vary
- Allow both components to reach room temperature (65–75°F) — cold epoxy is thicker and harder to apply
- Combine components in the ratio specified (typically 1:1 or 2:1 by volume)
- Stir slowly and thoroughly for 3–5 minutes — scrape the sides and bottom of the mixing container
- Allow to “induct” for 30 minutes after mixing (let it sit before applying) — this activates the chemical reaction and improves flow
- Pour into your paint tray and begin application
Temperature warning: Epoxy is very sensitive to temperature. Ideal application range: 60–85°F air temperature, with the concrete surface temperature between 55–85°F. Never apply epoxy when the concrete is warmer than the air (which happens in late afternoon with sun-heated concrete) — this causes outgassing bubbles in the finish.
Step 7: Apply the Epoxy — Cut In Edges First
Start at the far corner and work toward the exit — you must not walk on wet epoxy.
Edge work (cut-in first):
- Use a 2–3 inch brush to apply epoxy along all edges, corners, and areas the roller can’t reach
- Work in a 6-inch band along all walls
- Keep a wet edge — don’t let the cut-in dry before rolling into it
Rolling the main floor:
- Pour epoxy into the roller tray and load the roller fully
- Apply in 3×3-foot sections using a “W” or “M” rolling pattern to distribute epoxy evenly
- Then roll back over each section in one direction to level and even out the coating
- Work quickly but methodically — maintain a wet edge at all times
- Don’t stop mid-floor — complete sections without breaks to avoid lap marks
Decorative flakes (optional but recommended): Broadcast decorative color chips or flakes into the wet epoxy immediately after rolling each section. Throw them up and let them fall randomly for the most natural look. Apply until the desired coverage is achieved — light coverage (10–20%) for a subtle effect, heavy coverage (60–100%) for a full flake floor. The chips add grip, hide minor imperfections, and significantly improve the look.
Step 8: Apply a Clear Topcoat (Highly Recommended)
A clear polyurethane or polyaspartic topcoat over the cured epoxy dramatically extends the life of your floor and makes it easier to clean.
Benefits of a clear topcoat:
- Protects the color coat from UV fading (especially near garage doors)
- Adds additional chemical resistance
- Creates a higher-gloss, more durable wear surface
- Makes the floor easier to clean — less porous surface
Application: Apply 24–48 hours after the base coat has cured. Use the same rolling technique as the base coat. One coat of topcoat is standard; two coats for heavy-use garages.
Step 9: Curing — The Most Underestimated Step
Epoxy curing happens in stages. Respecting each stage prevents damage to your new floor.
| Stage | Timeframe | What It Means |
|---|---|---|
| Dry to touch | 8–12 hours | Surface feels dry, shouldn’t be walked on |
| Light foot traffic | 24 hours | Can walk carefully with clean shoes |
| Vehicle traffic | 72 hours minimum | Safe for cars and trucks |
| Full chemical cure | 7 days | Resistant to all chemicals; full durability achieved |
Common curing mistakes:
- Parking a car on the floor before 72 hours — tire marks can become permanent
- Placing heavy items directly on the floor before 7 days — can cause impressions
- Exposing the fresh floor to chemicals (gasoline, oil) before full cure — causes permanent staining
Temperature significantly affects curing time. In cold garages (below 55°F), curing takes significantly longer — sometimes double the standard timeframe. Heating the garage during curing helps.
Maintaining Your Epoxy Floor
A properly applied and cured epoxy floor is extremely easy to maintain.
Regular cleaning:
- Sweep or dust mop weekly to remove abrasive grit that can scratch the surface over time
- Mop with warm water and a pH-neutral cleaner monthly or as needed
- Clean chemical spills immediately — even chemical-resistant epoxy can be damaged by prolonged exposure to strong solvents
What to avoid:
- Harsh chemicals — bleach, acetone, and strong degreasers can damage the finish
- Dragging sharp metal objects — scratches the surface permanently
- Rubber-backed mats left in place long-term — can cause discoloration through a chemical reaction with the epoxy
Touch-up and repair: Small chips or scratches can be spot-repaired with matching epoxy. Sand the damaged area lightly, clean thoroughly, apply epoxy, and feather into the surrounding floor.
Common Epoxy Floor Mistakes and How to Avoid Them
Skipping the moisture test — The most expensive mistake. Epoxy over a damp floor will bubble and peel within months. Always test first.
Inadequate degreasing — Invisible oil contamination causes adhesion failure in patches. Degrease aggressively, even on floors that look clean.
Insufficient etching — Smooth concrete + epoxy = peeling. The etched surface must feel like sandpaper.
Applying in wrong temperature conditions — Too cold and epoxy won’t flow or bond properly. Too hot and it cures before leveling. Stay within the 60–85°F range.
Driving on the floor before 72 hours — Tire impressions in fresh epoxy can be permanent. Be patient.
One thin coat instead of two — A single thin coat won’t provide adequate durability. Apply two coats for a floor that lasts.
Cost Breakdown: DIY vs. Professional
| Approach | Cost (2-Car Garage) | Durability | Result |
|---|---|---|---|
| DIY water-based epoxy | $150–$300 | Good (5–10 years) | Solid, presentable |
| DIY 100% solid epoxy | $300–$600 | Excellent (15–20 years) | Professional-looking |
| Professional installation | $1,500–$3,500 | Excellent | Show quality |
For most homeowners, a quality DIY two-part epoxy kit in the $200–$400 range produces results that are genuinely impressive and dramatically outperform bare concrete — at a fraction of professional cost.
Before and After: How Epoxy Fits Into a Complete Garage Upgrade
An epoxy floor is even more impactful when paired with other garage improvements. If you’re doing a full garage refresh:
Pair it with insulation: A comfortable garage is one you’ll actually use. Our complete guide to insulating your garage covers walls, ceiling, and door insulation — making your newly beautiful garage usable year-round.
Add proper storage: The contrast between a gleaming epoxy floor and cluttered walls undermines the effect. Our 12 creative garage storage solutions guide covers wall-mounted systems, ceiling racks, and pegboards that complement a finished floor perfectly.
Paint the walls: If you’re coating the floor, painting the walls makes sense as a combined project. Our guide to cleaning garage walls before painting covers the prep process that ensures paint adheres and lasts.
FAQs
How long does garage floor epoxy last? A properly applied two-part epoxy on a well-prepared surface lasts 10–20 years in a typical residential garage. Factors that reduce lifespan: inadequate surface prep, excessive moisture, heavy vehicle traffic, and hot tire pickup from sports cars with performance tires.
Can I apply epoxy over existing paint or sealer? Not directly. Old paint or sealer must be completely removed (by grinding or chemical stripping) before epoxy can bond properly. Applying over existing coatings almost always results in delamination.
What causes hot tire pickup — and how do I prevent it? Hot tire pickup occurs when warm tires (from spirited driving or performance vehicles) bond slightly to the epoxy and lift it when the car drives away. Prevention: use a topcoat specifically rated for resistance to hot tire pickup (polyaspartic or polyurethane), or allow a mat under the tires when parking.
Can I do this in one day? The application itself can be done in one day once the floor is prepared. But proper prep (degreasing, etching, drying) typically takes 1–2 days before you ever open the epoxy kit. Plan for a 3-day weekend: Day 1 — clean and degrease. Day 2 — etch, dry, apply epoxy. Day 3 — second coat or topcoat.
Is epoxy slippery when wet? Plain epoxy can be slippery when wet. The solution: broadcast anti-slip additives (fine sand or aluminum oxide granules) into the wet epoxy, or use a topcoat that includes anti-slip aggregate. Decorative color flakes also add texture and grip.
Final Thoughts
A garage floor epoxy project delivers one of the best visible-impact-to-cost ratios of any home improvement project. The transformation is immediate and dramatic — and unlike many renovations, you live with the result every day.
The keys to success are simple but non-negotiable: test for moisture, degrease thoroughly, etch properly, apply in the right temperature range, and give it time to cure. Rush any of these steps and you’ll be peeling and reapplying within a year. Follow them correctly and you’ll have a floor that looks great and performs better than bare concrete in every measurable way.
Give it a weekend. Your garage — and everyone who sees it — will thank you.