How to Install an EV Charger in Your Garage: The Complete 2026 Guide
By Danial Marquez | Maintenance | Safety | Updated July 2026
Something significant is happening in American garages right now. According to the U.S. Department of Energy, more than 80% of all electric vehicle charging happens at home — and with EV registrations in the United States surpassing 4.5 million vehicles in 2026, that percentage represents tens of millions of charging sessions happening every single night in driveways and garages across the country.
The numbers don’t lie about the trend either. Real estate platform Realtor.com found that homes listed with EV charging stations appeared in listings 91.6% more often in 2025 compared to the year before — and the trend is accelerating into 2026. An EV charger in your garage has gone from a niche enthusiast upgrade to one of the single most in-demand home features on the market. It raises your home’s value, eliminates the dependence on public charging networks, and means you wake up every morning to a full battery without ever stopping at a gas station again.
This guide covers everything you need to know to set up home EV charging correctly in 2026 — from understanding the difference between charging levels to choosing the right equipment, navigating permits and electrical requirements, claiming the tax credit, and planning the installation within a well-organized, functional garage.
Why Home Charging Changes Everything
Before getting into the technical details, it’s worth understanding why home EV charging is such a transformational upgrade — and why Level 1 charging from a standard outlet usually isn’t good enough for daily drivers.
Level 1 charging (120V standard outlet): Every EV comes with a Level 1 “trickle charge” cable that plugs into any standard household outlet. It adds roughly 4–5 miles of range per hour of charging. For someone who drives 15 miles a day and has 10+ hours overnight, this technically works — but barely. For anyone with a longer commute, a large-battery vehicle, or two EVs in the household, Level 1 charging consistently falls behind daily usage. You’re charging all night and still not starting the day with a full battery.
Level 2 charging (240V dedicated circuit): A Level 2 charger — what most people mean when they talk about a “home EV charger” — adds 20 to 40+ miles of range per hour, depending on the vehicle and charger amperage. For the vast majority of EV owners, a few hours of Level 2 charging delivers a full charge overnight. Even a large-battery vehicle like a Ford F-150 Lightning (131 kWh battery) can charge from near-empty to full in 10–11 hours on a 48-amp Level 2 charger. The practical impact is transformative: you stop thinking about charging and just plug in when you get home, the same way you plug in your phone.
The cost math: Most utilities charge $0.12–$0.18 per kWh for electricity. The average EV uses about 3–4 miles of range per kWh. Even at $0.18/kWh, driving 12,000 miles per year in an EV costs roughly $540–$720 in electricity — compared to $1,800–$2,400 for the same mileage in a gasoline vehicle at current prices. With a smart Level 2 charger set to charge during off-peak hours (often $0.07–$0.10/kWh at night), those savings increase further.
Step 1: Understand What Your Electrical Panel Can Handle
Before ordering a charger or calling an electrician, you need to know whether your home’s electrical panel has the capacity to support a Level 2 EV charger.
Check your panel’s total capacity. Most homes built before the 1990s have 100-amp service panels. Homes built after that typically have 150 or 200-amp panels. A 100-amp panel can often support a Level 2 charger, but it’s tight — especially if you also have electric appliances like a clothes dryer, electric stove, water heater, or central air conditioning pulling significant loads. A 200-amp panel is almost always sufficient without an upgrade.
Look for open breaker slots. A Level 2 charger requires a dedicated circuit — it can’t share a breaker with anything else. Open your breaker panel and count available slots. Even a 200-amp panel with no open slots needs either a tandem breaker or a panel upgrade to add the circuit.
Determine the run length to the garage. The distance from your electrical panel to where the charger will be mounted affects both the cost of installation and the wire gauge needed. A short run (under 25 feet) is straightforward; a long run (50+ feet, or a detached garage requiring underground conduit) adds cost and complexity.
The panel upgrade question. If your panel is 100 amps and at capacity, upgrading to a 200-amp service panel costs $1,500–$4,000 depending on your location and the utility company’s requirements. This is a significant cost, but it future-proofs your home for additional electrical loads — an EV charger today, potentially a second EV, a heat pump, or other high-draw appliances tomorrow. Some homeowners use smart load management systems instead of upgrading the panel — these monitor the home’s total electrical load in real time and automatically throttle the EV charger’s speed when other appliances are drawing heavily, preventing the panel from being overloaded.
Step 2: Choose the Right Charger Level and Amperage
Level 2 chargers come in a range of amperages, and the right choice depends on your vehicle’s onboard charger capacity, your daily driving habits, and your electrical panel situation.
Understanding amps and charging speed:
- 16-amp charger: ~12 miles of range per hour (minimum practical Level 2)
- 24-amp charger: ~18 miles per hour
- 32-amp charger: ~24 miles per hour (adequate for most drivers)
- 40-amp charger: ~30 miles per hour (sweet spot for most applications)
- 48-amp charger: ~36 miles per hour (maximum for most residential panels)
- 80-amp charger: ~60 miles per hour (requires 200A panel and large dedicated circuit — for commercial-grade use or large trucks)
Match the charger to your vehicle’s onboard limit. Every EV has an onboard AC charger with a maximum input capacity — this is the number that actually limits how fast the car accepts energy from a Level 2 charger. The most common ratings are 7.2 kW (about 32 amps), 9.6 kW (about 40 amps), 11.5 kW (about 48 amps), and 19.2 kW (about 80 amps for vehicles like the Ford F-150 Lightning in dual-charger configuration). Buying a 48-amp charger for a vehicle with a 7.2 kW onboard limit simply means the car charges at 32 amps regardless — the extra capacity is unused. Check your vehicle’s manual for its maximum Level 2 AC charging rate before buying.
Our recommendation for most households: A 40-amp charger (requiring a 50-amp dedicated circuit, which is the standard) hits the sweet spot of speed, cost, and panel compatibility for the majority of EVs and home electrical systems. If you’re unsure whether you’ll upgrade to a higher-capacity vehicle in the next few years, buy a 48-amp charger installed on a 60-amp circuit — it’s a modest additional cost at installation time and eliminates the need to upsize later.
Step 3: Select Your EV Charger
The EV charger market in 2026 is mature and competitive, with several strong options across a range of price points and feature sets. Here’s what to look for:
Must-have features:
UL listing and Energy Star certification — UL certification confirms independent safety testing. Energy Star means the unit meets EPA standards for standby power consumption. Both should be non-negotiable baseline requirements.
J1772 or NACS connector — J1772 is the standard connector compatible with every non-Tesla Level 2 charger port. NACS (Tesla’s connector, now adopted by Ford, GM, Rivian, and others) is becoming the North American standard. Many 2026 chargers include an adapter or offer both, but confirm compatibility with your vehicle’s charge port before purchasing.
Cable length — Garage placement matters. A 20–25 foot cable gives you flexibility to charge from either side of the vehicle and reach different parking positions. Shorter cables limit placement options.
Hardwired vs. plug-in — Many Level 2 chargers offer both hardwired (permanent installation, wired directly to the circuit) and plug-in (using a NEMA 14-50 outlet) options. Plug-in via NEMA 14-50 is slightly easier to install and allows you to take the charger if you move, but it requires a properly installed NEMA 14-50 outlet in the garage. Hardwired is the cleaner permanent installation.
Smart features worth having:
Wi-Fi connectivity and companion app — Allows scheduling (set charging to start during off-peak electricity hours), monitoring energy usage and cost, and remote control. These features are standard on most mid- and upper-tier chargers in 2026 and are worth having for the scheduling capability alone — off-peak overnight charging is typically 30–50% cheaper than peak-rate daytime power.
Power sharing / load management — If you have or anticipate two EVs, look for chargers that offer power sharing between two units on a single circuit, automatically dividing available amperage between both vehicles. This avoids the need to wire a second dedicated circuit for the second car.
Vehicle-to-Home (V2H) compatibility — One of the most significant emerging trends in 2026 EV technology. V2H allows compatible vehicles (currently the Ford F-150 Lightning, Nissan Leaf with CHAdeMO, and a growing list of others) to use the EV battery as a home backup power source during outages — essentially turning your garage into an energy storage system. This requires a V2H-capable charger AND a V2H-capable vehicle AND a home transfer switch, but the technology is now mature enough that planning for it at installation time makes sense even if you’re not implementing it immediately.
Top charger picks for 2026:
ChargePoint Home Flex ($499–$599): The category benchmark. Adjustable amperage from 16 to 50A, both plug-in and hardwired options, J1772 and NACS connector choices, 23-foot cable, and an app that integrates with 250,000+ public ChargePoint stations. 24/7 customer support. Best for: drivers who value ecosystem integration and flexibility.
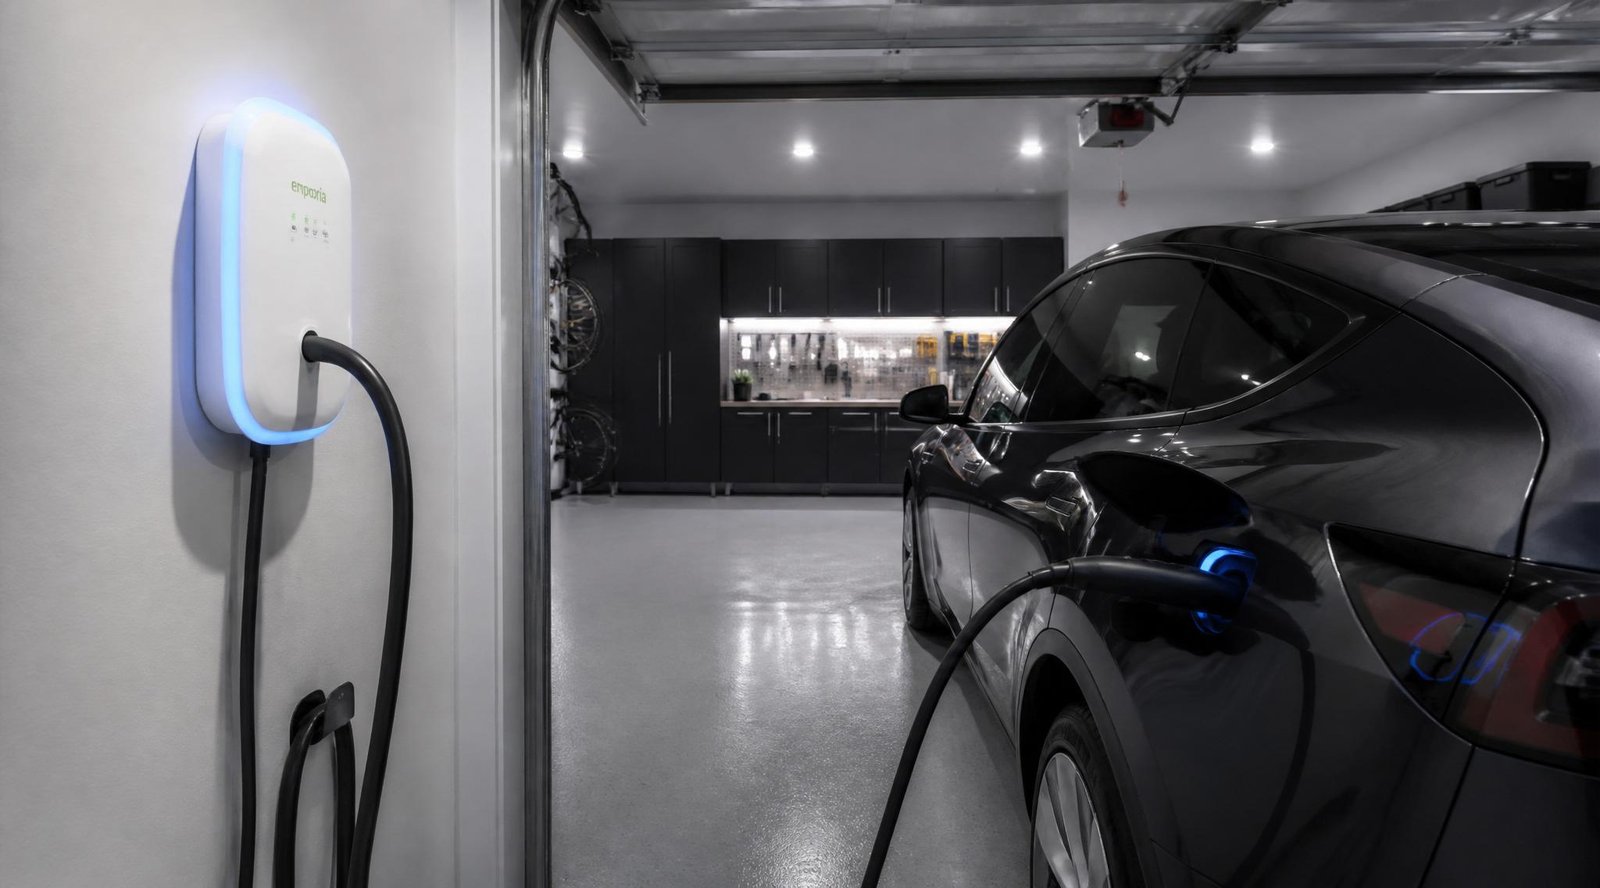
Emporia Level 2 Smart Charger ($299–$349): Exceptional value. Energy Star certified, Wi-Fi connected, 48A maximum, load management capable. Integrates with the Emporia home energy monitor for detailed electricity usage tracking. Best for: budget-conscious buyers who want full smart features without the premium price.
Wallbox Pulsar Plus ($399–$449): The most compact Level 2 charger available — significant if wall space in your garage is limited. Static Load Management allows two units to share a single circuit. Assembled in the US. Best for: households with two EVs or limited garage wall space.
Tesla Wall Connector ($350–$450): The obvious choice for Tesla owners. Hardwired, up to 48A, elegant design, integrates seamlessly with Tesla app. Can also charge non-Tesla vehicles via J1772 adapter. Best for: Tesla owners who want the cleanest, most integrated home charging experience.
Step 4: Plan the Installation
Careful planning before the electrician arrives saves both time and money, and ensures the charger ends up in the most useful location.
Choose the mounting location. The charger should be mounted on the wall of the garage at a height of approximately 4–5 feet from the floor, close enough to where your vehicle’s charge port will be when parked. For most vehicles, the charge port is on the front left fender or the rear left corner — measure your specific vehicle’s port location and park it in your normal spot before deciding where to mount the charger.
Consider the cable reach. If you park two vehicles in a two-car garage and might want to charge either one, a longer cable (20–25 feet) centered on the rear wall gives more flexibility than a shorter cable on the side wall.
Account for wall structure. The charger needs to mount to studs or a solid wood backing plate. In a garage with open stud walls (common if you haven’t yet drywalled after the insulation project), mounting options are plentiful. On a finished wall, locate studs before deciding on the exact position.
Plan the circuit route. Your electrician will run the circuit from the breaker panel to the charger location. In an attached garage, this often means running conduit through the shared wall and along the garage ceiling or wall. In a detached garage, it may mean trenching underground conduit from the house — a more involved installation that significantly affects cost. The shorter and more direct the circuit run, the lower the installation cost.
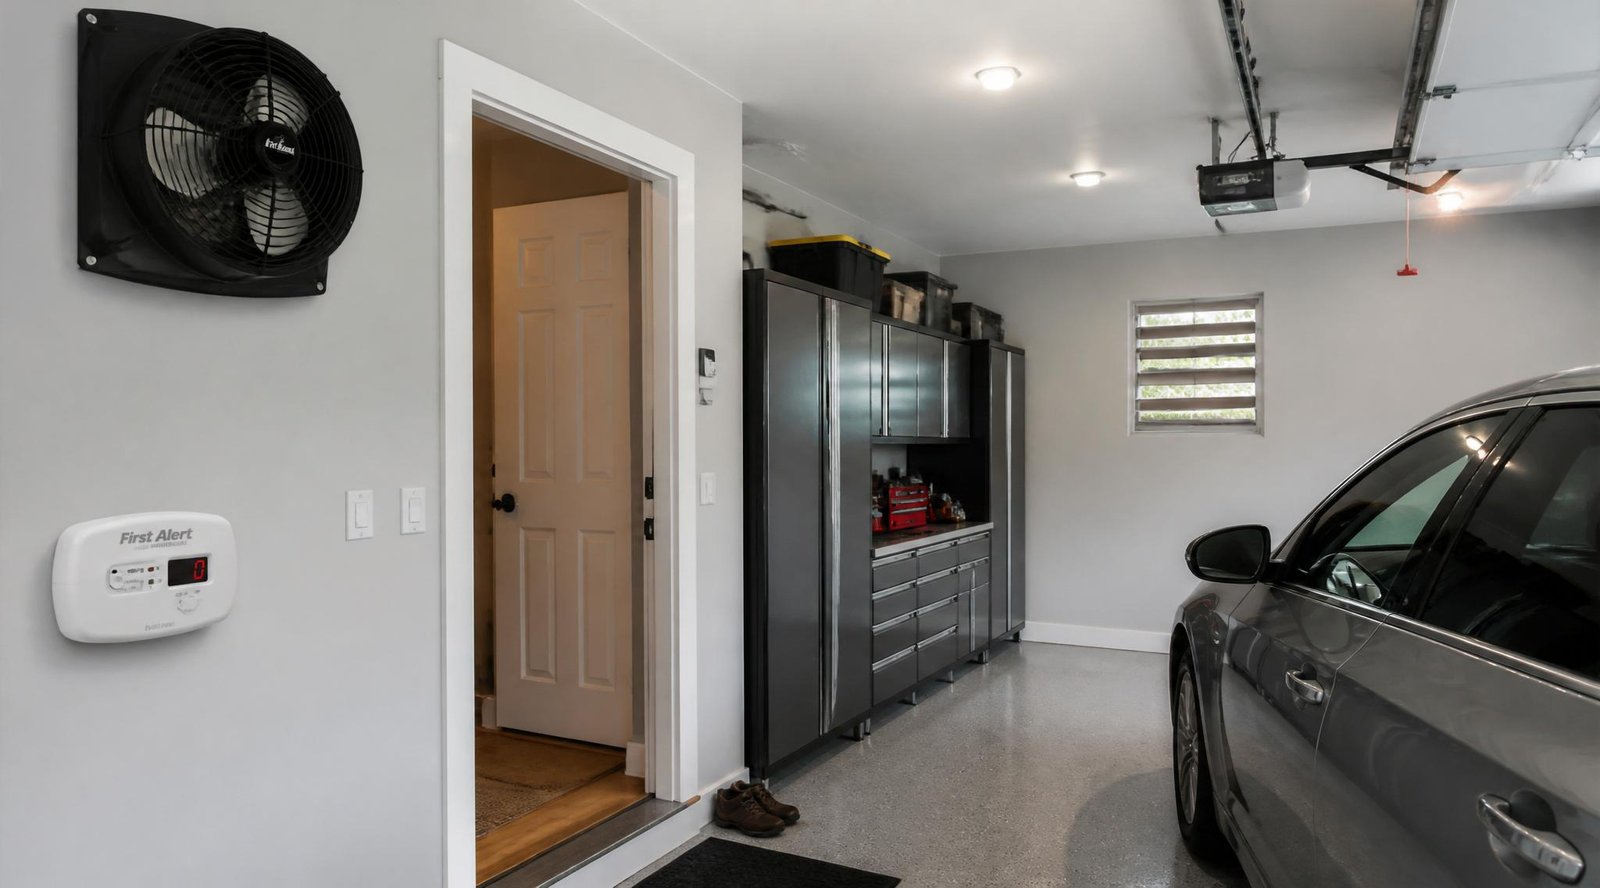
Ventilation awareness. A garage that’s been properly ventilated following the recommendations in our complete garage ventilation guide will have adequate airflow for EV charging without additional modifications. EV chargers themselves don’t produce significant fumes, but the garage should have proper airflow to manage heat and any off-gassing from the battery management systems in the vehicle during charging — a well-ventilated garage handles this naturally.
Step 5: Permits and the Inspection Process
In 2026, most municipalities require an electrical permit for EV charger installation, and this is genuinely important — not just bureaucratic box-checking. Permitted and inspected installations carry insurance coverage and are compliant with the updated 2026 National Electrical Code (NEC), which has new provisions specifically addressing EV charging circuit requirements.
Who pulls the permit: In most jurisdictions, the licensed electrician you hire pulls the permit as part of the installation. Budget $75–$200 for permit fees, which your electrician will typically include in the project quote.
What the inspector checks: The inspector will verify that the circuit is properly sized for the charger’s amperage, that the wiring gauge is appropriate, that the GFCI (Ground Fault Circuit Interrupter) protection is properly implemented per the 2026 NEC requirements, and that the charger is mounted and installed per manufacturer specifications.
Why it matters for homeowners: An unpermitted EV charger installation can create issues at home sale (inspectors routinely flag them), may not be covered by homeowner’s insurance if a fire or electrical fault occurs, and potentially voids the charger manufacturer’s warranty. The permit process adds a small amount of time but is straightforwardly worth it.
Step 6: The Federal Tax Credit — How to Claim It
This is one of the most underutilized benefits of home EV charger installation, and it’s significant.
IRS Section 30C Alternative Fuel Vehicle Refueling Property Credit covers 30% of the total cost of purchasing and installing a qualified EV home charging station, up to a maximum credit of $1,000 for residential installations. The credit applies to the charger hardware AND the installation labor cost combined — so for a typical home installation that costs $800–$1,500 in total (charger + electrician), the credit covers $240–$450 of that.
How to claim it: File IRS Form 8911 with your federal tax return for the year the installation is completed. You’ll need receipts for both the equipment and the installation labor. This is a tax credit (reduces your tax bill dollar-for-dollar), not a deduction (which only reduces taxable income).
State and utility incentives: In addition to the federal credit, many states and utility companies offer their own EV charger rebates. The DSIRE database (Database of State Incentives for Renewables and Efficiency) at dsireusa.org maintains a current, searchable list of incentives by state. Some utility programs in California, Washington, New York, and other states offer rebates of $250–$500 on top of the federal credit, and some utilities provide discounted overnight electricity rates specifically for EV charging — making the combination of a smart charger with off-peak scheduling especially valuable.
The credit is available through 2032 under the Inflation Reduction Act, so there’s no urgency deadline to worry about, but the benefit is real and should absolutely be factored into the cost calculation.
Step 7: Working With an Electrician
Unless you are a licensed electrician, the actual circuit installation should be done by a professional. Installing a 240V circuit involves working inside the breaker panel with live high-voltage connections, which is a genuinely dangerous task for anyone without electrical training. The charger itself can be mounted by a skilled DIYer, but the circuit wiring requires professional installation in most jurisdictions.
Finding a qualified electrician: Look specifically for electricians with EV charging installation experience — not all residential electricians are equally familiar with the specific requirements, and an experienced EV charger installer will complete the job more efficiently and is more likely to be familiar with local permit requirements.
Getting a quote: Request quotes from at least two or three electricians. Describe the job specifically: the charger model, the panel location, the charger mounting location, and the approximate circuit run length. A typical installation for an attached garage with a straightforward panel-to-charger run costs $200–$500 in labor. Complex runs, panel upgrades, or underground trenching for detached garages can cost $1,000–$3,000+.
What to confirm before work starts: Confirm the electrician will pull the permit, will install the correct wire gauge for your chosen amperage (10 AWG for 30A circuits, 8 AWG for 40A, 6 AWG for 50A, 4 AWG for 60A), and will verify the panel has adequate capacity before beginning.
Integrating EV Charging Into Your Garage’s Broader Setup
A home EV charger doesn’t exist in isolation — it’s most functional when the rest of the garage is organized and equipped to support it. Several of the garage projects covered in our other guides integrate directly with an EV charging setup.
Floor and organization. A clean, well-organized garage makes daily EV charging dramatically more pleasant — pulling in to plug in a vehicle is easier in a garage with clear sight lines and defined parking positions. Our complete guide to organizing a garage covers zone planning that accounts for a charging cable run and the cable management that keeps the garage from looking cluttered. Our garage floor epoxy guide is also relevant here: an epoxy-coated floor not only looks better but is easier to clean under a parked EV (drips, tire marks, and road grime wipe up completely from sealed concrete rather than soaking in).
Insulation and climate control. EVs charge most efficiently at moderate temperatures — extreme cold significantly reduces charging efficiency and battery capacity. A well-insulated garage (see our complete garage insulation guide) maintains a warmer ambient temperature in winter, which helps the vehicle’s battery management system operate more efficiently during charging. Some EVs have a “precondition battery” feature that uses grid power (rather than battery power) to warm the battery to optimal charging temperature when plugged in — a feature that only works if the car is actually plugged into a charger, making Level 2 home charging a prerequisite.
Lighting. Plugging in a vehicle in a dimly lit garage — especially late at night — is frustrating and can lead to misaligned connections or tripped-over cables. If your garage lighting is currently inadequate, pairing the charger installation with a proper LED lighting upgrade is a natural companion project. Good overhead lighting combined with the charger’s indicator light makes the nightly plug-in routine simple and quick.
Safety. A garage with an EV charger and a parked electric vehicle should have a working CO detector and smoke detector. While EVs don’t produce carbon monoxide during operation (no combustion engine), the garage may still be used by gas-powered equipment — lawn mowers, generators, leaf blowers — and the CO risk in an attached garage remains real. Our complete garage ventilation and safety guide covers CO detector placement and the broader safety protocols that apply to any occupied, attached garage.
Common Questions About Home EV Charging
Can I install a Level 2 charger myself? The charger unit itself — mounting it to the wall — is straightforward DIY work. The dedicated 240V circuit running from your panel to the charger requires a licensed electrician in most jurisdictions and for most homeowners’ safety. Some experienced DIYers do pull permits and wire their own circuits, but this is not recommended without genuine electrical knowledge and experience working in breaker panels.
What if my garage is detached? Installation is more complex and expensive for a detached garage because it requires either running overhead conduit on the exterior of the house (which has aesthetic drawbacks) or trenching underground conduit from the house to the garage. Underground installation typically requires 24-inch burial depth for conduit and is a more significant project — but it’s the cleanest, most code-compliant solution for a detached garage. Budget $500–$2,000+ in additional electrician cost beyond what an attached garage installation would run.
Can I charge two EVs on one charger or one circuit? Some charger models (like the Wallbox Pulsar Plus) offer Load Management between two units on a single shared circuit, automatically dividing amperage between both vehicles. This is more economical than wiring two separate full-amperage circuits, though both vehicles charge somewhat slower when both are plugged in simultaneously.
Will charging at home raise my electric bill significantly? Yes, but the increase is typically modest relative to the fuel savings. Charging 1,000 miles per month (roughly the average U.S. driver’s monthly mileage) requires about 300–350 kWh of electricity, which at $0.15/kWh national average adds about $45–$52 to the monthly electricity bill. The same mileage in a gasoline vehicle at $3.50/gallon and 30 mpg costs about $117. The net saving is approximately $65–$70 per month even before considering off-peak rate advantages.
How long does home EV charger installation take? A typical attached garage installation — existing panel with open capacity, straightforward circuit run — takes 2–5 hours for the electrician. Add time for panel inspections and permit-related steps.
2026’s Emerging Technology: Vehicle-to-Home (V2H)
The most exciting development in home EV charging for 2026 isn’t about charging speed — it’s about energy flow in the other direction.
Vehicle-to-Home (V2H) technology, now available on a growing number of vehicles and charger configurations, allows a compatible EV to discharge its battery back into the home’s electrical system. A Ford F-150 Lightning with its 130+ kWh battery pack can power an average American home for 3–4 days during a power outage. With a properly installed bidirectional charger and home transfer switch, the EV becomes a backup power source far more capable (and less expensive per kWh of storage) than dedicated home battery systems.
Planning for V2H at installation time costs very little extra — it primarily means selecting a V2H-compatible charger and ensuring the dedicated circuit is sized for bidirectional power flow, then adding the home transfer switch when you’re ready. If you own or are considering a V2H-capable vehicle, talk to your electrician about future-proofing the installation at the initial stage.
Total Cost Summary: What to Budget
Equipment (charger unit): $150–$600 depending on brand, amperage, and features
Electrician labor (attached garage, straightforward run): $200–$500
Permit fees: $75–$200
Panel upgrade (if needed): $1,500–$4,000
Detached garage underground run (if applicable): $500–$2,000 additional
Federal tax credit (30%, up to $1,000): Reduces the total out-of-pocket cost
Typical all-in cost for most homeowners (attached garage, no panel upgrade): $600–$1,200 before tax credit → $420–$840 after federal 30% credit
This makes a home Level 2 EV charger one of the most affordable meaningful home upgrades available — and one that adds measurably to home value, reduces ongoing fuel costs, and eliminates the friction of public charging dependence entirely.
Final Thoughts
The shift to electric vehicles isn’t a future trend anymore — it’s the present, and the garage is at the center of it. A properly installed Level 2 home charger transforms the EV ownership experience: you stop thinking about charging and just live with a full battery every morning. The installation process is well-understood, the products are mature and proven, the tax credits are generous, and the payback period measured in fuel savings is typically 18–36 months.
If you’re building out a garage that functions as more than just a parking space — a workshop, a gym, a storage system, a finished floor — an EV charger is the infrastructure upgrade that completes the modern garage in 2026. Plan the circuit now even if you don’t have an EV yet. Roughing in a 50-amp circuit to the garage wall costs very little more than the electrician’s time and positions you perfectly for the EV purchase you’ll almost certainly make in the next few years.
For the full picture of a fully upgraded, future-ready garage, pair this guide with our projects on how to insulate a garage, how to organize a garage, how to epoxy coat a garage floor, and our complete garage ventilation and safety guide — together, they represent the complete modern garage built for how people actually live in 2026.
Planning an EV charger installation or already charging at home? Drop your setup, questions, or tips in the comments — and browse our complete Maintenance guides for more garage upgrades in 2026.