
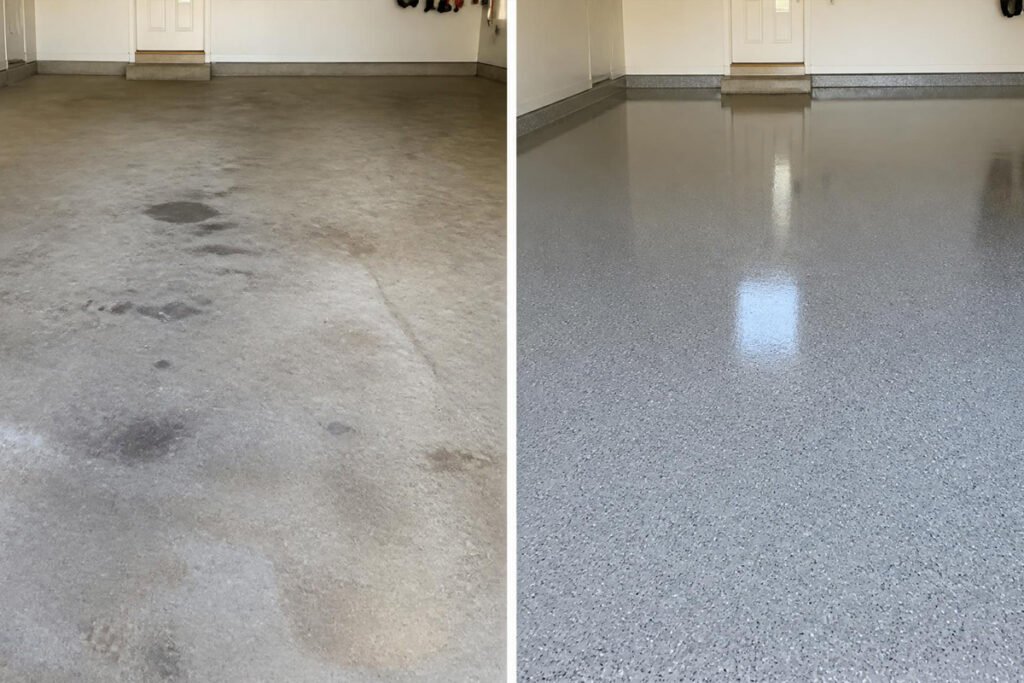
Bare concrete is one of the toughest surfaces in a home to actually keep looking good — it’s porous, it dusts constantly, and every oil drip or antifreeze spill soaks in and stains permanently. A floor coating fixes all three problems at once, sealing the concrete, resisting stains, and turning a dull gray slab into something that actually looks finished.
The hard part isn’t deciding whether to coat your floor — it’s figuring out which type of kit is right for your garage, your climate, and your patience for the application process. This guide breaks down the best garage floor coating kits available right now, how they differ, and which one fits your specific project. If you’ve already chosen epoxy and are ready to apply it, our step-by-step guide on how to epoxy coat a garage floor walks through the full process.
Quick Answer
The best garage floor coating kit depends on your budget, timeline, and how much durability you need. For a first-time DIY project on a budget, a water-based epoxy kit offers the easiest application and lowest cost. For serious long-term durability, a 100% solids epoxy kit resists hot tire pickup and chemical stains far better than water-based formulas. For homeowners who don’t want to wait days for cure time, a polyaspartic (polyurea) kit cures in hours instead of days, though at a higher price point. Whichever you choose, proper concrete prep matters more to the final result than the coating itself.
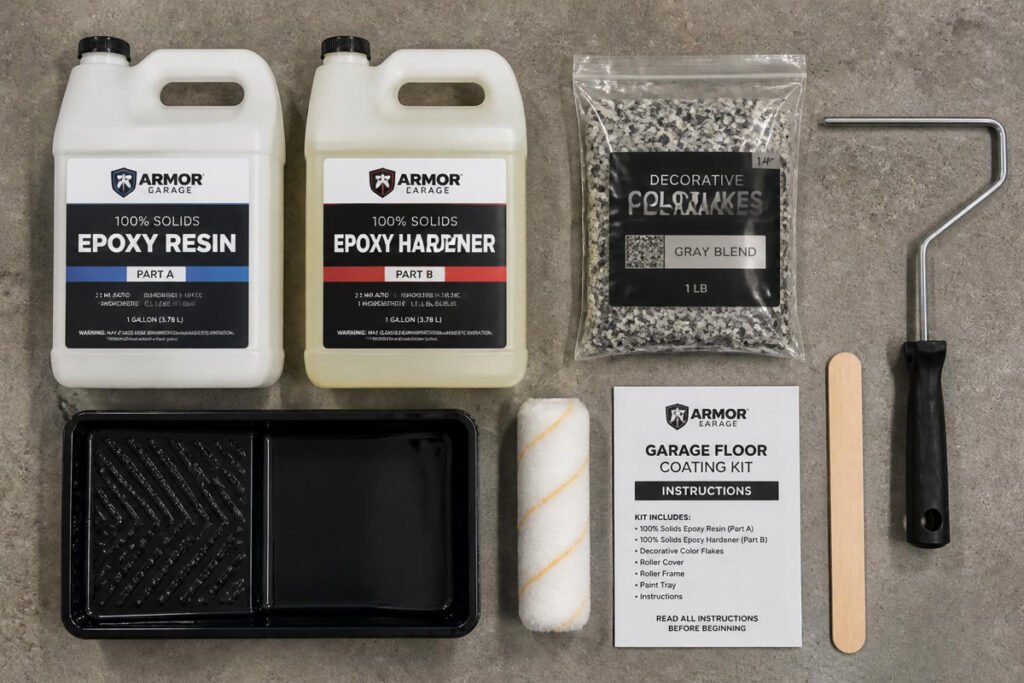
Table of Contents
- Epoxy vs. Polyaspartic vs. Paint: What’s Actually Different
- How to Choose the Right Coating Kit
- Best Garage Floor Coating Kits Available
- Comparison Table
- Best Coatings for Different Garage Conditions
- How to Apply a Garage Floor Coating Correctly
- Common Mistakes
- Expert Tips
- Final Thoughts
- Frequently Asked Questions
Epoxy vs. Polyaspartic vs. Paint: What’s Actually Different {#what-you-need}
Epoxy is the most common garage floor coating, forming a hard, chemical-resistant layer through a resin-and-hardener chemical reaction. It’s durable and affordable but takes longer to cure and can be sensitive to UV exposure over time. Polyaspartic (also called polyurea) coatings cure dramatically faster — often within hours instead of days — and hold up better to UV light, but cost more per kit. Garage floor paint is the simplest and cheapest option, offering a basic protective layer without the thickness or durability of epoxy or polyaspartic, and typically needs reapplication sooner.
Whichever coating you choose, the surface it’s going onto matters just as much — if your floor has existing stains or hasn’t been properly cleaned, see our garage floor cleaning guide before doing anything else.
How to Choose the Right Coating Kit {#how-to-choose}
Before buying, ask three questions:
- How much downtime can I afford? Water-based epoxy needs several days before the floor can handle vehicle traffic; polyaspartic often allows use within 24 hours.
- What condition is my concrete in? Cracked, previously coated, or heavily stained concrete needs more prep work, and some kits include stronger etching solutions than others.
- How much traffic and chemical exposure will the floor see? A daily-use workshop garage needs a tougher, thicker coating than a garage used mainly for parking.
For general guidance on concrete surface preparation standards, the American Concrete Institute’s resources on surface preparation are a useful, non-commercial reference for understanding why prep work matters so much to coating longevity.
Best Garage Floor Coating Kits Available {#best-tools}
1. Water-Based Epoxy Kit
Overview: This is the most common entry point for DIY garage floor coating — a two-part water-based epoxy system that’s easier to mix and apply than solvent-based alternatives, with lower odor during application.
Key Features:
- Two-part resin and hardener system
- Lower odor than solvent-based epoxy
- Often includes decorative color flakes
- Typically covers a standard 2-car garage (400–500 sq ft) per kit
Best For: First-time DIY coating projects, budget-conscious homeowners
Pros: ✅ Most affordable coating option ✅ Easier mixing and application for beginners ✅ Lower odor makes it easier to work with indoors Cons: ❌ Thinner film than 100% solids formulas, shorter lifespan ❌ Longer cure time before vehicle traffic is safe
Our Verdict: The right starting point for most first-time coating projects — follow our step-by-step epoxy coating guide for the full application process from prep to final coat.
2. 100% Solids Epoxy Kit
Overview: Unlike water-based formulas, 100% solids epoxy contains no evaporating carrier liquid, resulting in a significantly thicker, more durable finish that resists hot tire pickup and chemical stains far better.
Key Features:
- No water or solvent content, full-strength cured film
- Thicker finished coating than water-based options
- Strong resistance to hot tire pickup and chemicals
- Often used in combination with a topcoat for added durability
Best For: Long-term durability, workshop garages, heavy vehicle traffic
Pros: ✅ Significantly more durable than water-based epoxy ✅ Better resistance to hot tire pickup and chemical spills ✅ Longer expected lifespan overall Cons: ❌ More challenging application, often requiring careful timing ❌ Higher price point than water-based kits
Our Verdict: Worth the extra cost and effort if you want a coating that genuinely lasts — pair the prep work with our garage floor cleaning guide to make sure the concrete is fully ready.
3. Polyaspartic (Polyurea) Coating Kit
Overview: Polyaspartic coatings cure through a different chemical process than epoxy, allowing them to set in hours rather than days. They also resist UV yellowing better than epoxy, making them a strong choice for garages exposed to sunlight through open doors or windows.
Key Features:
- Rapid cure time, often usable within 24 hours
- Strong UV resistance, resists yellowing over time
- Can often be applied in a wider temperature range than epoxy
- Typically higher gloss finish than epoxy
Best For: Homeowners who can’t afford multiple days of garage downtime, sunlit garages
Pros: ✅ Dramatically faster cure and return-to-use time ✅ Better UV stability than standard epoxy ✅ Wider application temperature range Cons: ❌ Highest price point among coating types ❌ Faster cure time also means less working time during application
Our Verdict: If you can’t afford to have your garage unusable for days, this is the clear choice — our guide on cleaning a polyaspartic garage floor covers what maintenance looks like once it’s installed.
4. Polycuramine (Hybrid) Coating Kit
Overview: Polycuramine blends properties of epoxy and urethane into a single coating, aiming for a middle ground of strong durability with a somewhat simpler application process than full 100% solids epoxy systems.
Key Features:
- Hybrid formula combining epoxy and urethane properties
- Often applied as a single coat rather than multiple layers
- Strong resistance to chemicals and abrasion
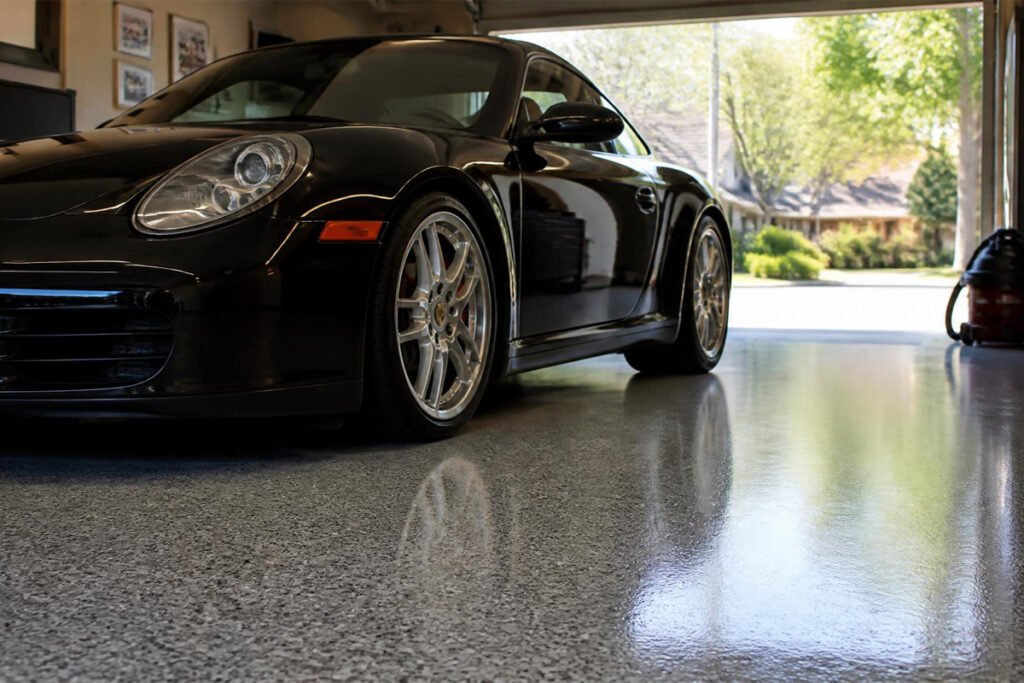
- Glossy, showroom-style finish
Best For: Homeowners wanting strong durability without the full complexity of a multi-coat epoxy system
Pros: ✅ Simpler application than multi-step epoxy systems ✅ Strong overall durability ✅ High-gloss finished appearance Cons: ❌ Higher price than basic epoxy kits ❌ Fewer color and finish options than some epoxy systems
Our Verdict: A solid middle-ground option if you want strong results without committing to the most involved multi-coat epoxy process.
5. Concrete Sealer (Penetrating, Non-Film Coating)
Overview: Unlike epoxy, polyaspartic, or paint, a penetrating concrete sealer soaks into the concrete itself rather than forming a surface film. It won’t give the glossy showroom look of the other options, but it’s the simplest, fastest, and most forgiving choice for basic protection.
Key Features:
- Penetrates into the concrete rather than coating the surface
- No peeling or chipping risk since there’s no surface film
- Fast, simple application with minimal prep
- Provides stain and moisture resistance without changing floor appearance
Best For: Budget projects, garages where appearance matters less than basic protection, quick weekend projects
Pros: ✅ Simplest application of any option on this list ✅ No peeling risk since it doesn’t form a surface film ✅ Fastest project turnaround Cons: ❌ No decorative finish or glossy look ❌ Less stain resistance than a true epoxy or polyaspartic coating
Our Verdict: The right pick if protection matters more to you than appearance, or if you’re not ready to commit to a full coating project yet.
Comparison Table {#comparison-table}
| Coating Type | Best For | Cure Time | Approx. Price Range | Durability |
|---|---|---|---|---|
| Water-Based Epoxy | First-time DIY projects | 3–7 days | $80–$200 | Moderate |
| 100% Solids Epoxy | Long-term durability, workshops | 3–5 days | $150–$350 | High |
| Polyaspartic/Polyurea | Fast turnaround, sunlit garages | 12–24 hours | $250–$500 | High |
| Polycuramine (Hybrid) | Strong durability, simpler application | 24–48 hours | $200–$400 | High |
| Penetrating Concrete Sealer | Budget, quick projects | Same-day to 24 hours | $40–$100 | Moderate |
Best Coatings for Different Garage Conditions {#different-conditions}
Sun-Exposed or Frequently Open Garages
Polyaspartic resists UV yellowing significantly better than standard epoxy, making it the better long-term choice if your garage door stays open often or gets direct sunlight.
Heavy Workshop or Daily-Use Garages
A 100% solids epoxy or polycuramine kit handles the chemical exposure and abrasion of daily workshop use far better than a thinner water-based formula — pair it with good ventilation from our garage ventilation guide during application.
Older or Previously Stained Concrete
Thorough cleaning and degreasing matter more here than the coating choice itself — see our guide on the best garage floor degreaser to fully prep a stained floor before any coating goes down.
How to Apply a Garage Floor Coating Correctly {#how-to-apply}
Step 1: Clean and Degrease the Floor Thoroughly
Any remaining oil, grease, or dust will prevent proper adhesion — a full clean and degrease is non-negotiable before coating.
Step 2: Etch or Grind the Concrete Surface
Most kits include an etching solution, or you can mechanically grind the surface, to open the concrete’s pores for better bonding.
Step 3: Repair Cracks and Let the Floor Fully Dry
Fill any cracks and allow complete drying time before applying any coating — trapped moisture is one of the leading causes of coating failure.
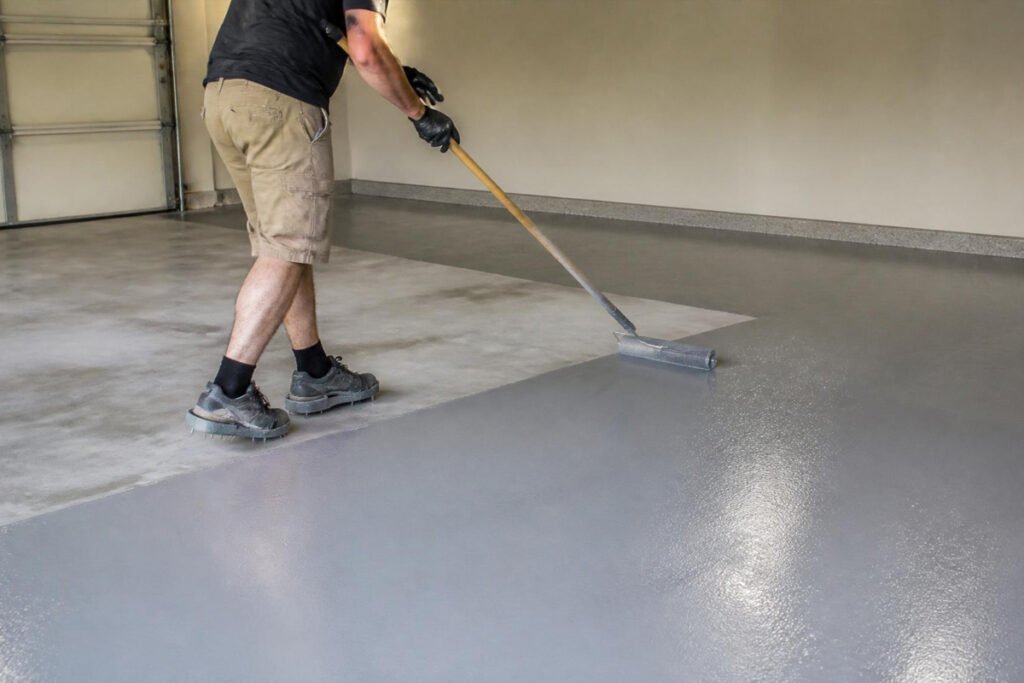
Step 4: Apply the Base Coat
Work in manageable sections, following the manufacturer’s mixing ratios and working time exactly.
Step 5: Add Flakes or Topcoat, Then Cure Fully
Apply decorative flakes while the base coat is still tacky if desired, then allow the full cure time before walking or driving on the floor.
Common Mistakes {#common-mistakes}
Skipping proper degreasing before coating. Even a light film of old oil residue will cause the coating to peel prematurely — see our floor degreaser guide before starting.
Applying coating in the wrong temperature or humidity conditions. Most kits have a specific temperature and humidity window — coating outside that range leads to poor curing and a shorter lifespan.
Driving or walking on the floor before it’s fully cured. Even if the surface looks dry, full cure strength often takes longer than the surface appears to indicate — always follow the manufacturer’s minimum wait time.
Expert Tips {#expert-tips}
Never skip the etching step, even on newer concrete. New concrete still has a surface layer that inhibits proper bonding — etching or grinding is essential regardless of the slab’s age.
Work in smaller sections than you think you need to. Epoxy and polyaspartic both have limited working time once mixed — smaller sections prevent the product from setting up before you can finish rolling it out.
Plan your project around a stretch of stable weather. Humidity and temperature swings during the cure window are one of the most common causes of a coating that doesn’t fully harden properly.
Final Thoughts {#final-thoughts}
Best Overall: A 100% solids epoxy kit for the best balance of durability and cost for most garages. Best Budget: A water-based epoxy kit or penetrating concrete sealer, depending on whether appearance matters to you. Best for Fast Turnaround: A polyaspartic (polyurea) kit, since it returns your garage to usable condition dramatically faster than epoxy.
Whichever coating you choose, the prep work determines the outcome more than the product itself — see our full epoxy coating guide and garage floor cleaning guide before starting your project.
Frequently Asked Questions {#faq}
How long does a garage floor coating actually last? Water-based epoxy typically lasts 3–5 years, 100% solids epoxy and polyaspartic often last 10+ years with proper care, and how well the floor was prepped before coating affects longevity more than the product itself.
Epoxy vs. polyaspartic — which one should I choose? Epoxy is more affordable and widely available, while polyaspartic cures much faster and resists UV yellowing better. If timeline matters more than budget, polyaspartic is usually the better choice.
Do I need to hire a professional, or can I DIY a floor coating? Many water-based and 100% solids epoxy kits are DIY-friendly, though polyaspartic’s fast cure time makes it less forgiving for first-time applicators — professional installation is worth considering if you’re new to the process.
How much does a garage floor coating kit typically cost? Most kits for a standard 2-car garage (400–500 sq ft) run anywhere from $80 for basic water-based epoxy to $500+ for premium polyaspartic systems.
Can I coat over an old, previously coated floor? It depends on the existing coating’s condition — a properly adhered, intact coating can sometimes be recoated, but a peeling or failing coating needs to be fully removed first.
Why is my epoxy floor peeling after just a few months? This almost always traces back to inadequate surface prep — either insufficient degreasing, skipped etching, or moisture trapped beneath the coating during application.
How long before I can park my car on a newly coated floor? Water-based epoxy typically needs 3–7 days before vehicle traffic, while polyaspartic can often handle light traffic within 24 hours — always confirm the specific product’s cure time.
Does the coating protect against hot tire pickup? 100% solids epoxy, polyaspartic, and polycuramine all resist hot tire pickup significantly better than thinner water-based epoxy or basic paint.
Can I add color flakes to any coating type? Most epoxy and polyaspartic systems support decorative flakes applied into the wet base coat, though a plain penetrating sealer won’t support flakes since it doesn’t form a surface film.
Author: Danial Marquez Last Updated: August 2026






