How To Clean Garage Door Rollers: A Comprehensive Cleaning Guide
Welcome to the concealed realm hidden behind your garage door—a space where the harmony of seamless functionality is not a mere coincidence but a product of dedicated care and meticulous maintenance. In this comprehensive guide, we’ll explore the easy tricks on How To Clean Garage Door Rollers. Here, we’ll unravel the mysteries that contribute to the enduring resilience of these unsung heroes, ensuring they not only withstand the wear of time but also continue to operate with unparalleled efficiency.
Table of Contents
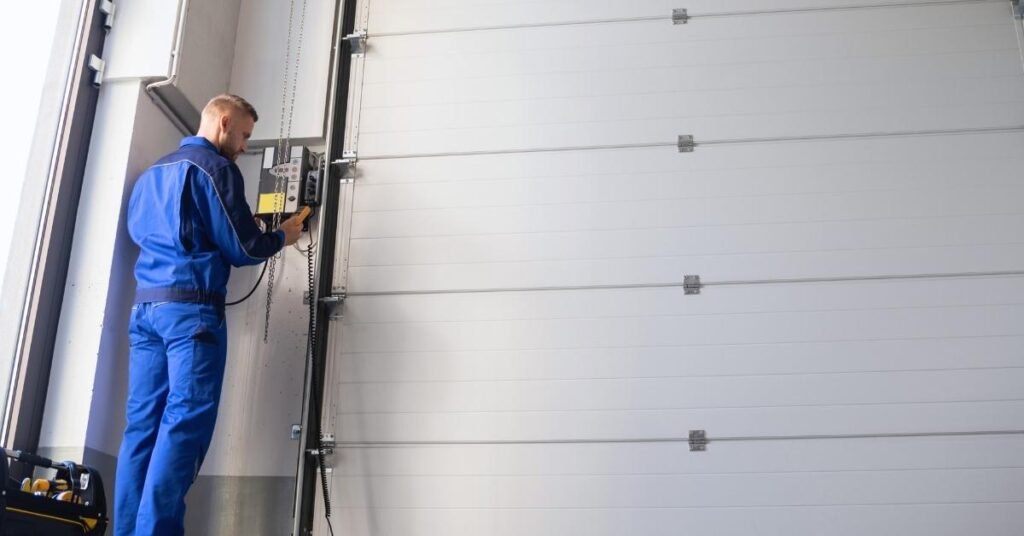
It’s Time to Clean Garage Door Rollers: When?
Ever wondered about the perfect moment to pamper your garage door rollers?
We are going to unveil the signs that scream, “It’s cleaning time!” Discover the signs that prompt you to give your rollers the attention they deserve.
Specific Things To Prioritize
Signs of Wear and Tear
Garage door rollers, like any other component, exhibit signs of wear over time. If you notice visible wear, such as cracks or chipping on the rollers, it’s a clear indication that a cleaning session is due.
Unusual Noises during Operation
Is your garage door making more noise than usual?
Squeaking, grinding, or any other unusual sounds during operation might be a sign that the rollers are accumulating dirt and need your attention.
Difficulty in Smooth Operation
The essence of well-functioning garage door rollers lies in their ability to facilitate a smooth opening and closing mechanism. If you sense any jerky movements or resistance when operating the door, it’s a red flag that cleaning is in order.
Visual Inspection Reveals Dirt or Debris
Sometimes, the evidence is right before your eyes. A visual inspection of the rollers that reveals accumulated dirt, debris, or any foreign substances is a clear signal that a cleaning regimen is necessary.
Regular Maintenance Schedule
Even if there are no apparent issues, adhering to a regular maintenance schedule is a proactive approach. Cleaning your garage door rollers every six months is a good practice to prevent issues before they arise. Unveiling these signs and understanding when it’s time to clean your garage door rollers ensures that you address potential problems promptly and maintain the optimal performance of your garage door system.
How to Clean Garage Door Rollers: Required Tools
Before you plan for the roller-cleaning journey, gather your required tools. From the basics to the must-haves, we detail the tools essential for a thorough garage door roller cleansing. Be prepared, and your rollers will thank you for it. Let’s have a glance at the required tools:
Essential Tools for Initial Cleaning
Begin your roller-cleaning journey with these fundamental tools:
● Soft-bristle brush
● Vacuum cleaner with nozzle attachment
Advanced Cleaning Tools
For a more thorough cleanse, consider adding these tools to your arsenal:
● Mild detergent
● Clean, damp cloth
Essential Lubrication Tools
Ensure the longevity of your garage door rollers by having these lubrication tools:
● Silicone-based lubricant
● Applicator or rag for even distribution
Safety Gear
Prioritize safety during the cleaning process with:
● Safety goggles to protect your eyes from debris
● Work gloves for hand protection
Optional Tools for Intensive Cleaning
If your rollers require extra attention, these tools might be beneficial:
● Screwdriver for removing stubborn debris
● Pliers for securing loose components
Gathering this comprehensive set of tools equips you with a thorough garage door roller cleaning. Remember, being prepared ensures not only an efficient cleaning process but also extends the life and performance of your garage door rollers.
How to Clean Garage Door Rollers: Step-by-Step Guide
Dive into the nitty-gritty of roller rejuvenation with our step-by-step guide. From inspecting for grime to applying the perfect lubricant, we walk you through the process, ensuring your garage door glides effortlessly on its tracks.
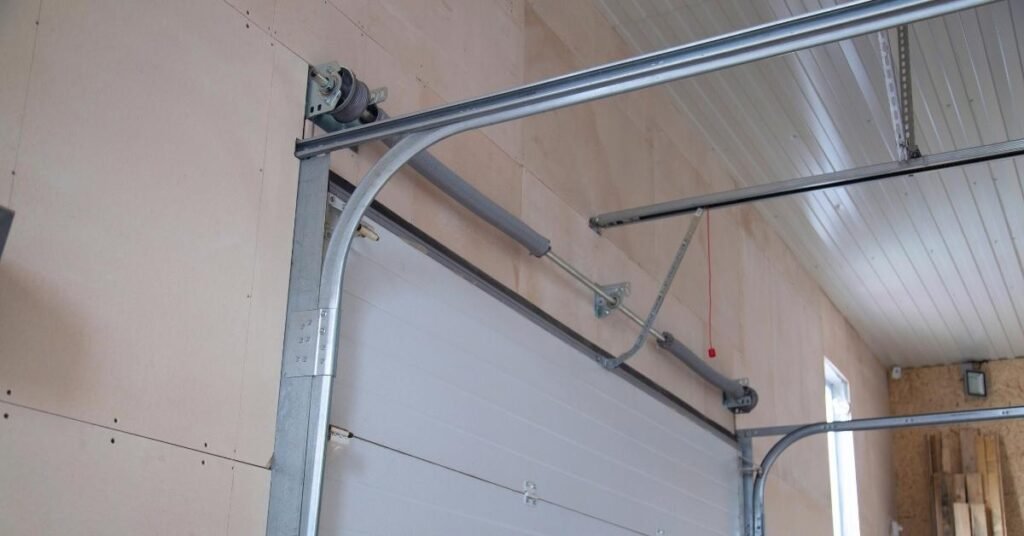
Inspection for Grime and Debris: Begin by closely inspecting each garage door roller for accumulated grime and debris. Use a soft-bristle brush and a vacuum cleaner with a nozzle attachment to remove loose dirt and particles.
Vacuuming the Tracks: Clean the tracks by using the vacuum cleaner’s nozzle attachment. Ensure that all debris, dust, and loose particles are thoroughly removed from the tracks to prevent interference with the roller’s movement.
Damp Cloth Cleaning: Dampen a clean cloth with a mild detergent solution. Wipe each garage door roller thoroughly, ensuring that all surfaces are cleaned. Pay extra attention to hard-to-reach areas and crevices.
Lubrication Application: Apply a silicone-based lubricant to each garage door roller and its hinges. Use either a dedicated applicator or a clean rag to ensure an even distribution of the lubricant. Move the door manually to help the lubricant penetrate the roller mechanisms.
Testing the Door Operation: After cleaning and lubricating the rollers, test the garage door by opening and closing it several times. This helps to distribute the lubricant evenly and ensures smooth operation.
Inspecting for Residual Debris: Conduct a final inspection to make sure no residual debris or dirt remains on the rollers or in the tracks. Use a soft brush to remove any remaining particles gently. Following these step-by-step instructions guarantees a thorough cleaning and lubrication process for your garage door rollers.
By adding these steps to your maintenance routine, you contribute to the longevity and optimal performance of your entire garage door system.
How Long Do Garage Rollers Last: Maintain the Longevity
Roller lifespan – it’s not just a number. Uncover the factors influencing how long your garage door rollers can endure. Learn maintenance tips and tricks that not only extend their life but also keep your entire garage door system in top-notch condition.
FAQ: How To Clean Garage Door Rollers
Q1: How often should I clean my garage door rollers?
A: Cleaning your garage door rollers every six months is generally sufficient. However, if you notice any buildup of dirt or if the rollers are making unusual noises, it’s wise to clean them more frequently.
Q2: Can I use any lubricant on the rollers?
A: It’s recommended to use a silicone-based lubricant specifically designed for garage door rollers. Avoid using WD-40 or similar products, as they can attract more dirt and may not provide long-lasting lubrication.
Q3: What signs indicate that my rollers need cleaning?
A: If you hear squeaking or grinding noises when operating the garage door, if the door is jerky or works unevenly, or if you visually observe dirt or debris on the rollers, it’s time for a cleaning.
Q4: Are there specific tools I should avoid using on garage door rollers?
A: Yes, avoid using harsh chemicals or abrasive tools. Stick to a soft brush and a mild detergent for cleaning. Also, please refrain from using petroleum-based lubricants, as they can attract dust and grime.
Q5: Can I clean the rollers without professional help, even if I’m not a DIY expert?
A: Yes, cleaning garage door rollers is a task that most homeowners can do. Follow our step-by-step guide, use the recommended tools, and exercise caution. If you encounter significant issues or are unsure, it’s advisable to seek professional assistance.
Bottom Line
As we finish up our adventure of How To Clean Garage Door Rollers, think of them like the backstage wizards, making sure your garage door dance is smooth and graceful every day. It’s not just about cleaning; it’s like saying a big thank you to the protectors of your garage, those unseen heroes. Taking a bit of time to care for them really makes a big difference in how long they last and how well they work.
They don’t get much attention, but they play a crucial role in making sure your garage door goes up and down perfectly. So, let’s give them a little spotlight and love, and they’ll make sure every time your garage door moves, it’s like a perfectly choreographed dance.Cheers to the smooth moves, the quiet performances, and the reliable work of your garage door rollers – may they keep dancing smoothly for many more years to come!






![A standard smoke detector is the wrong tool for a garage — dust, vehicle exhaust, and temperature swings trigger enough false alarms that most people eventually just disable the unit, which defeats the purpose entirely. A heat detector solves that by responding to actual temperature change instead of airborne particles. For related garage fire and safety context, see our carbon monoxide and garage safety guide. This roundup focuses specifically on which heat detector to buy. Quick answer: for most attached garages, a hardwired, interconnectable unit like the First Alert HD6135FB is the most reliable choice, since it ties into your home's existing smoke/CO alarm system rather than operating as an isolated device. If wiring isn't an option or you want app alerts when you're not home, a smart or wireless model further down this list covers that instead. We compared products on detection method (fixed temperature vs. rate-of-rise), operating temperature range, interconnection capability, installation type, and price — specifically for garage use, where dust, exhaust, and wide temperature swings rule out options that work fine in a bedroom or hallway. [IMAGE 1 — THUMBNAIL: heat detector mounted on garage ceiling with LED indicator visible — full professional photo brief in SEO package] Quick Comparison Product Best For Detection Type Approx. Price First Alert HD6135FB Best Overall 135°F fixed + rate-of-rise ~$25–$35 Kidde HD135F Best for Whole-Home Interconnection 135°F fixed only ~$25–$35 X-Sense XH02-M Best Smart/App-Connected Heat + app alerts (needs base station) ~$30–$40 + base station RiSol Commercial Heat Detector Best for Large or Extreme-Range Garages Dual fixed + rate-of-rise, –4°F to 135°F ~$50–$80 Honeywell 5809SS Best Wireless (No Hardwiring) Fixed + rate-of-rise, 345MHz wireless ~$40–$55 Note: prices are approximate and based on typical current listings — confirm exact specs and compatibility before you buy. 1. First Alert HD6135FB — Best Overall ⭐ Best Overall 135°F fixed temperature + rate-of-rise (15°F/min) | Hardwired 120VAC with 9V battery backup | 85dB horn | UL539 compliant | ~$25–$35 [IMAGE 2 — First Alert HD6135FB mounted on garage ceiling, white housing visible — full professional photo brief in SEO package] This is the most widely stocked and referenced heat detector for exactly this use case, and the dual-sensing approach is the reason why: it triggers either when the temperature hits a fixed 135°F or when it rises more than 15°F in a single minute, whichever comes first. That rate-of-rise sensing catches a fast-developing fire earlier than a fixed-temperature-only unit would, without the false-alarm sensitivity of a smoke detector. Why buy it • Dual detection (fixed + rate-of-rise) catches fast-developing fires earlier than fixed-only units • Microprocessor control specifically reduces nuisance alarms from dust and temperature swings • Interconnects with other First Alert/BRK hardwired alarms so a garage fire triggers alarms throughout the house Worth knowing • Requires hardwiring into a 120V circuit — not a simple battery-only install • Not rated for extreme cold below –20°F or heat above 115°F, which covers the vast majority of garages but is worth checking for extreme climates Verdict: the safest default pick if your garage is already wired or you're comfortable having an electrician add the circuit — the interconnection with the rest of your home's alarm system is the real value here. 2. Kidde HD135F — Best for Whole-Home Interconnection 🔗 Best for Interconnection 135°F fixed temperature only | Hardwired with 9V battery backup | Interconnects up to 24 Kidde devices | 2 status LEDs | ~$25–$35 [IMAGE 3 — Kidde HD135F heat detector on ceiling with visible LED status lights — full professional photo brief in SEO package] If your home already runs on Kidde smoke and CO alarms, this is the natural fit — it interconnects with up to 24 other Kidde AC-interconnect devices, meaning a garage fire trips every alarm in the house, not just the one nearest the fire. The trade-off against the First Alert pick above is that this unit is fixed-temperature only, without rate-of-rise sensing, which means it won't catch a fast-developing fire quite as early. Pair it with our carbon monoxide safety guide if you're building out a full Kidde-based alarm ecosystem across the house. Why buy it • Seamless interconnection if the rest of your home already runs Kidde alarms • Two LED indicators make status checking simple at a glance • UL 539 certified with a straightforward, well-documented hardwired install Worth knowing • Fixed temperature only — no rate-of-rise detection, so it triggers slightly later on a fast-developing fire • Only interconnects with other Kidde AC-interconnect devices, not mixed brands Verdict: the right choice specifically if you're standardizing on Kidde across the house — otherwise the First Alert's rate-of-rise sensing is the stronger technical pick. 3. X-Sense XH02-M — Best Smart/App-Connected 📱 Best Smart Option Heat sensing + WiFi app alerts | Requires SBS50 base station (sold separately) | Push notifications, battery status alerts | ~$30–$40 + base station [IMAGE 4 — X-Sense XH02-M heat detector with smartphone showing app alert notification — full professional photo brief in SEO package] This is the pick if you want to know about a problem while you're at work or on vacation, not just when you're standing in the garage. It connects to X-Sense's SBS50 base station over 2.4GHz WiFi and pushes alerts, battery status, and incident updates straight to your phone through the X-Sense Home Security app — genuinely useful for anyone who travels or has a detached garage/workshop they don't check daily. Why buy it • Remote push notifications mean you find out about a problem even when you're away from home • Battery status alerts prevent the detector from silently going dead without your knowledge • Straightforward app setup compared to a full hardwired interconnect system Worth knowing • Requires the separate SBS50 base station to function — factor that cost into the total price • Depends on home WiFi and the manufacturer's app/cloud service staying online to deliver remote alerts Verdict: worth the added cost and setup if remote monitoring genuinely matters to your situation — skip it if you're rarely away from the property for long stretches. 4. RiSol Commercial-Grade Heat Detector — Best for Large or Extreme-Range Garages 🌡️ Best for Extreme Ranges Dual fixed + rate-of-rise thermistor sensing | Operating range –4°F to 135°F | Covers up to 900 sq ft | 85dB alarm | ~$50–$80 [IMAGE 5 — RiSol commercial heat detector mounted in a large workshop-style garage — full professional photo brief in SEO package] Built with commercial and industrial spaces in mind, this steps up both the coverage area and the operating temperature range compared to standard residential units — rated down to –4°F, which matters for an uninsulated garage in a genuinely cold climate. The wider 900 sq ft coverage also means a large two-car garage or combined garage/workshop can often get by with fewer total units than standard residential detectors would require. Why buy it • Wide operating range handles genuinely extreme cold better than standard residential units • Larger 900 sq ft coverage area reduces the total number of units needed for a big space • Dual-sensor design matches the fixed + rate-of-rise approach of the best residential picks Worth knowing • Costs more than standard residential heat detectors, reflecting the commercial-grade build • Overkill for a small single-car garage — sized for larger spaces specifically Verdict: the right pick for a large garage, detached workshop, or genuinely harsh climate where standard residential units are pushed past their comfortable operating range. 5. Honeywell 5809SS — Best Wireless (No Hardwiring) 📡 Best Wireless Fixed + rate-of-rise detection | 345MHz wireless | Requires a compatible security panel/receiver | ~$40–$55 [IMAGE 6 — Honeywell 5809SS wireless heat detector mounted with no visible wiring — full professional photo brief in SEO package] For a garage that isn't wired and where running new electrical isn't practical, this is a genuine wireless alternative — it communicates over 345MHz radio to a compatible security system receiver rather than needing a hardwired connection. The catch is real and worth stating plainly: this only works if you already have, or are willing to add, a compatible security panel. It's not a fully standalone battery unit that works on its own out of the box. Why buy it • No electrical work required — genuinely useful for an unwired detached garage or workshop • Same fixed + rate-of-rise dual detection as the best hardwired picks on this list • Integrates with an existing home security system if you already have compatible Honeywell/Resideo equipment Worth knowing • Requires a compatible 345MHz security panel or receiver — it will not function as a true standalone device • Adds an ongoing dependency on your security system staying powered and functional Verdict: the right pick only if you already have, or plan to add, a compatible security system — otherwise the hardwiring cost for a First Alert or Kidde unit is usually simpler. Which Heat Detector Fits Your Garage? • Standard attached garage, already wired: the First Alert HD6135FB is the safest, most tested default. • Home already runs Kidde smoke/CO alarms: the Kidde HD135F keeps the whole system on one interconnected brand. • You travel often or have a detached workshop you don't check daily: the X-Sense XH02-M's app alerts are worth the extra setup. • Large two-car garage, workshop, or genuinely cold climate: the RiSol commercial unit's wider range and coverage area earn the higher price. • Garage isn't wired and running new electrical isn't practical: the Honeywell 5809SS is the realistic wireless option, provided you have or plan to add a compatible security panel. If you're installing a detector alongside other garage upgrades — an EV charger, new overhead storage, or a full workshop build-out — it's worth planning detector placement at the same time rather than as an afterthought once everything else is installed. A Quick Reality Check on “Battery-Only” Heat Detectors If you've searched for a simple, standalone battery-powered heat detector with no wiring and no base station required, you've likely noticed there aren't many well-established options from major brands — that's not an oversight on this list, it reflects the actual market. Most “battery operated” heat detectors marketed online are either wireless units requiring a compatible security panel (like the Honeywell above) or generic, unbranded products without established testing history. If a fully standalone, no-ecosystem battery unit is a hard requirement, expect to do extra due diligence on UL listing and brand reputation before buying, since this is a thinner and less-regulated part of the market than hardwired or panel-based options. Common Mistakes When Buying a Garage Heat Detector Installing a smoke detector instead This is the single most common mistake, and the reason this guide exists — a standard smoke detector in a garage will false-alarm from dust and exhaust often enough that most people eventually disconnect it, leaving the garage with no working fire detection at all. Assuming any heat detector interconnects with any brand Interconnection is almost always brand-specific — a Kidde heat detector won't trip a First Alert smoke alarm elsewhere in the house, and vice versa. If whole-home interconnection matters to you, match the brand to what's already installed. Skipping the operating temperature range Standard residential units are typically rated for roughly –20°F to 115°F. An uninsulated garage in a genuinely extreme climate can exceed that range, which is exactly the gap a wider-range commercial unit like the RiSol pick is built to cover. Forgetting it's not a substitute for a CO detector A heat detector responds to fire risk, not carbon monoxide. Both belong in or near a garage, but they're solving different problems — see our carbon monoxide safety guide for the CO side of garage safety. Fast Buying Guide Fixed temperature vs. rate-of-rise Fixed-temperature detectors trigger at a set threshold, typically 135°F. Rate-of-rise detectors trigger when temperature climbs quickly, regardless of the absolute number, which catches a fast-developing fire earlier. Dual-sensor units combine both and are the stronger choice whenever the price difference is small. Where to mount it Ceiling-mounted, centered in the garage or near the highest-risk area (workbench, electrical panel), away from HVAC vents and garage door tracks that could cause airflow interference. If your garage doubles as a workshop, position it to cover the hot-work or highest-risk station specifically rather than just the geometric center of the room. Interconnected vs. standalone An interconnected unit (hardwired or app-based) alerts the rest of the house when the garage detector trips, buying more time to react. A standalone unit only sounds locally in the garage, which is a real limitation if no one is nearby to hear it. Interconnection is worth the small added cost or setup effort for most attached garages. How many detectors does a garage need A single-car garage under about 500 sq ft typically needs just one unit, centered on the ceiling. A two-car garage or workshop over that size may need two, especially if there's a distinct high-risk zone like a hot-work station on one side of the room. Frequently Asked Questions Why not just use a smoke detector in the garage? Dust, vehicle exhaust, and temperature swings cause frequent false alarms in a standard smoke detector, which tends to end with the unit being disabled entirely — the opposite of what you want. A heat detector responds to actual temperature change instead, avoiding that false-alarm problem. Do I need a hardwired or battery-powered heat detector? Hardwired units are generally more reliable for a garage that already has wiring nearby, and interconnect with the rest of the home's alarm system. If wiring isn't practical, a wireless option paired with a compatible security panel is the realistic alternative — true standalone battery-only heat detectors from major brands are uncommon. What temperature should a garage heat detector trigger at? 135°F is the standard fixed-temperature threshold used by most residential heat detectors, paired with rate-of-rise sensing (commonly 15°F per minute) on better units to catch fast-developing fires earlier. Can a heat detector replace a smoke detector everywhere in my house? No — heat detectors are specifically recommended for spaces where smoke detectors perform poorly, like garages, attics, and crawl spaces. Living areas and bedrooms should still use smoke detectors, which respond faster to smoldering fires that a heat detector wouldn't catch until much later. How often should I test or replace a garage heat detector? Test monthly using the built-in test button, and replace the unit every 10 years regardless of apparent condition, consistent with standard smoke/heat alarm replacement guidance — sensors degrade with age even when a unit still appears to power on correctly. The Bottom Line If you buy just one thing from this list, make it a hardwired dual-sensor unit like the First Alert HD6135FB — it solves the actual problem (a garage with no reliable fire detection) for most households without complicated setup. Go wireless only if hardwiring genuinely isn't an option, and step up to a commercial-grade unit only if your garage is unusually large or exposed to genuinely extreme temperatures. Last Updated: July 2026](https://garagedaily.com/wp-content/uploads/2026/08/Best-Heat-Detectors-for-the-Garage-Top-5-Picks-Buying-Guide-1.jpg)