By Danial Marquez | Safety | Updated July 2026
Most homeowners think about garage ventilation only when it becomes impossible to ignore — when the garage is unbearably hot in July, when fumes from a paint project linger for days, or when a mechanic friend mentions offhandedly that running a car inside a closed garage is dangerous. By that point, the ventilation problem has already been affecting the garage’s safety and usability for years.
Garage ventilation is not a luxury upgrade. It is a fundamental safety requirement, especially for attached garages, and it becomes even more critical once you’ve invested in insulation, converted the space to a gym or workshop, or started using the garage for any purpose beyond simple vehicle parking. A well-sealed, well-insulated garage that lacks proper airflow traps heat, moisture, fumes, and potentially lethal gases just as effectively as it traps warmth in winter.
This guide covers every dimension of garage ventilation: why it matters, what the specific risks are, how to assess your current situation, and exactly which solutions work for which garage configurations — from passive vents to powered exhaust systems to whole-garage cooling setups.
Why Garage Ventilation Matters More Than Most Homeowners Realize
The risks associated with a poorly ventilated garage fall into four categories, and understanding all four is what motivates taking this seriously rather than treating it as a cosmetic concern.
1. Carbon Monoxide: The Invisible Killer
Carbon monoxide (CO) is produced by every internal combustion engine, including car engines, lawn mowers, generators, and gas-powered tools. It is colorless, odorless, and tasteless — completely undetectable by human senses until symptoms of poisoning have already begun.
Even briefly running a car inside a closed or poorly ventilated garage — to warm it up in winter, to move it a short distance, or even just to let it idle for a minute — can raise CO levels to dangerous concentrations within minutes. In an attached garage, CO can migrate through shared walls and under the door into living spaces even when the car is not running inside the house, simply from fumes entering through gaps.
The danger is not theoretical. CO poisoning from attached garages is one of the leading causes of accidental poisoning deaths in residential settings. A garage with proper exhaust ventilation and a CO detector at the entry point to the house is the most important safety upgrade many homeowners could make.
2. Fume Accumulation From Chemicals and Work Activities
Garages are storage and work spaces for a wide range of chemical products: paints, solvents, gasoline, pesticides, fertilizers, and cleaning products. Many of these release volatile organic compounds (VOCs) continuously during storage — not just when in use — and in a sealed, unventilated space, concentrations build over time.
For homeowners who use the garage as a workshop for painting, staining, woodworking, or automotive work, fume accumulation during active work is an acute safety concern. High concentrations of VOCs cause headaches, dizziness, and respiratory irritation; at very high concentrations or with prolonged exposure, serious health effects and fire risk both increase significantly.
3. Heat Buildup
An unventilated garage in summer can reach temperatures of 130°F to 150°F (54–65°C). This extreme heat is not just uncomfortable — it degrades stored items, degrades paint and finishes on vehicles, accelerates the breakdown of rubber seals and gasoline, and makes the garage completely unusable as a workspace during the hottest months of the year.
Heat buildup is also directly relevant to other garage projects: epoxy floor coatings should not be applied in temperatures above 85°F, and both insulation and soundproofing projects assume the space will be used in a reasonably comfortable temperature range. For garages converted to home gyms or living spaces, summer heat without ventilation makes the conversion functionally useless for several months of the year.
4. Moisture, Condensation, and Mold
Moisture in a garage comes from multiple sources: vehicles bringing in rain and snow, the concrete slab releasing moisture vapor, outdoor humidity entering through gaps, and — paradoxically — the improved air sealing achieved by insulation, which prevents natural moisture exchange that previously happened through cracks and gaps.
Without ventilation to move moisture-laden air out and replace it with drier outside air, condensation forms on walls, ceiling, and stored items. Over time this leads to rust on tools and vehicles, wood rot in shelving and door frames, mold growth behind stored boxes, and a persistent musty smell. Moisture also attracts the very pests we work to exclude — our complete guide to getting rid of garage pests makes clear that moisture control is one of the most effective long-term pest prevention measures available. A dry, well-ventilated garage is simply a less hospitable environment for rodents, insects, and spiders than a damp, stagnant one.
Step 1: Assess Your Current Ventilation Situation
Before deciding on solutions, it’s worth understanding precisely what ventilation — if any — your garage currently has.
Check for existing vents. Walk the perimeter of your garage and look for any louvered or screened openings in the walls or soffits. Many garages have at least one passive vent near the roofline on a gable end wall — this allows some passive airflow but typically provides very limited actual air exchange, especially in hot, still weather when air movement is minimal.
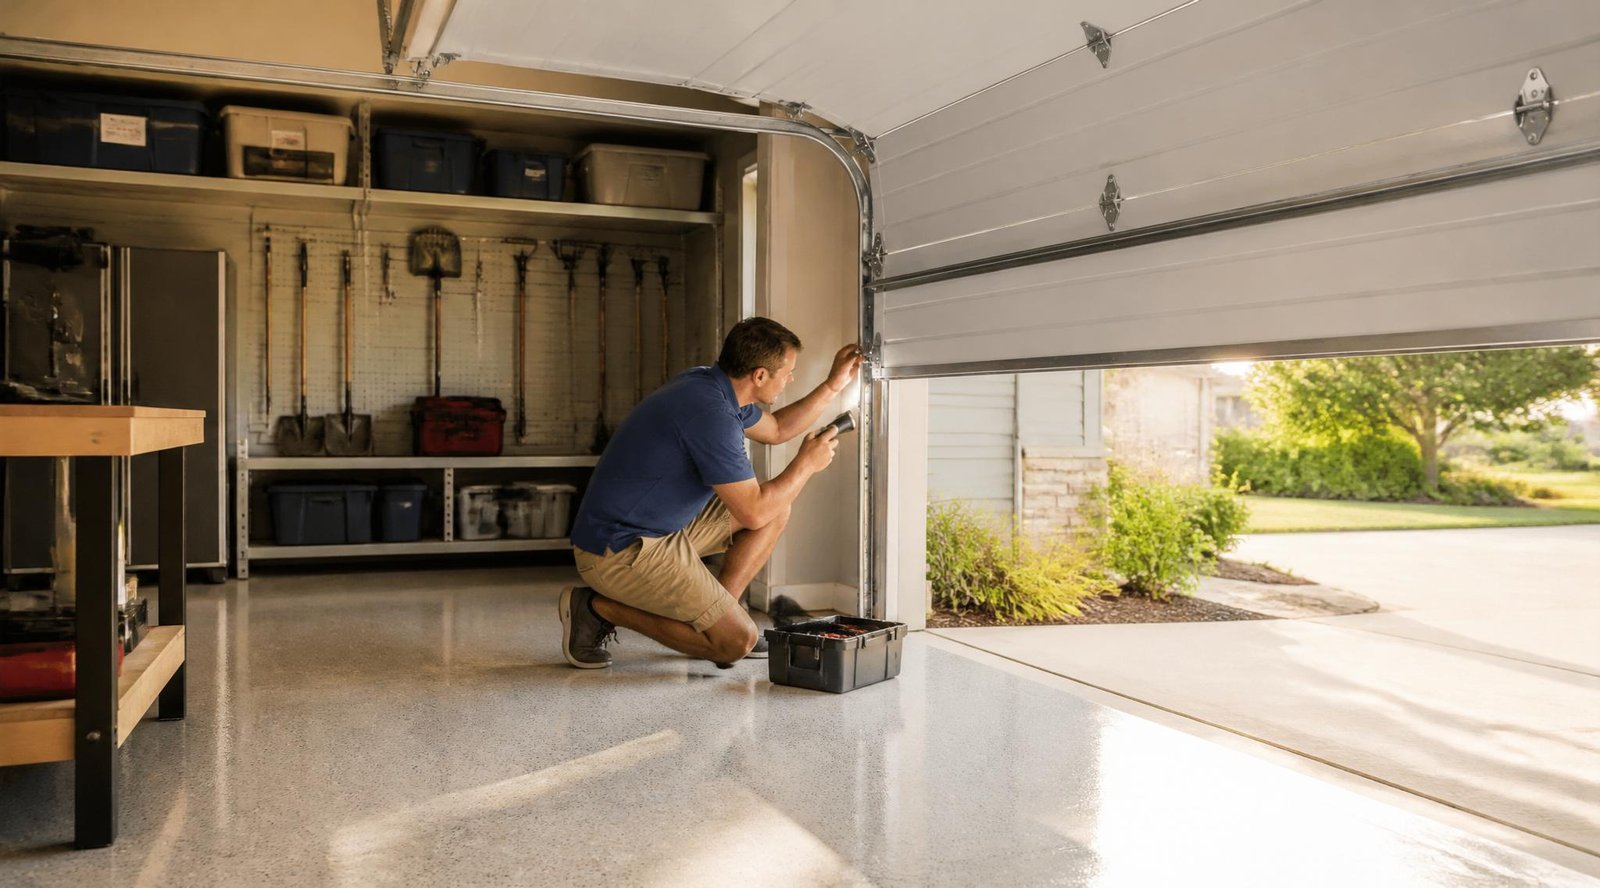
Check the garage door gaps. A properly weatherstripped garage door (as detailed in our guide on replacing garage door weatherstripping and the bottom seal) has minimal gaps, but an older door with worn seals can inadvertently function as the garage’s primary “ventilation” — which means it’s also letting in pests, dust, and outdoor air that bypasses any climate control you’ve added.
Check for a window. A single operable window on the opposite wall from the garage door creates cross-ventilation potential when both are open — basic but effective for moderate conditions.
Identify your garage type. A detached garage has much lower risk from CO migration than an attached garage, but still has heat, moisture, and fume accumulation concerns. An attached garage — sharing at least one wall, the ceiling, or a door with living space — has all of those concerns plus the critical CO risk, since any fume that accumulates in the garage has a pathway into the home through every gap in the shared assembly.
The Four Ventilation Solutions: Passive to Active
Garage ventilation solutions range from entirely passive (no power required, no installation beyond cutting holes) to fully powered exhaust and supply systems. The right approach depends on how you use the garage, your climate, and your budget.
Solution 1: Passive Vents — The Baseline
Passive ventilation uses louvered wall vents, gable vents, or soffit and ridge vents to allow natural air circulation driven by wind pressure and thermal convection (hot air rising). No power required, no moving parts to maintain, and installation is straightforward.
Wall louvers are the simplest option — a louvered metal or plastic vent installed through the wall, typically near the top of the wall on one side and another near the bottom on the opposite side (or near floor level). The principle is stack ventilation: cool, dense air enters low, warms up inside the garage, rises, and exits through the upper vent. This works reasonably well in mild climates and for garages that aren’t used for heat-generating activities.
Turbine roof vents are spinning wind-driven vents installed on the roof that draw air upward from inside the garage when wind spins the turbine. More effective than simple louvers in breezy locations, though less effective on still summer days when ventilation is needed most.
Soffit and ridge vent systems (more common on garages with finished ceiling/attic spaces) allow continuous passive airflow from eaves to ridge — the same principle as attic ventilation in the main house.
Limitation: Passive ventilation works adequately for a simple parking garage in a moderate climate. It does not provide adequate ventilation for a garage used as a workshop, gym, or living space; it does not protect against CO in an attached garage; and it provides minimal cooling on hot, still days. Treat passive vents as the minimum starting point, not the complete solution for an active garage.
Solution 2: Exhaust Fan — The Most Important Single Upgrade
A powered exhaust fan is the single most impactful ventilation upgrade for most garages, and it addresses all four risk categories simultaneously: it evacuates CO, removes fumes and VOCs, drives out hot air, and pulls humid air out before it can condense.
Sizing an exhaust fan: Fans are rated in CFM (cubic feet per minute). The standard rule for garage ventilation is to size the fan to exchange the entire volume of garage air at least once per minute, which is expressed as:
Garage Volume (length × width × height in feet) = minimum CFM rating
For a standard two-car garage (20 × 20 × 9 feet = 3,600 cubic feet), this means a fan rated at a minimum of 3,600 CFM. In practice, for hot climates or active workshop use, sizing up 20–30% provides better results.
Placement: Mount the exhaust fan as high as possible on a wall (within 12 inches of the ceiling) — hot air and fumes both rise, so exhausting from high on the wall removes the highest-concentration air most effectively. Position the fan on the wall opposite from the primary fresh air intake (a vent, window, or the main garage door) to maximize the distance air travels across the garage before being exhausted.
Direct the exhaust away from the house. In an attached garage, the fan outlet should direct exhausted air away from windows, doors, and any other openings into the living space. Fumes exhausted from the garage and immediately drawn back in through an adjacent window defeat the purpose entirely.
Wiring: A standard residential exhaust fan requires a 120V electrical circuit. Many garage exhaust fans can be wired to a simple on/off wall switch, though a thermostatically controlled model — one that switches on automatically when temperature exceeds a set point — is more convenient and ensures the fan runs whenever needed without depending on someone remembering to switch it on. If adding a circuit isn’t in the budget, a corded fan plugged into an existing outlet (for a smaller portable unit) is better than no fan at all, though permanent installation is strongly preferred.
Solution 3: Supply Fan — Completing the Airflow Loop
An exhaust fan works best when there is a dedicated fresh air intake to replace the air it’s pulling out. Without an intake, the fan creates negative pressure inside the garage and draws air in through whatever gaps exist — gaps around the door, around windows, under the pass-through door to the house — which undermines the controlled airflow the fan is intended to create.
A supply fan (blowing air into the garage) mounted low on the opposite wall from the exhaust fan creates a complete, controlled airflow path: fresh air in at one end, contaminated air out at the other. This cross-ventilation pattern is the most effective at both cooling and fume removal, and it’s the approach used in professional paint booths and automotive work spaces.
For most residential garages, a simpler approach is an intake louver (passive, no fan) positioned low on the opposite wall from the exhaust fan, sized to match the exhaust fan’s CFM capacity. This provides the necessary fresh air path without the cost of a second powered fan.
Solution 4: Mini-Split Air Conditioning — For Converted Garages
For garages converted to home gyms, workshops, or living spaces — where the goal is a genuinely comfortable working environment year-round rather than simply safe air quality — a ductless mini-split system is the most effective climate control solution.
A mini-split provides both heating and cooling without ductwork, making it ideal for a garage that isn’t connected to the home’s HVAC system. It maintains a controlled temperature regardless of outdoor conditions, filters and circulates air continuously, and dehumidifies as part of the cooling cycle — directly addressing the moisture problem.
The primary limitation is cost: a single-zone mini-split installed by an HVAC contractor typically runs $1,500–$4,000 for a two-car garage, depending on unit size and installation complexity. For a garage gym or workspace that will be used year-round, it’s often the most justifiable investment in the entire conversion project — worth considering alongside the insulation and soundproofing work covered in our related guides, since a mini-split in an uninsulated garage simply loses its conditioned air directly through the walls and roof.
This is exactly why we recommend completing the garage insulation project before adding climate control — a well-insulated, air-sealed garage requires a significantly smaller and less expensive HVAC unit to reach and maintain a comfortable temperature than one that’s losing conditioned air through uninsulated walls and ceiling.
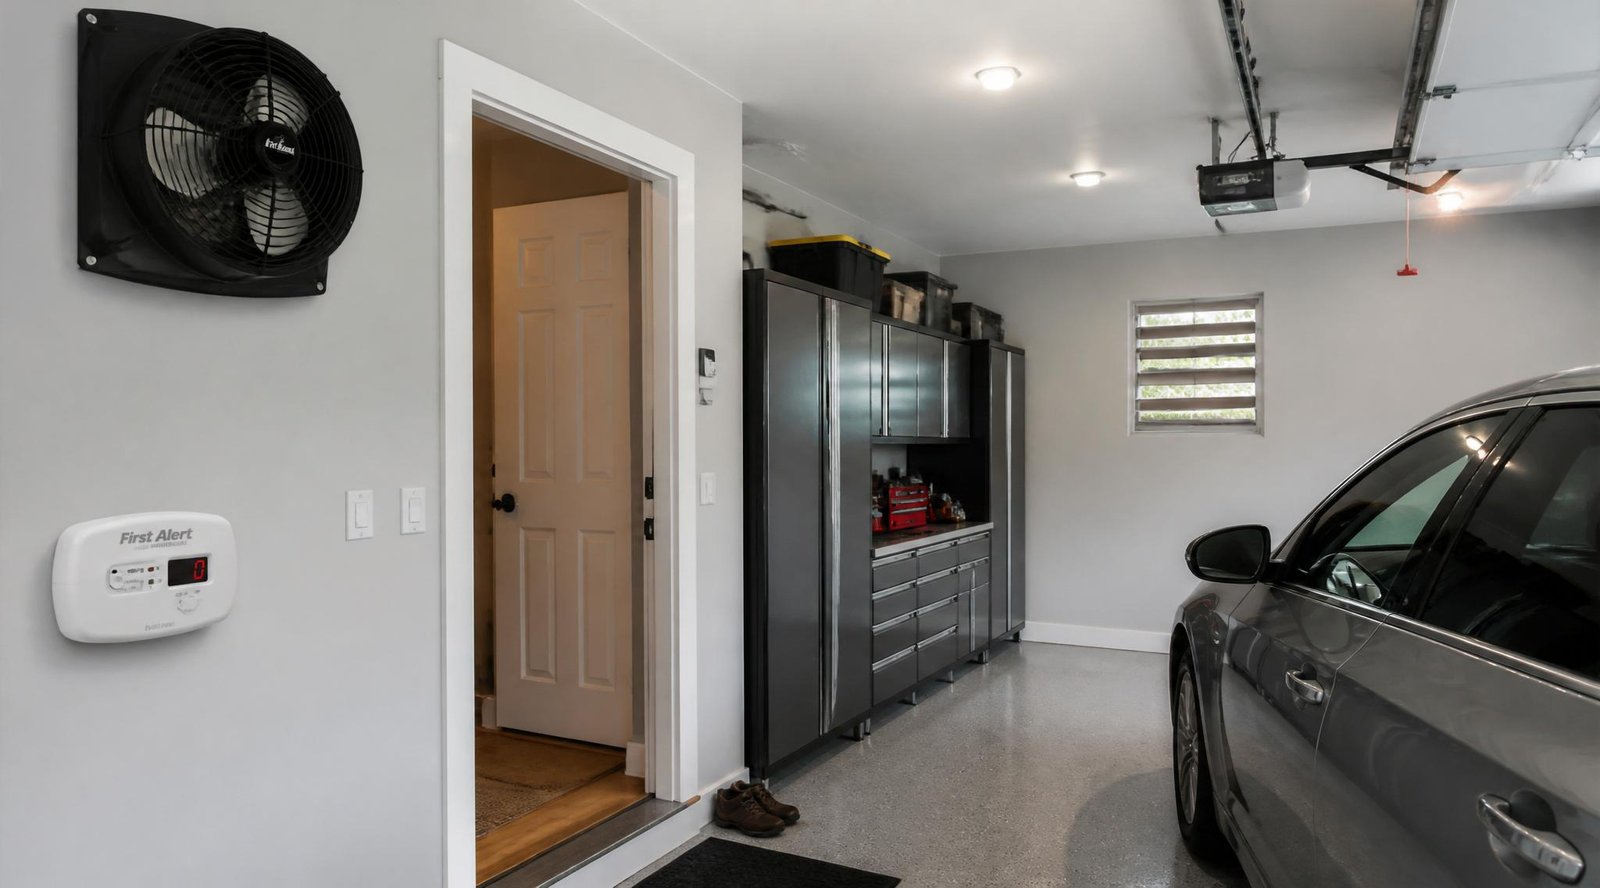
Carbon Monoxide Detectors: Non-Negotiable for Attached Garages
Every attached garage should have a CO detector. This is not a redundant safety measure if you already have one inside the house — it’s a necessary first line of defense at the point where CO enters the living space.
Where to install it: Mount a CO detector at the interior doorway between the garage and the living space — on the wall inside the house, adjacent to the door. This placement catches CO migrating from the garage before it spreads through the home.
What to buy: Any CO detector listed to UL 2034 standard is acceptable. Combination smoke/CO detectors are convenient and cover both hazards in one unit. Units with digital displays showing actual CO concentration levels (in parts per million) are more informative than simple alarm-only units — a reading of 35 ppm sustained over several hours is harmful; readings above 150 ppm are acutely dangerous.
Additional placement: A second CO detector inside the garage itself, mounted at about waist height (CO disperses relatively evenly at room temperature rather than strictly rising like some other gases), gives early warning during vehicle work or generator use before concentrations reach the level that triggers detectors inside the house.
Battery backup: If the primary detector is hardwired, ensure it has battery backup. Power outages and CO events can coincide during winter storms when generators are running.
Test and replace: Test CO detectors monthly using the test button. Replace them every 5–7 years — the electrochemical sensing elements degrade over time and the detector may appear to function (lights on, no alarm) while no longer accurately detecting CO.
Ventilation and the Insulated Garage: A Critical Connection
If you’ve followed our complete guide to insulating a garage and done a thorough job sealing air gaps, caulking penetrations, and weatherstripping the door, your garage is significantly tighter than it was before. This is excellent news for energy efficiency and comfort — and it makes proper mechanical ventilation more important, not less.
A leaky, uninsulated garage ventilates itself passively (and poorly) through every gap in the building envelope. An insulated, air-sealed garage does not. The natural air exchange that happened accidentally through gaps and cracks is now gone, which means moisture, heat, and fumes accumulate faster and to higher concentrations in the sealed space.
Think of it this way: insulation controls temperature, but it doesn’t control air quality. Ventilation controls air quality. You need both, and they work as a system. An insulated garage without ventilation becomes a sealed box; a ventilated garage without insulation loses all climate control benefit through the walls and ceiling. The two projects belong together, which is why we recommend planning and budgeting for both in the same renovation sequence.
The same principle applies to soundproofing — a well-sealed, soundproofed garage needs dedicated mechanical ventilation to replace the passive air exchange that gaps and cracks previously provided. If you’ve completed the soundproofing project covered in our complete garage soundproofing guide, adding an exhaust fan should be the next step if you haven’t already done so.
Specific Ventilation Needs by Garage Use Type
The Parking Garage
Minimum requirements: One exhaust fan sized to the garage volume, one CO detector at the house entry door, passive intake vent on the opposite wall. Run the fan whenever a vehicle runs inside the garage — a thermostat-controlled fan that activates when temperature rises from engine heat is an elegant automatic solution.
Priority risk: CO. Even a few minutes of idling can raise concentrations significantly in a closed, attached garage.
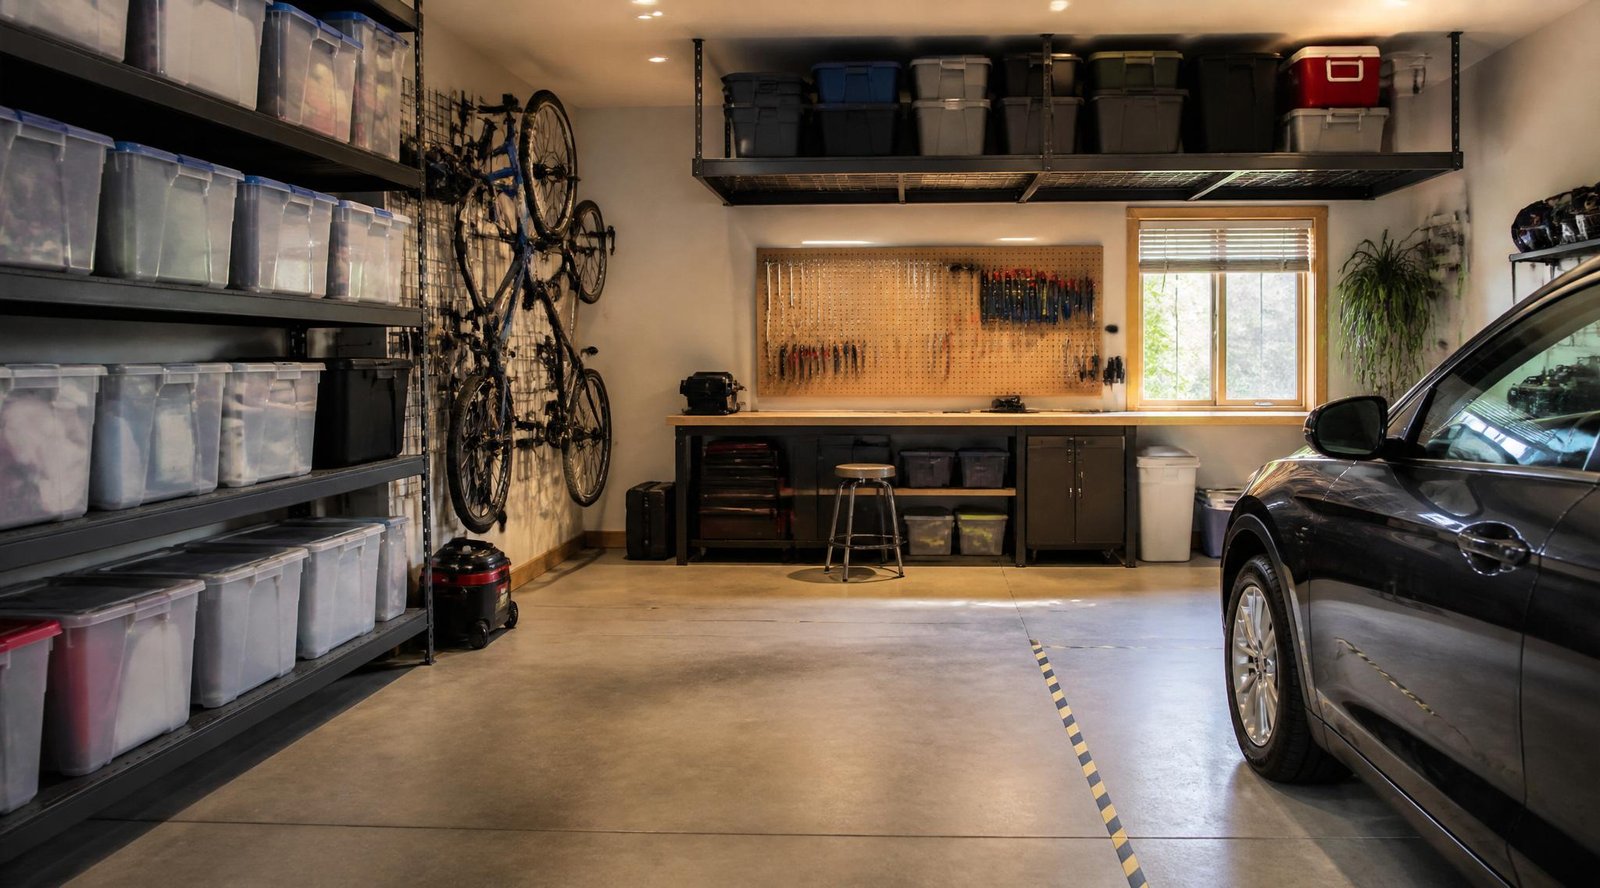
The Home Workshop
Requirements: Full mechanical exhaust system sized to the volume, fresh air intake at floor level opposite the exhaust, ideally with a switch to run the fan on high during active work with solvents or finishes. For woodworking, the exhaust fan works alongside (not instead of) a dust collection system — the exhaust handles fumes and heat; dust collection handles particulate at the source.
Priority risks: VOC and solvent fumes; heat from power tools and lighting running for extended periods; fire risk from sawdust in the presence of sparks.
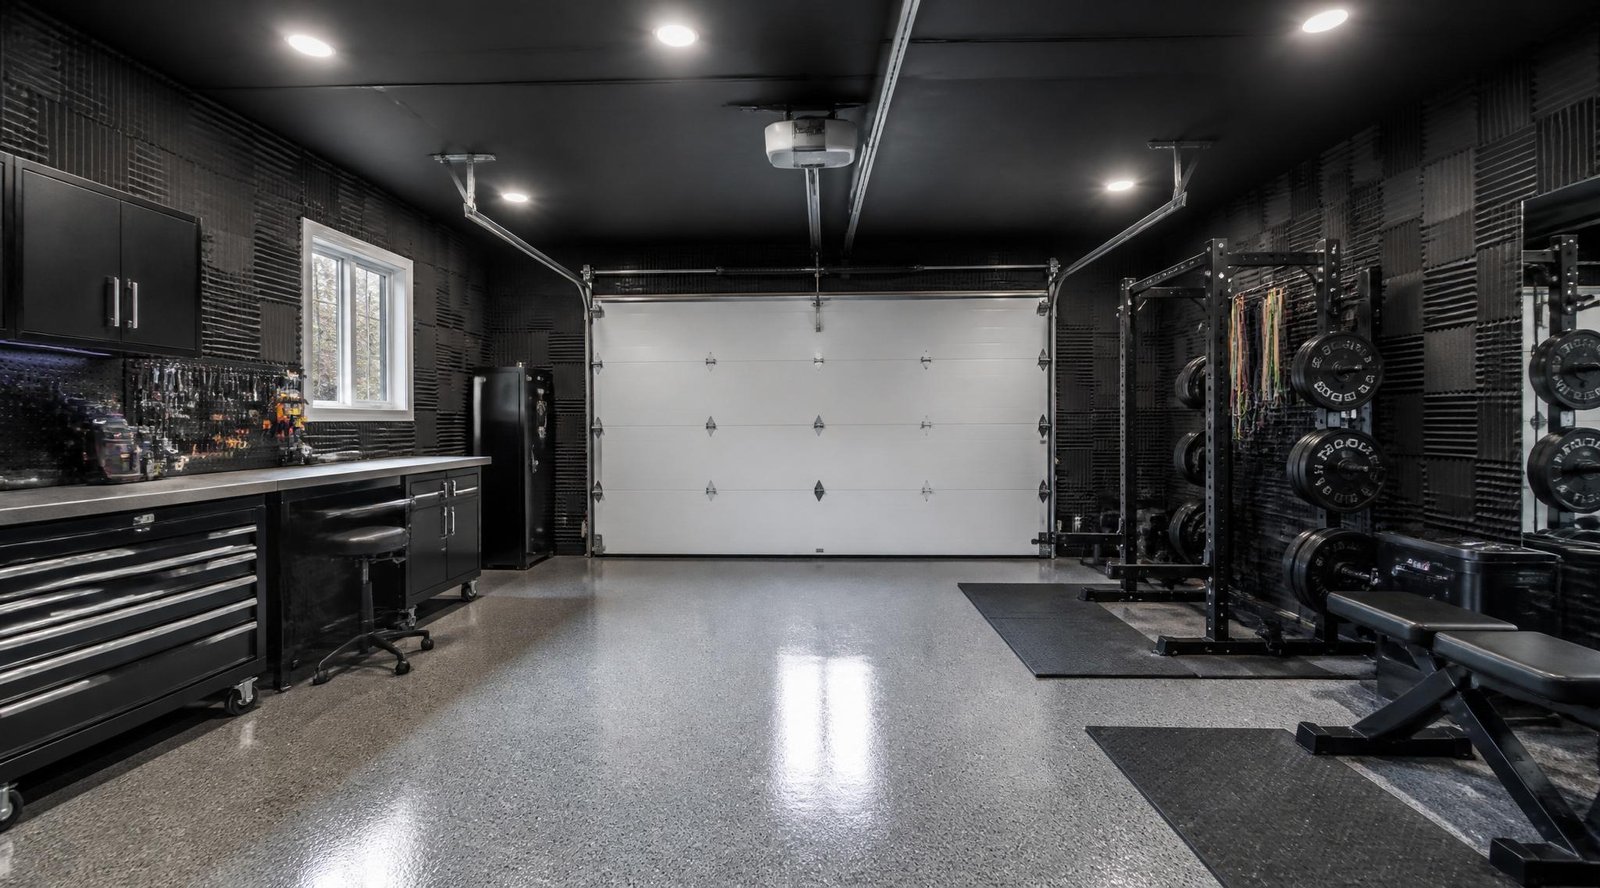
The Home Gym
Requirements: At minimum, a powered exhaust fan and a fresh air intake. Ideally, a mini-split system for temperature and humidity control — gym activity generates significant body heat and moisture, and without active temperature management a garage gym becomes unusable in summer.
Priority risks: Heat and humidity, which degrade exercise capacity, create mold risk on soft equipment, and make the space uncomfortable enough to stop using. Our guide to converting a garage into a home gym covers the full setup sequence, and ventilation is consistently the factor that determines whether a garage gym gets used year-round or sits abandoned through July and August.
The Converted Living Space
Requirements: A full HVAC solution (mini-split or connection to the home system) plus mechanical ventilation, and very likely a building permit — most jurisdictions require habitable rooms to meet minimum ventilation standards in addition to structural and fire separation requirements. If you’ve followed our guide to converting a garage into a living space, local building codes almost certainly specify minimum ventilation requirements for the finished space.
Priority risks: All of the above, plus building code compliance for habitability. A living space without adequate ventilation may fail inspection and require remediation before the permit can close.
Ventilation Planning for Pest Prevention
Moisture and stagnant air are two of the most reliable predictors of pest activity in a garage. Rodents and insects are drawn to environments with high humidity, stable temperatures, and undisturbed air — exactly the conditions a sealed, unventilated garage creates.
A properly ventilated garage — one where air moves continuously, moisture is evacuated before it can condense, and temperature swings are controlled — is a substantially less hospitable environment for the pests covered in our garage pest control guide. Eliminating the moisture that attracts insects, preventing the condensation that creates ideal rodent nesting conditions, and keeping the garage environment dynamic rather than stable are all byproducts of adequate ventilation.
This connection between ventilation and pest prevention is often overlooked but is one of the most practical reasons to prioritize this project even for homeowners who don’t use the garage for any purpose beyond parking.
Quick Reference: Ventilation by Garage Size
One-car garage (approx. 200–250 sq ft, 10 ft ceiling): Minimum exhaust fan: 2,000–2,500 CFM Recommended: 1 exhaust fan + 1 louvered intake vent + CO detector
Two-car garage (approx. 400–500 sq ft, 9–10 ft ceiling): Minimum exhaust fan: 3,600–5,000 CFM Recommended: 1 large exhaust fan or 2 standard exhaust fans + louvered intake + CO detector + thermostat control
Three-car or oversized garage (600+ sq ft): Minimum: 6,000+ CFM exhaust capacity (2 fans or 1 commercial unit) Recommended: Full exhaust/supply system with thermostat control + mini-split for converted or active-use spaces + CO detector at every house entry point
Budget Overview
Basic passive vent installation (DIY): $40–$120 per vent, materials only
Powered exhaust fan (residential, hardwired): $150–$400 for the unit; $100–$300 for electrician installation if needed
Combination exhaust fan with thermostat control: $250–$600 installed
CO detector (hardwired with battery backup): $40–$80 per unit
Mini-split system (single zone, 12,000–18,000 BTU for a two-car garage): $1,500–$4,000 installed by HVAC contractor
Complete ventilation package for a converted gym or workshop (exhaust fan + intake + CO detector + mini-split): $2,000–$5,000 depending on garage size and system quality
Common Ventilation Mistakes to Avoid
Installing an exhaust fan but no intake. The fan creates negative pressure and draws air through uncontrolled gaps — including under the door to the house, which is exactly the wrong direction for CO safety.
Mounting the exhaust fan too low. Hot air and fumes rise. A fan mounted at 4 feet high exhausts the most comfortable air in the room, not the contaminated air near the ceiling. Mount within 12 inches of the ceiling.
Relying on the main garage door for ventilation. Opening the garage door provides excellent temporary ventilation but is not a substitute for a permanent system. The door can’t be left open in rain, at night, in very cold weather, or when the garage contains items you don’t want exposed to outdoor access.
Buying a fan that’s undersized. A fan that’s too small for the garage volume creates a barely perceptible airflow that doesn’t effectively dilute fumes or cool the space. Size to the volume, then add 20% for active-use garages.
Skipping the CO detector because “we’re careful.” CO poisoning happens precisely when people believe they’re being careful. CO detectors are inexpensive and their value-to-cost ratio makes them one of the few garage safety investments with essentially no reasonable argument against them.
Final Thoughts
Garage ventilation doesn’t get the attention that insulation, flooring, or organization upgrades receive, but it’s arguably the most important of all the projects on this list — because it’s the one most directly connected to health and safety rather than comfort and aesthetics.
Start with a CO detector at the entry to the house if you have an attached garage — this takes 15 minutes and costs less than $50. Then plan a powered exhaust fan sized appropriately for your garage volume, with a complementary intake vent positioned to create cross-airflow. If you’re converting the space or spending serious time in it, add a mini-split for full climate control.
These improvements work together with the insulation, soundproofing, and floor coating projects covered in our other guides to create a garage that’s genuinely safe, comfortable, and functional year-round — not just a raw storage space you park in and leave as quickly as possible.
Have a question about ventilation for your specific garage setup or climate? Ask in the comments below — and explore our full Safety category for more ways to protect your home and family in 2026.